Loading ...
Loading ...
Loading ...
33
W415-0748 / 12.12.08
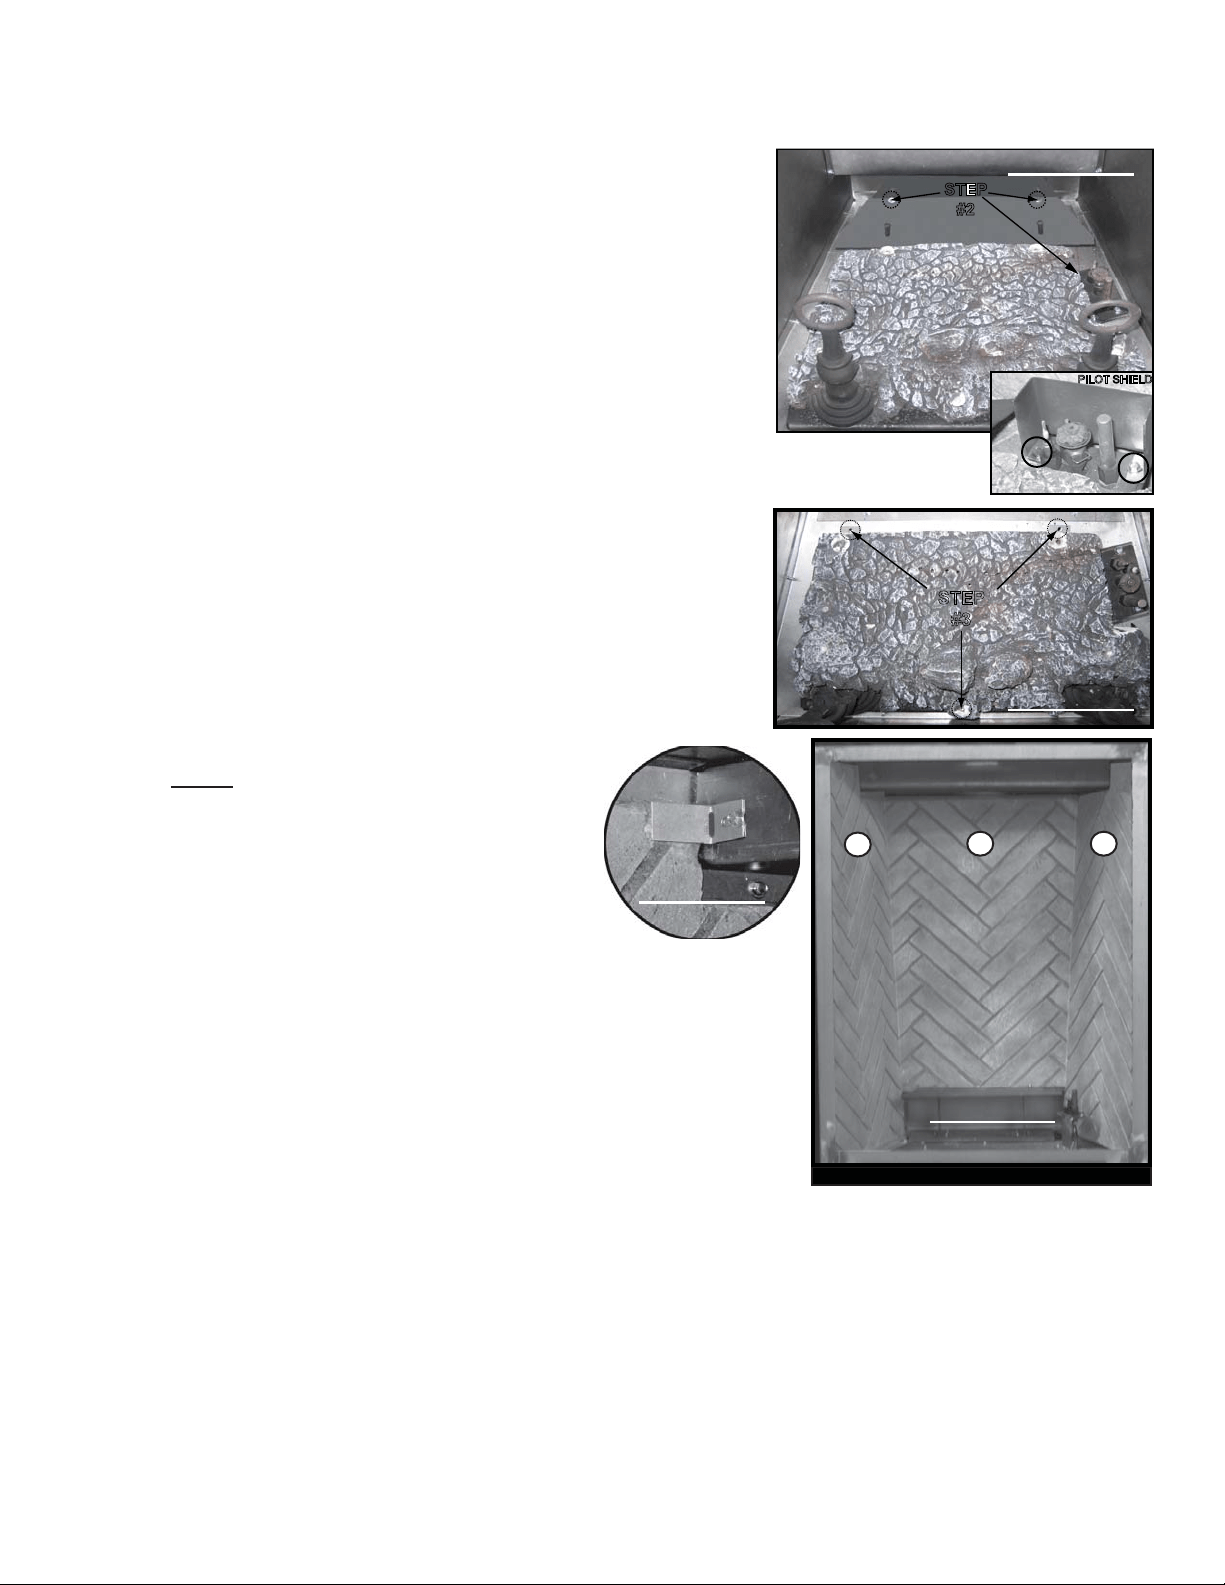
6.4 DECORATIVE BRICK PANEL INSTALLATION
32
1
HERRINGBONE PATTERN ILLUSTRATED
STEP
#2
PILOT SHIELD
STEP
#3
Decorative panels may discolor after time.
6.4.1 Carefully remove the glass door and all logs see
“FINISHING” section.
6.4.2 Remove the two screws holding the front portion of the
rear air defl ector. Remove the pilot shield by removing
the two screws as illustrated.
6.4.3 Remove the 3 screws holding the burner down and
carefully remove the burner.
6.4.4 Install the right brick panel by sliding the bottom edge
of the panel down the right fi rebox side then pivot the
top edge of the panel into place against the fi rebox wall. Hold in place with the brick
retainers.
6.4.5 Rest the bottom edge of the rear panel on top of the rear
portion of the air defl ector at the back of the fi rebox and
push into place. The rear panel is held in place when both
side panels are in position.
6.4.6 Install the left brick panel using the same method described
in step 4.
6.4.7 Replace the burner, air defl ector, logs and glass door.
NOTE: Due to the brittle material of the bricks,
care must be taken not to bend or force them
into place. Refractory panels require a 24
hour curing period on a low fl ame.
FIGURE 6.4.2
FIGURE 6.4.3
FIGURE 6.4.4
FIGURE 6.4.5
Loading ...
Loading ...
Loading ...