Loading ...
Loading ...
Loading ...
14
78D0011
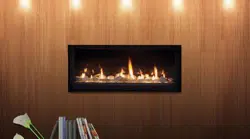
WDV Series Gas Fireplace
Locate vent opening on the wall. It may be necessary to
rst position the replace and measure to obtain hole lo-
cation. Depending on whether the wall is combustible or
noncombustible, cut opening to size. Figure 11 (For com-
bustible walls rst frame in opening.)
Cut a 10Z\x”H x 10Z\x”W (267 x 267
mm) hole through the exterior wall and frame as shown.
Figure 11
Hole opening must be 8Z\x” (216
mm) in diameter.
10Z\x”
(267 mm)
Min.
Fireplace Hearth
Framing Detail
8Z\x”
(216 mm)
Fireplace Hearth
FP2293
Figure 11 -
Locate vent opening on wall
10Z\x”
(267 mm) Min.
Secure restop to the inside frame, center in the 10Z\x” x
10Z\x” vent opening.
Place replace into position. Measure the vertical height
(X) required from the base of the ue collars to the center
of the wall opening. Figure 12
Using appropriate length of pipe section(s) attach to re-
place with three (3) screws. Follow with the installation of
the elbow.
X
Figure 12 -
Vertical Height
Requirement
FP1181
Measure the horizontal length requirement guring a 1Z\v”
(32 mm) overlap, i.e. from the elbow to the outside wall
cap. Figure 13
X
Figure 13 -
Horizontal Length
Requirement
FP1182
Use appropriate length of pipe sections - telescopic or
xed - and install.
Guide the vent terminations 5” and 8” collard into their
respective vent pipes. Double check that the vent pipes
overlap the collars by a minimum 1Z\v” (32 mm). Secure
the termination to the wall with screws provided and caulk
around the wall plate to weatherproof. As an alternative to
screwing the termination directly to the wall, you may also
use expanding plugs or an approved exterior construction
adhesive.
Loading ...
Loading ...
Loading ...