Loading ...
Loading ...
Loading ...
IMPORTANT: Make a black pencil line on the guide
bar at the end of the rip fence head. This will be
explained further on in this manual under "Basic
Operation" . .. ripping ...
\
4. Place BLADE GUARD on table .., engage slots in
SPREADER with WING SCREWS ... move spreader
toward front of saw so that wing screw is at end of slot
•.. TIGHTEN wing screws.
NUIS AND
BOLTS LOOSE _
IMPORTANT - The SPREADER must always be
PARALLEL to the sawblade and in the MIDDLE of the
cut (KERF) made by the sawblade.
SPACE EQUAL TO
3 THICKNESSES OF PAPER
/
SPREADER
]
LOOKING DOWN ON SAW
KERF WOOD
/ BLiDE
, _ _
5. Fold LOOSE PARTS LIST twice making THREE
thicknesses,
The spreader i$ thinner than the width of the KERF by
approximately six thicknesses of paper. The folded
au "
parts list will be used as a "spacing g ge.
LOOSEPARTS LIST
/
FOLDED PARTS LIST
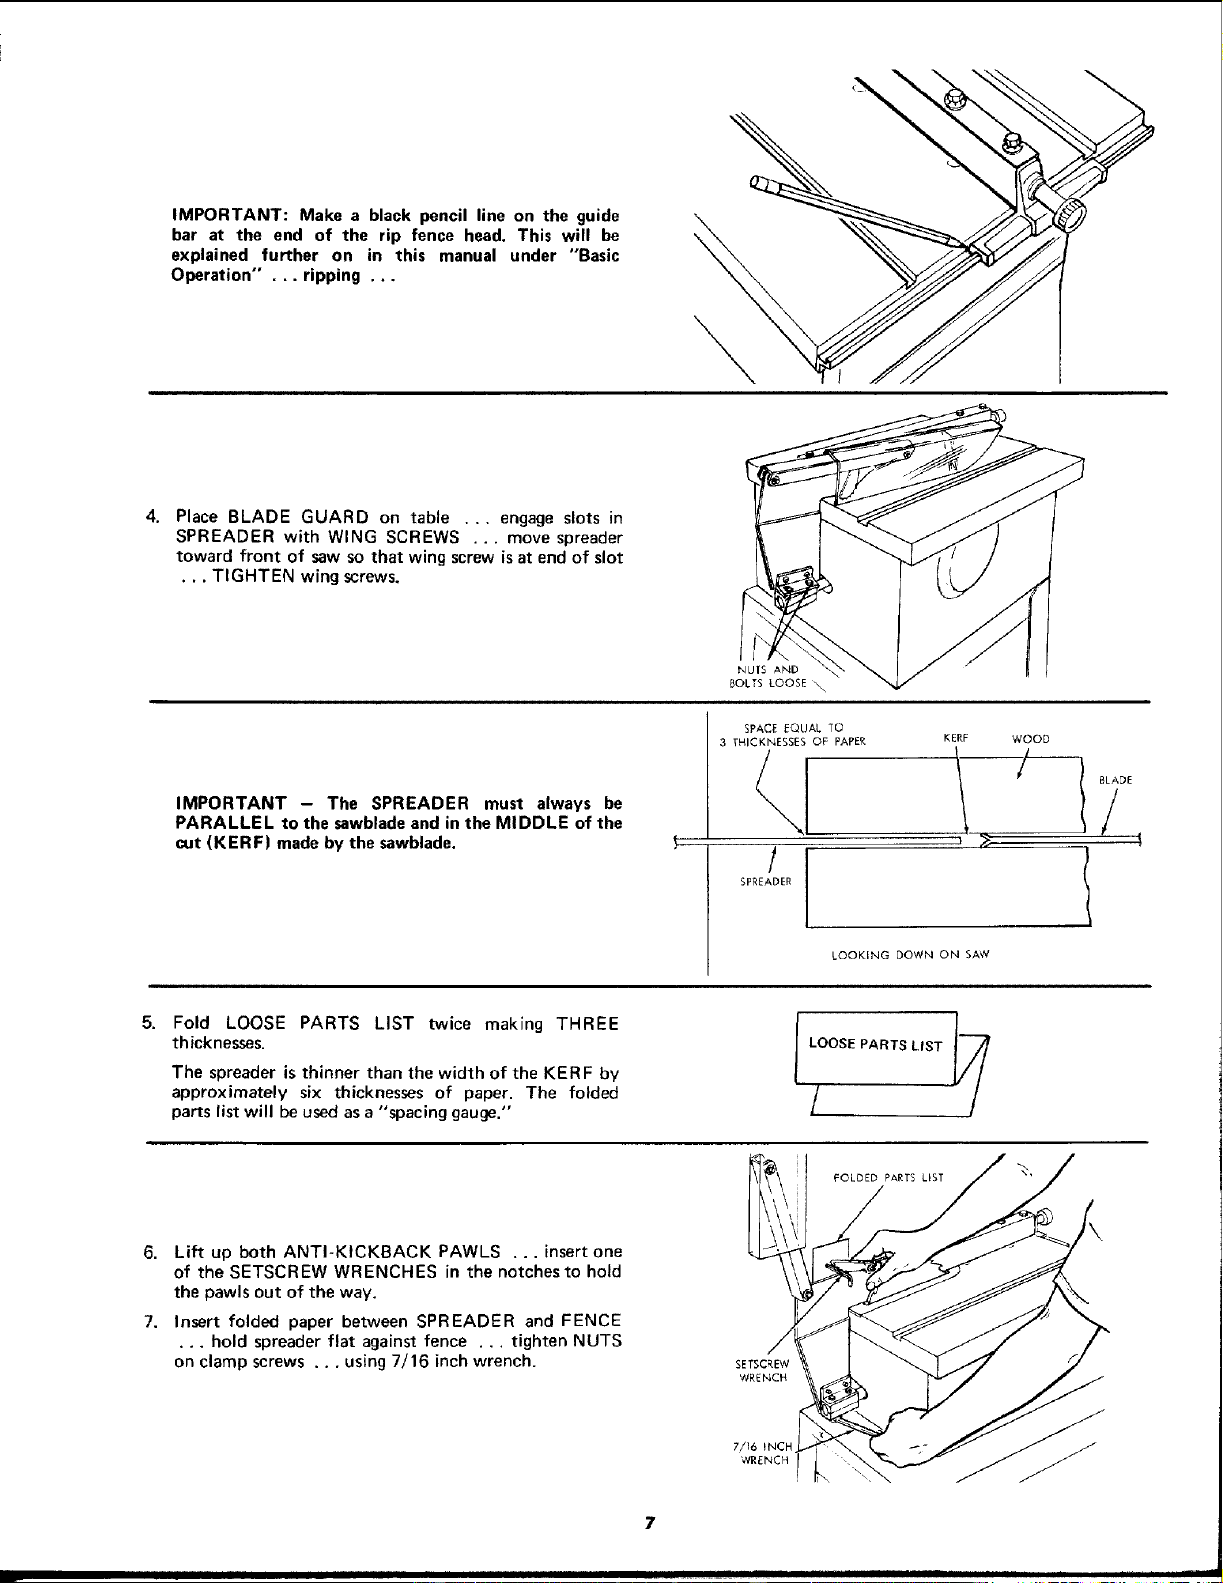
6. Lift up both ANTI-KICKBACK PAWLS ...insertone
of the SETSCREW WRENCHES in the notches to hold
the pawls out of the way.
7. Insert folded paper between SPREADER and FENCE
•.. hold spreader flat against fence ... tighten NUTS
on clamp screws ... using 7/16 inch wrench. SETSCREW
WRENCH
7
i
Loading ...
Loading ...
Loading ...