Loading ...
Loading ...
Loading ...
unpacking and checking contents
CONTENTS
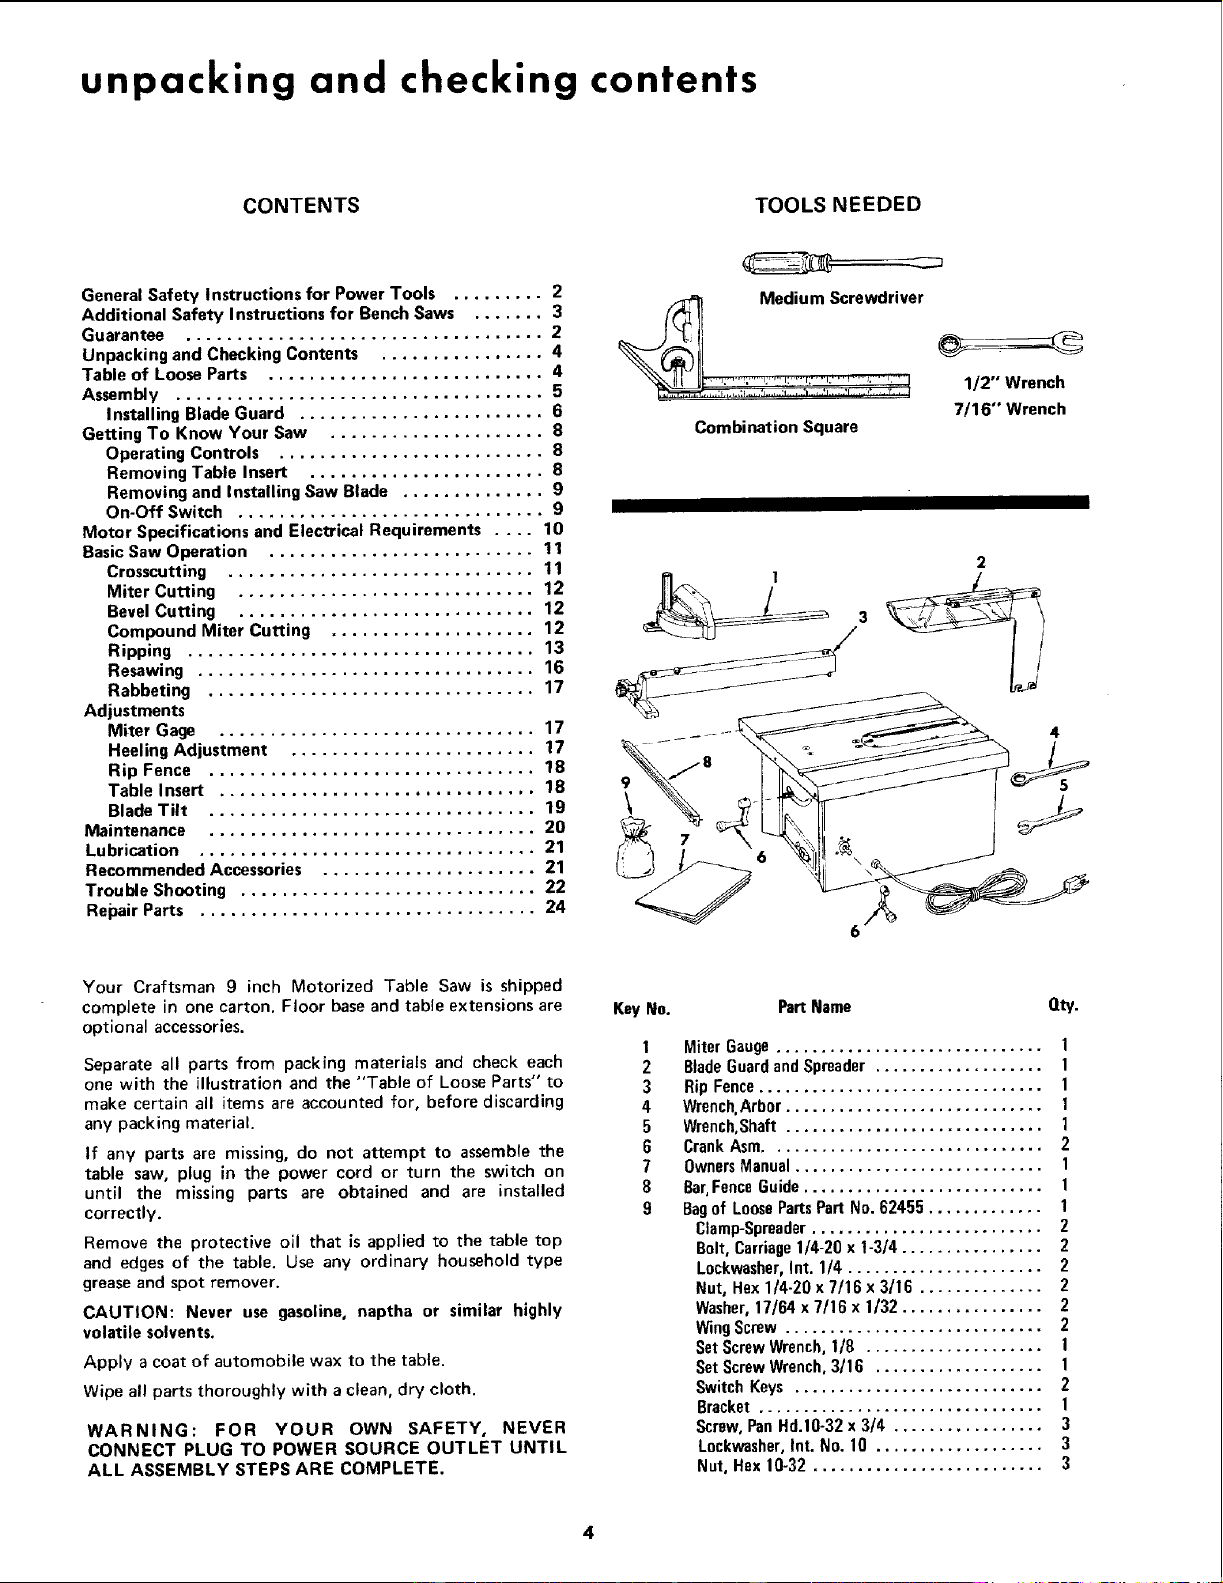
TOOLS NEEDED
General Safety Instructions for Power Tools ......... 2
Additional Safety Instructions for Bench Saws ....... 3
Guarantee ................................... 2
Unpacking and Checking Contents ................ 4
Table of Loose Parts ........................... 4
Assembly .................................... 5
Installing Blade Guard ........................ 6
Getting To Know Your Saw ..................... 8
Operating Controls .......................... 8
Removing Table Insert ....................... 8
Removing and Installing Saw Blade .............. 9
On-Off Switch .............................. 9
Motor Specifications and Electrical Requirements .... 10
Basic Saw Operation .......................... 11
Crosscutting .............................. 11
Miter Cutting ............................. 12
Bevel Cutting ............................. 12
Compound Miter Cutting .................... 12
Ripping .................................. 13
Resawing ................................. 16
Rabbeting ................................ 17
Adjustments
Miter Gage ............................... 17
Heeling Adjustment ........................ 17
Rip Fence ................................ 18
Table Insert ............................... 18
Blade Tilt ................................ 19
Maintenance ................................ 20
Lubrication ................................. 21
Recommended Accessories ..................... 21
Trouble Shooting ............................. 22
Repair Parts ................................. 24
MeimSlewiver
Combination Square
1/2" Wrench
7/16"" Wrench
4
5
Your Craftsman 9 inch Motorized Table Saw is shipped
complete in one carton. Floor base and table extensions are
optional accessories.
Separate all parts from packing materials and check each
one with the illustration and the "Table of Loose Parts" to
make certain all items are accounted for, before discarding
any packing material.
If any parts are missing, do not attempt to assemble the
table saw, plug in the power cord or turn the switch on
until the missing parts are obtained and are installed
correctly.
Remove the protective oil that is applied to the table top
and edges of the table. Use any ordinary household type
grease and spot remover.
CAUTION: Never use gasoline, naptha or similar highly
volatile solvents.
Apply a coat of automobile wax to the table.
Wipe all parts thoroughly with a clean, dry cloth.
WARNING: FOR YOUR OWN SAFETY, NEVER
CONNECT PLUG TO POWER SOURCE OUTLET UNTIL
ALL ASSEMBLY STEPS ARE COMPLETE.
Key No. Part Name Qty.
1
2
3
4
5
6
7
8
9
Miter Gauge.............................. 1
BladeGuardandSpreader ................... 1
Rip Fence................................ 1
Wrench,Arb0r ............................. 1
Wrench,Shaft............................. 1
CrankAsm............................... 2
OwnersManual............................ 1
Bar,FenceGuide........................... 1
Bagof LoosePartsPart No.62455 ............. 1
Clamp-Spreader.......................... 2
Bolt, Carriage1/4-20 x 1-3/4 ................ 2
L0ckwasher,Int. 1/4 ...................... 2
Nut, Hax 1/4-20 x 7/16 x 3/16 .............. 2
Washer,17/64 x 7/16 x 1/32 ................ 2
WingScrew ............................. 2
SetScrewWrench,1/8 .................... i
SetScrewWrench,3/16 ................... 1
SwitchKeys ............................ 2
Bracket ................................ 1
Screw,PanHal.10-32x 3/4 ................. 3
Lockwasher,Int. No. 10 ................... 3
Nat. Hex 10-32 .......................... 3
4
Loading ...
Loading ...
Loading ...