Loading ...
Loading ...
Loading ...
Assembly
Note: "Operator's Position" is defined as standing directly behind
the snow thrower.
Unpacking
o Remove snow thrower from the carton.
o Set carton debris aside or discard to prevent tire punctures
and personal injury.
o Remove all loose parts from the unit
o (1) Snow thrower
o (2) Ignition/Safety keys (secured to unit)
o (1) Operator's manual
o (1) Oil funnel for adding engine oil
o (1) 5/8 Inch spark plug wrench
o (1) Electric cord
o (1) Oil can (empty)
o (1) 10mm wrench
o (1) Clean-out tool
o (2) Shear pins with Bow-tie cotter pins
Upper and Lower Handle
WARNING
Unintentional engine start-up may result in serious
injury. Always disconnect and ground the spark plug
when conducting assembly or maintenance.
1. Remove plastic bubble wrap and cable ties from Auger and
Drive Controls. (This will free up cable tension)
2. Remove the wing knobs, washers and bolts from the lower
handle. (see Fig. 1-1)
3. Align the upper handle onto the lower handle.
4. Secure the upper handle and lower handle with the four
wing knobs, cupped washers and carriage bolts previously
removed and tighten.
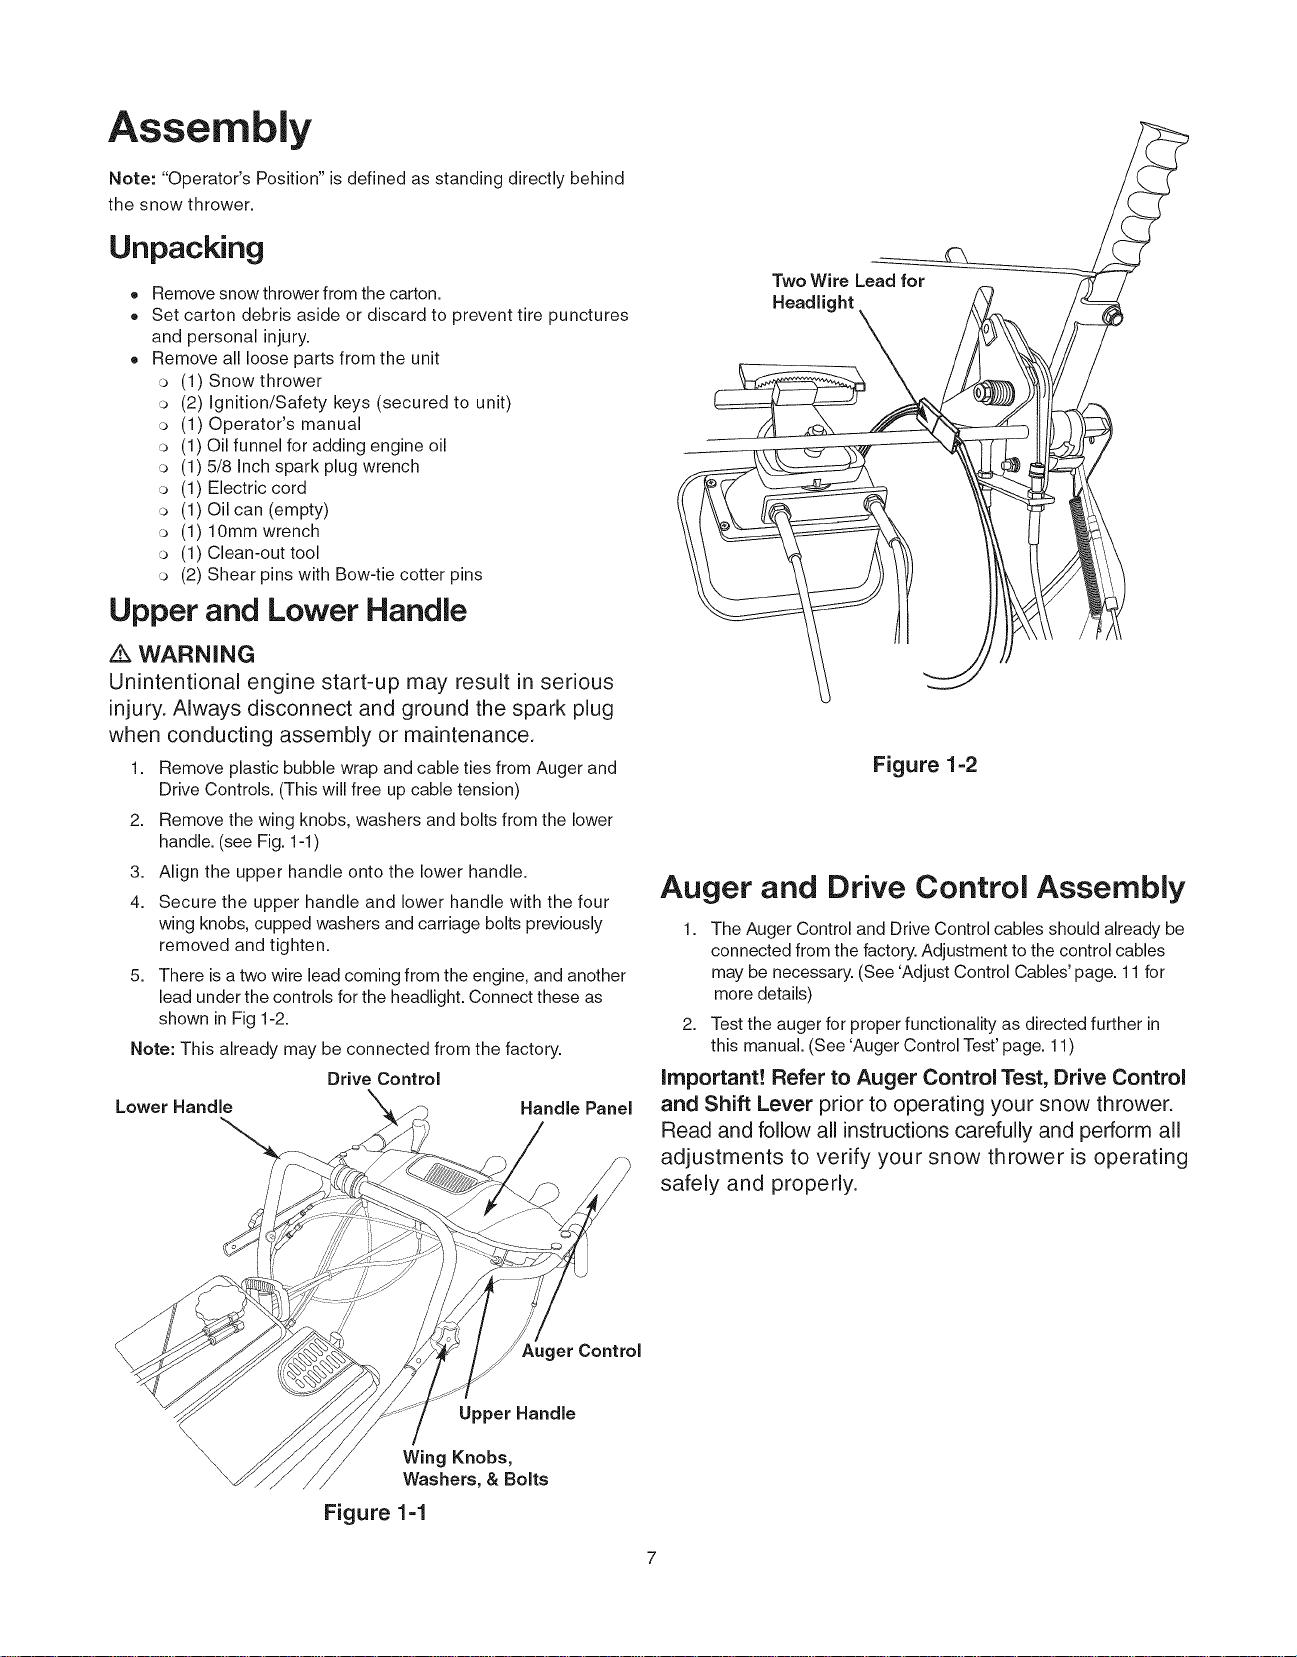
5. There is atwo wire lead coming from the engine, and another
lead under the controls for the headlight. Connect these as
shown in Fig 1-2.
Note: This already may be connected from the factory.
Drive Control
Lower Handle X Handle Panel
Two Wire Lead for
Headlight
Figure 1-2
Auger and Drive Control Assembly
1. The Auger Control and Drive Control cables should already be
connected from the factory. Adjustment to the control cables
may be necessary. (See 'Adjust Control Cables' page. 11 for
more details)
2. Test the auger for proper functionality as directed further in
this manual. (See 'Auger Control Test' page. 11)
important! Refer to Auger Control Test, Drive Control
and Shift Lever prior to operating your snow thrower.
Read and follow all instructions carefully and perform all
adjustments to verify your snow thrower is operating
safely and properly.
\
\
\\
\
Upper Handle
Wing Knobs,
Washers, & Bolts
Figure 1=1
Loading ...
Loading ...
Loading ...