Loading ...
Loading ...
Loading ...
Shift Lever: Usedto regulateboth the speedand
directionof travel.
ChuteDirectional Control: Usedto changethe
directionthesnowis thrown.
Chute Tilt Control: Used to change the angle the
snow is thrown.
Drive Control: Engages wheel drive.
Important! Always release the Drive Control before
changing speeds.
Headlight: Provides light.
Skid Shoe: Used to adjust the space between the
ground and the shave plate.
A
B
G
E
C
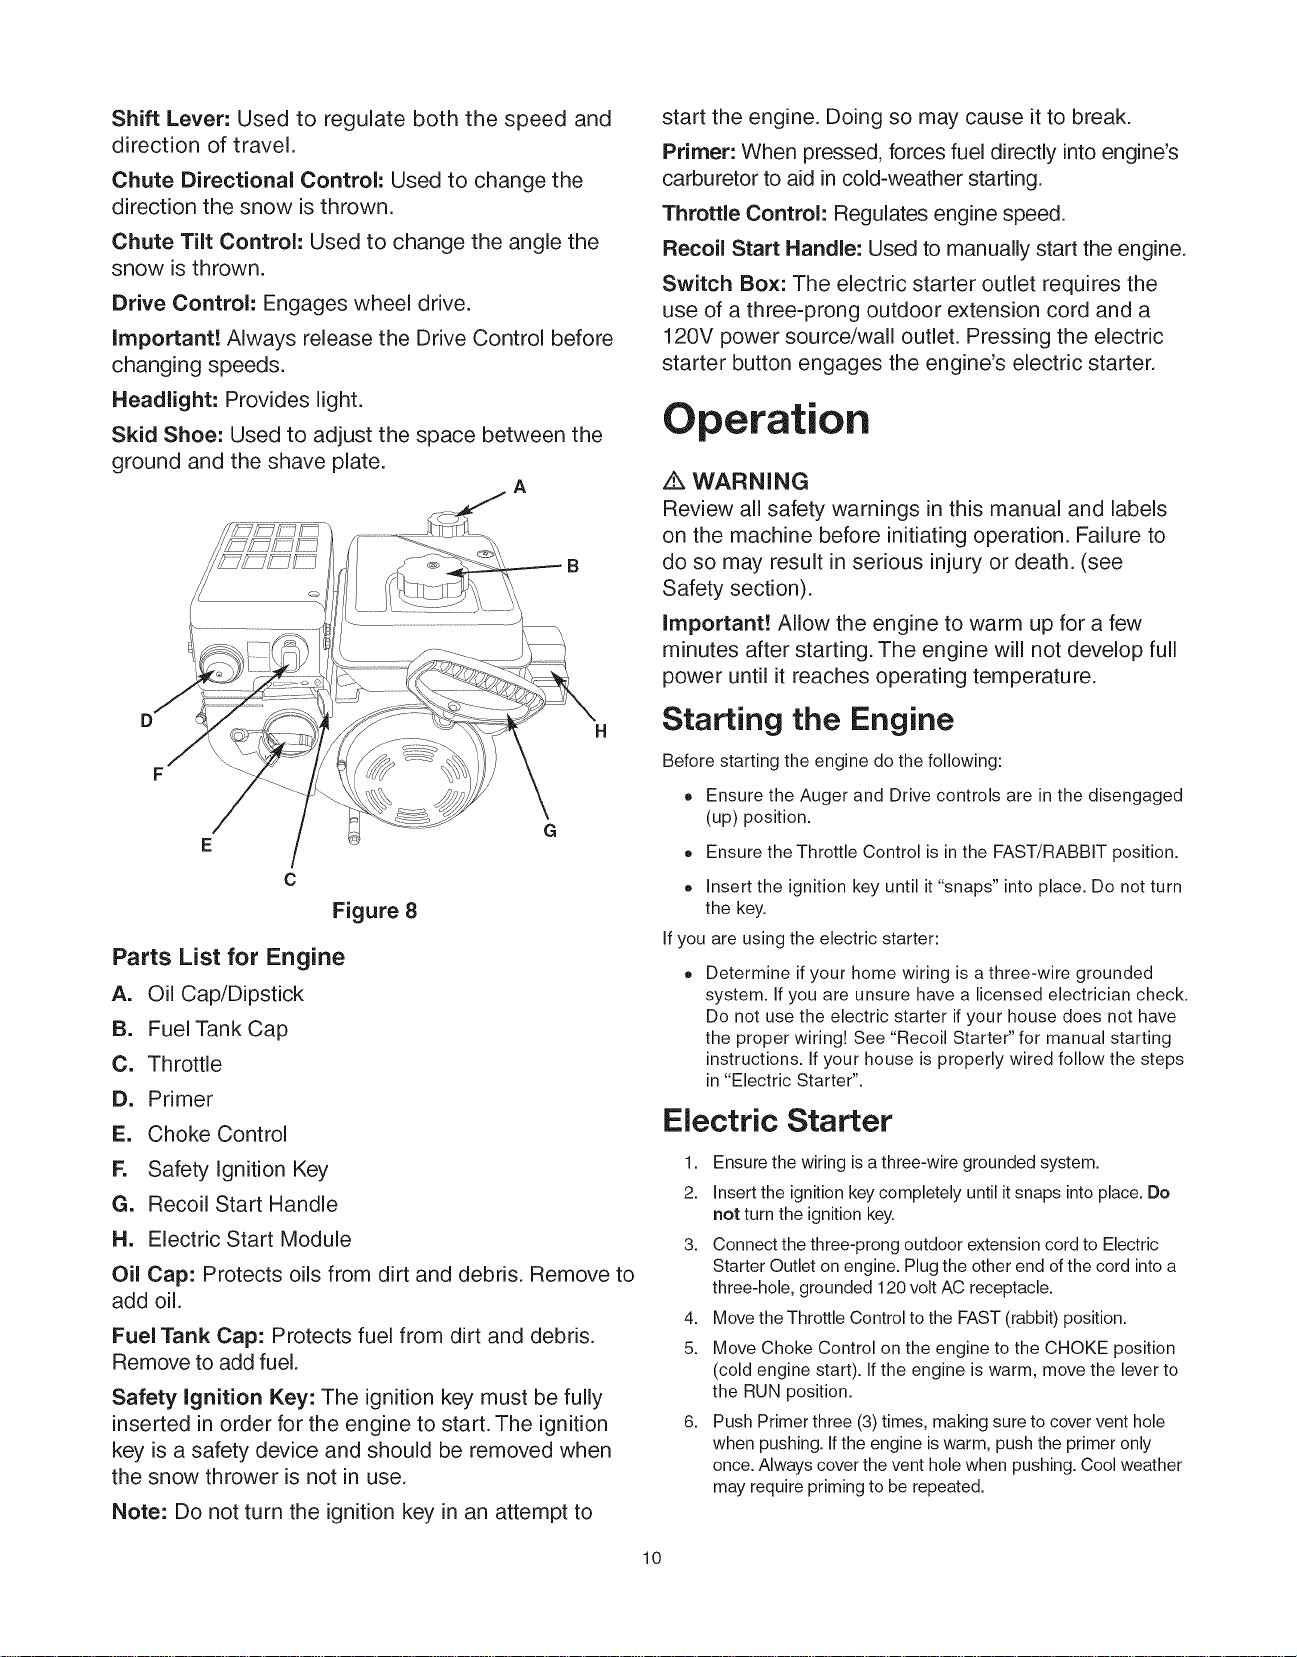
Figure 8
Parts List for Engine
A. Oil Cap/Dipstick
B. Fuel Tank Cap
C. Throttle
D. Primer
E. Choke Control
F. Safety Ignition Key
G. Recoil Start Handle
H. Electric Start Module
Oil Cap: Protects oils from dirt and debris. Remove to
add oil.
Fuel Tank Cap: Protects fuel from dirt and debris.
Remove to add fuel.
Safety Ignition Key: The ignition key must be fully
inserted in order for the engine to start. The ignition
key is a safety device and should be removed when
the snow thrower is not in use.
Note: Do not turn the ignition key in an attempt to
start the engine. Doing so may cause it to break.
Primer: When pressed, forces fuel directly into engine's
carburetor to aid in cold-weather starting.
Throttle Control: Regulates engine speed.
Recoil Start Handle: Used to manually start the engine.
Switch Box: The electric starter outlet requires the
use of a three-prong outdoor extension cord and a
120V power source/wall outlet. Pressing the electric
starter button engages the engine's electric starter.
Operation
WARNING
Review all safety warnings in this manual and labels
on the machine before initiating operation. Failure to
do so may result in serious injury or death. (see
Safety section).
important! Allow the engine to warm up for a few
minutes after starting. The engine will not develop full
power until it reaches operating temperature.
Starting the Engine
Before starting the engine do the following:
e Ensure the Auger and Drive controls are in the disengaged
(up) position.
e Ensure the Throttle Control is in the FAST/RABBIT position.
e Insert the ignition key until it "snaps" into place. Do not turn
the key.
If you are using the electric starter:
Determine if your home wiring is a three-wire grounded
system. If you are unsure have a licensed electrician check.
Do not use the electric starter if your house does not have
the proper wiring! See "Recoil Starter" for manual starting
instructions. If your house is properly wired follow the steps
in "Electric Starter".
Electric Starter
1. Ensure the wiring is a three-wire grounded system.
2. Insert the ignition key completely until it snaps into place. Do
not turn the ignition key.
3. Connect the three-prong outdoor extension cord to Electric
Starter Outlet on engine. Plug the other end of the cord into a
three-hole, grounded 120 volt AC receptacle.
4. Move the Throttle Control to the FAST (rabbit) position.
5. Move Choke Control on the engine to the CHOKE position
(cold engine start). If the engine is warm, move the lever to
the RUN position.
6. Push Primer three (3) times, making sure to cover vent hole
when pushing. Ifthe engine is warm, push the primer only
once. Always cover the vent hole when pushing. Cool weather
may require priming to be repeated.
10
Loading ...
Loading ...
Loading ...