Loading ...
Loading ...
Loading ...
Stopping the Engine
Shut down procedures are the same ifyou use the electric start
or the manual start.
1. Disengage both the drive and the auger controls.
2. Slow the engine throttle to the 'turtle' position.
3. Remove the safety ignition key from its location. Do not
turn the key.
4. The engine will stop as soon as the key is removed.
5. Remove all snow and debris from the controls for the
next use.
Adjustments and
Maintenance
WARNING
Unexpected auger movement may cause personal
injury. Before servicing, repairing or inspecting the
snow thrower, disengage the Auger Control. Stop
the engine and remove the Ignition Key to prevent
unintended start up.
Adjustsments
Auger Control
Refer to the Auger Control Test in the Operation
section of this manual for Auger Control adjustment
instructions.
Drive Control and Shift Lever
CAUTION
Fuel spillage may ignite if in contact with an ignition
source and cause personal injury or property damage.
Always drain the fuel into an approved container
and place a plastic film under the Gas Cap before
turning the machine over to make adjustments.
Follow
1.
2.
these steps to adjust the Drive Control and Shift Lever:
With the engine off, move the shift lever all the way forward
to the highest speed. With the drive control released, push
the snow thrower forward. The unit should roll forward. Then
engage the drive control. The wheels should stop turning.
Release the drive control and push the unit again.Tip the
snow thrower back so that it rests on the handle.
3.
4.
Move the shift lever back to the fast reverse position then
all the way forward again.There should be no resistance in
the shift lever, and the wheels should keep turning.
Ifyou have resistance when moving the shift lever or the
wheels stop when they should not, loosen the jam nut on
the drive control cable and unthread the cable one turn.
5. If the wheel does not stop when you engage the drive
thread the cable in one turn.
6. Recheck the adjustment and repeat as necessary. Tighten
the jam nut to secure the cable when correct adjustment is
reached.
Follow these steps to check if you have the correct adjustment:
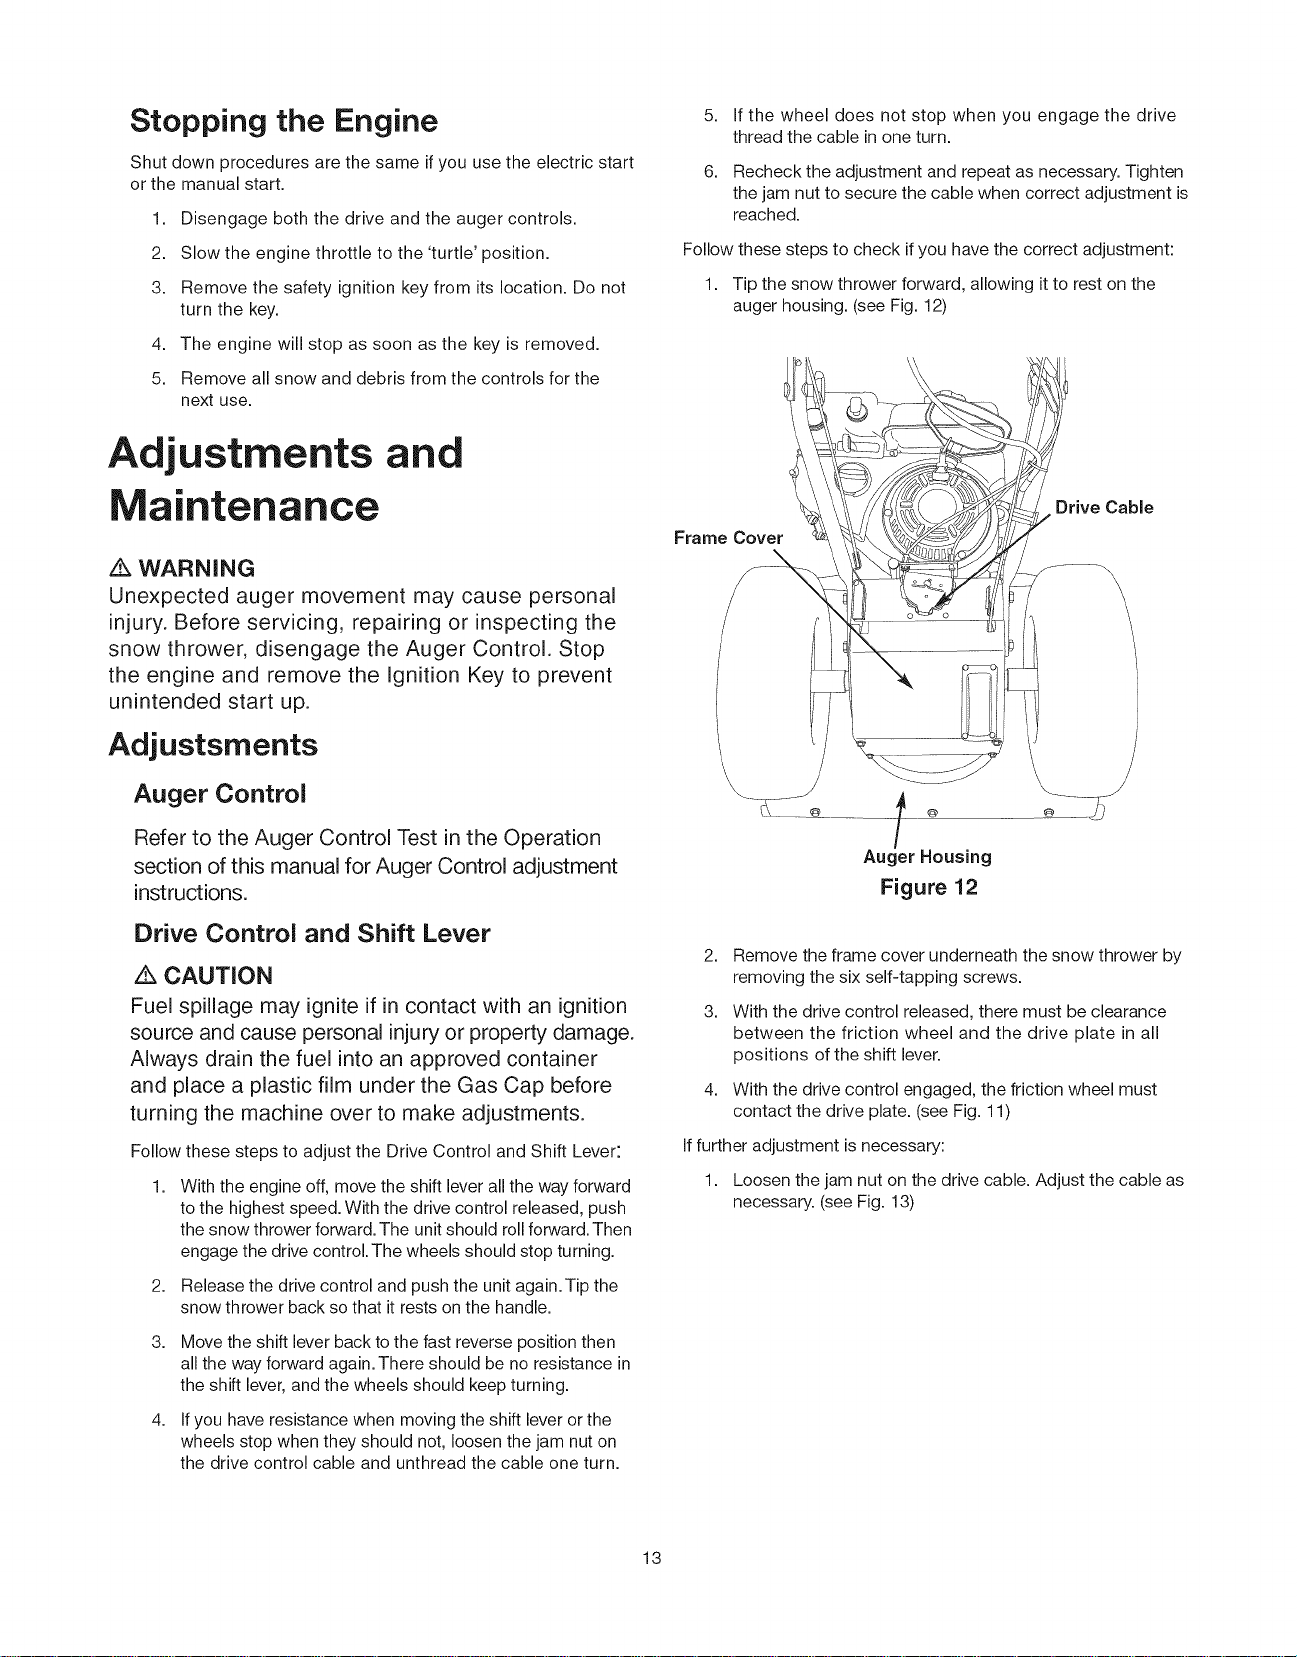
1. Tip the snow thrower forward, allowing it to rest on the
auger housing. (see Fig. 12)
Frame Cover
Drive Cable
@
Auger Housing
Figure 12
2. Remove the frame cover underneath the snow thrower by
removing the six self-tapping screws.
3. With the drive control released, there must be clearance
between the friction wheel and the drive plate in all
positions of the shift lever.
4. With the drive control engaged, the friction wheel must
contact the drive plate. (see Fig. 11)
If further adjustment is necessary:
1. Loosen the jam nut on the drive cable. Adjust the cable as
necessary. (see Fig. 13)
13
Loading ...
Loading ...
Loading ...