Loading ...
Loading ...
Loading ...
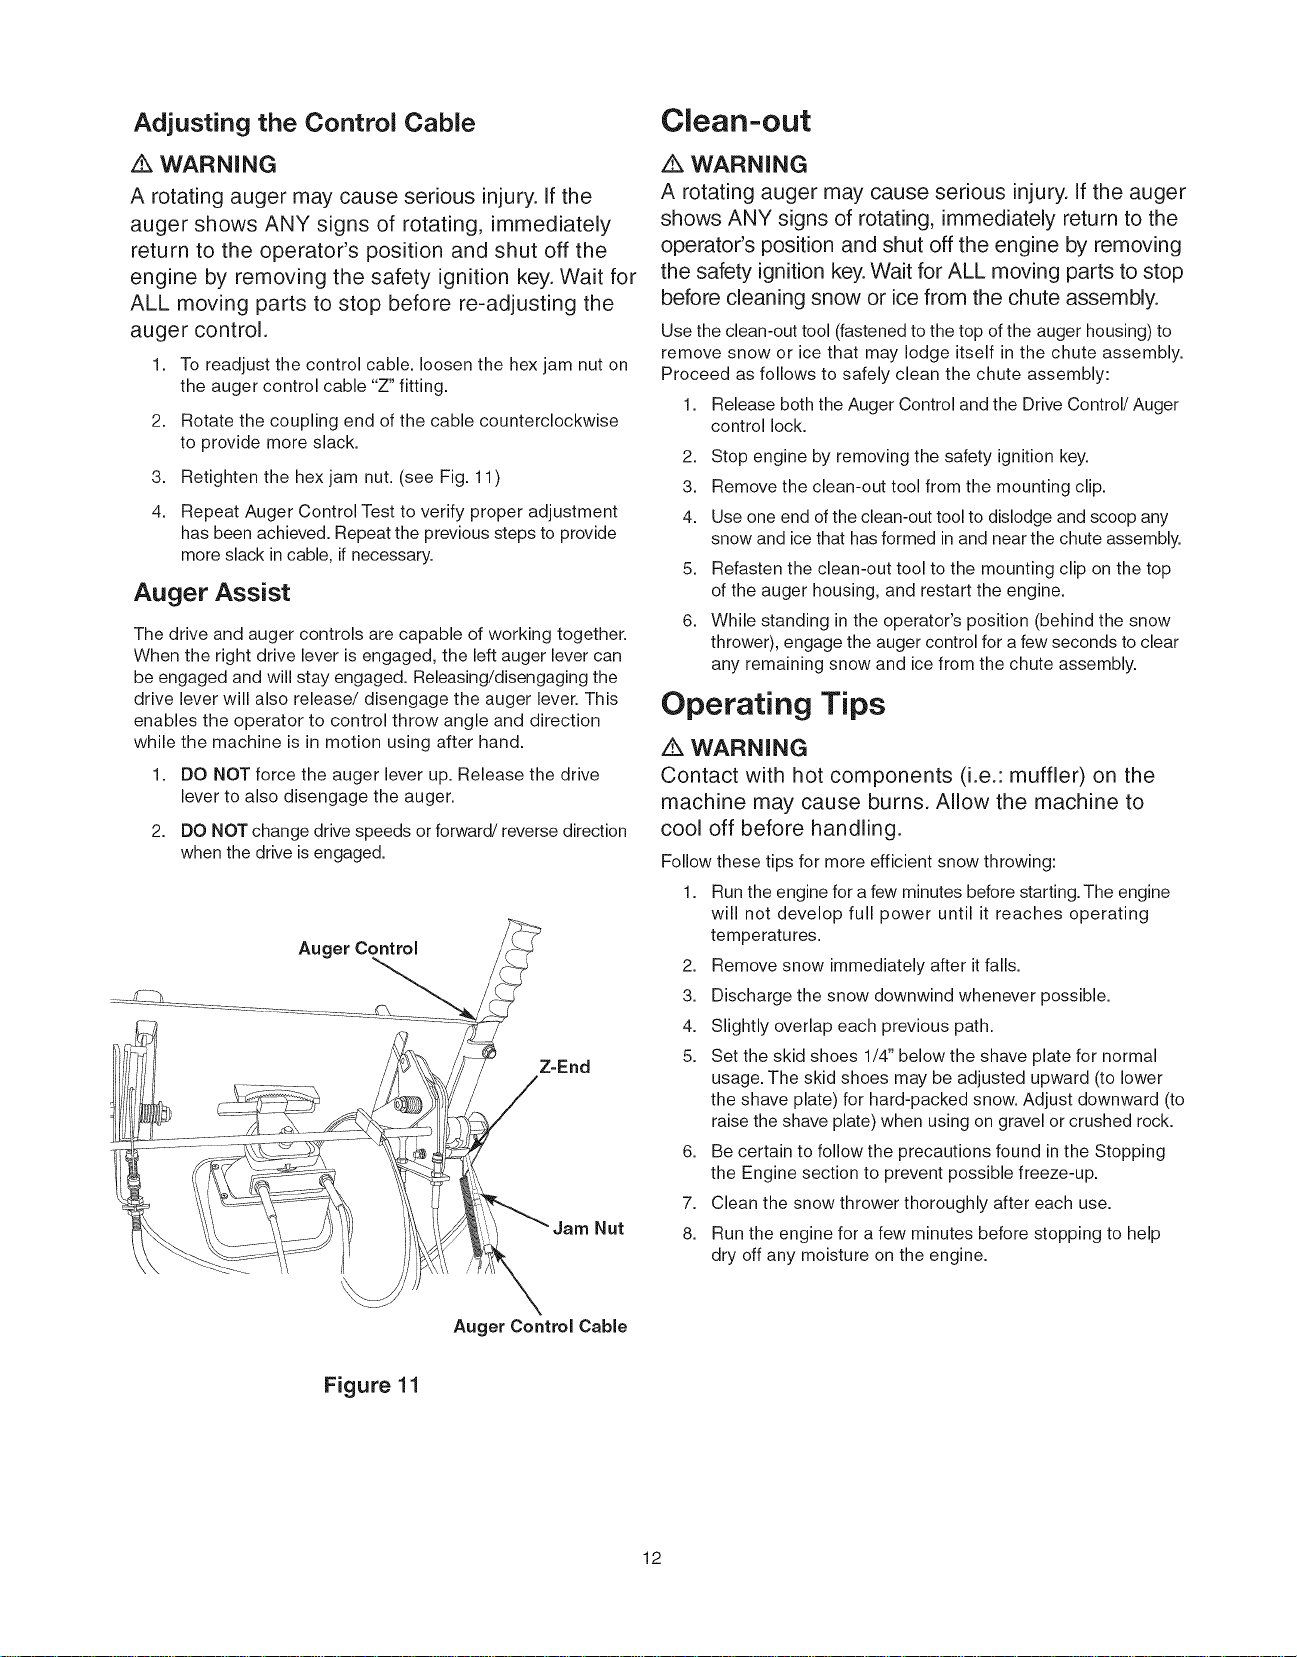
Adjusting the Control Cable
WARNING
A rotating auger may cause serious injury. If the
auger shows ANY signs of rotating, immediately
return to the operator's position and shut off the
engine by removing the safety ignition key. Wait for
ALL moving parts to stop before re-adjusting the
auger control.
1. To readjust the control cable, loosen the hex jam nut on
the auger control cable "Z" fitting.
2. Rotate the coupling end of the cable counterclockwise
to provide more slack.
3. Retighten the hex jam nut. (see Fig. 11)
4. Repeat Auger Control Test to verify proper adjustment
has been achieved. Repeat the previous steps to provide
more slack in cable, if necessary.
Auger Assist
The drive and auger controls are capable of working together.
When the right drive lever is engaged, the left auger lever can
be engaged and will stay engaged. Releasing/disengaging the
drive lever will also release/disengage the auger lever. This
enables the operator to control throw angle and direction
while the machine is in motion using after hand.
1. DO NOT force the auger lever up. Release the drive
lever to also disengage the auger.
2. DO NOT change drive speeds or forward/reverse direction
when the drive is engaged.
Auger Control
Z=End
Jam Nut
Clean=out
z_ WARNING
A rotating auger may cause serious injury. If the auger
shows ANY signs of rotating, immediately return to the
operator's position and shut off the engine by removing
the safety ignition key. Wait for ALL moving parts to stop
before cleaning snow or ice from the chute assembly.
Use the clean-out tool (fastened to the top of the auger housing) to
remove snow or ice that may lodge itself in the chute assembly.
Proceed as follows to safely clean the chute assembly:
Release both the Auger Control and the Drive Control/Auger
control lock.
1.
2. Stop engine by removing the safety ignition key.
3. Remove the clean-out tool from the mounting clip.
4. Use one end ofthe clean-out tool to dislodge and scoop any
snow and ice that has formed in and near the chute assembly.
5. Refasten the clean-out tool to the mounting clip on the top
of the auger housing, and restart the engine.
6. While standing in the operator's position (behind the snow
thrower), engage the auger control for a few seconds to clear
any remaining snow and ice from the chute assembly.
Operating Tips
Z_ WARNING
Contact with hot components (i.e.: muffler) on the
machine may cause burns. Allow the machine to
cool off before handling.
Follow these tips for more efficient snow throwing:
1. Run the engine for a few minutes before starting.The engine
will not develop full power until it reaches operating
temperatures.
2. Remove snow immediately after it falls.
3. Discharge the snow downwind whenever possible.
4. Slightly overlap each previous path.
5. Set the skid shoes 1/4" below the shave plate for normal
usage. The skid shoes may be adjusted upward (to lower
the shave plate) for hard-packed snow. Adjust downward (to
raise the shave plate) when using on gravel or crushed rock.
6. Be certain to follow the precautions found in the Stopping
the Engine section to prevent possible freeze-up.
7. Clean the snow thrower thoroughly after each use.
8. Run the engine for a few minutes before stopping to help
dry off any moisture on the engine.
Auger Control Cable
Figure 11
12
Loading ...
Loading ...
Loading ...