
Loading ...
Loading ...
Loading ...
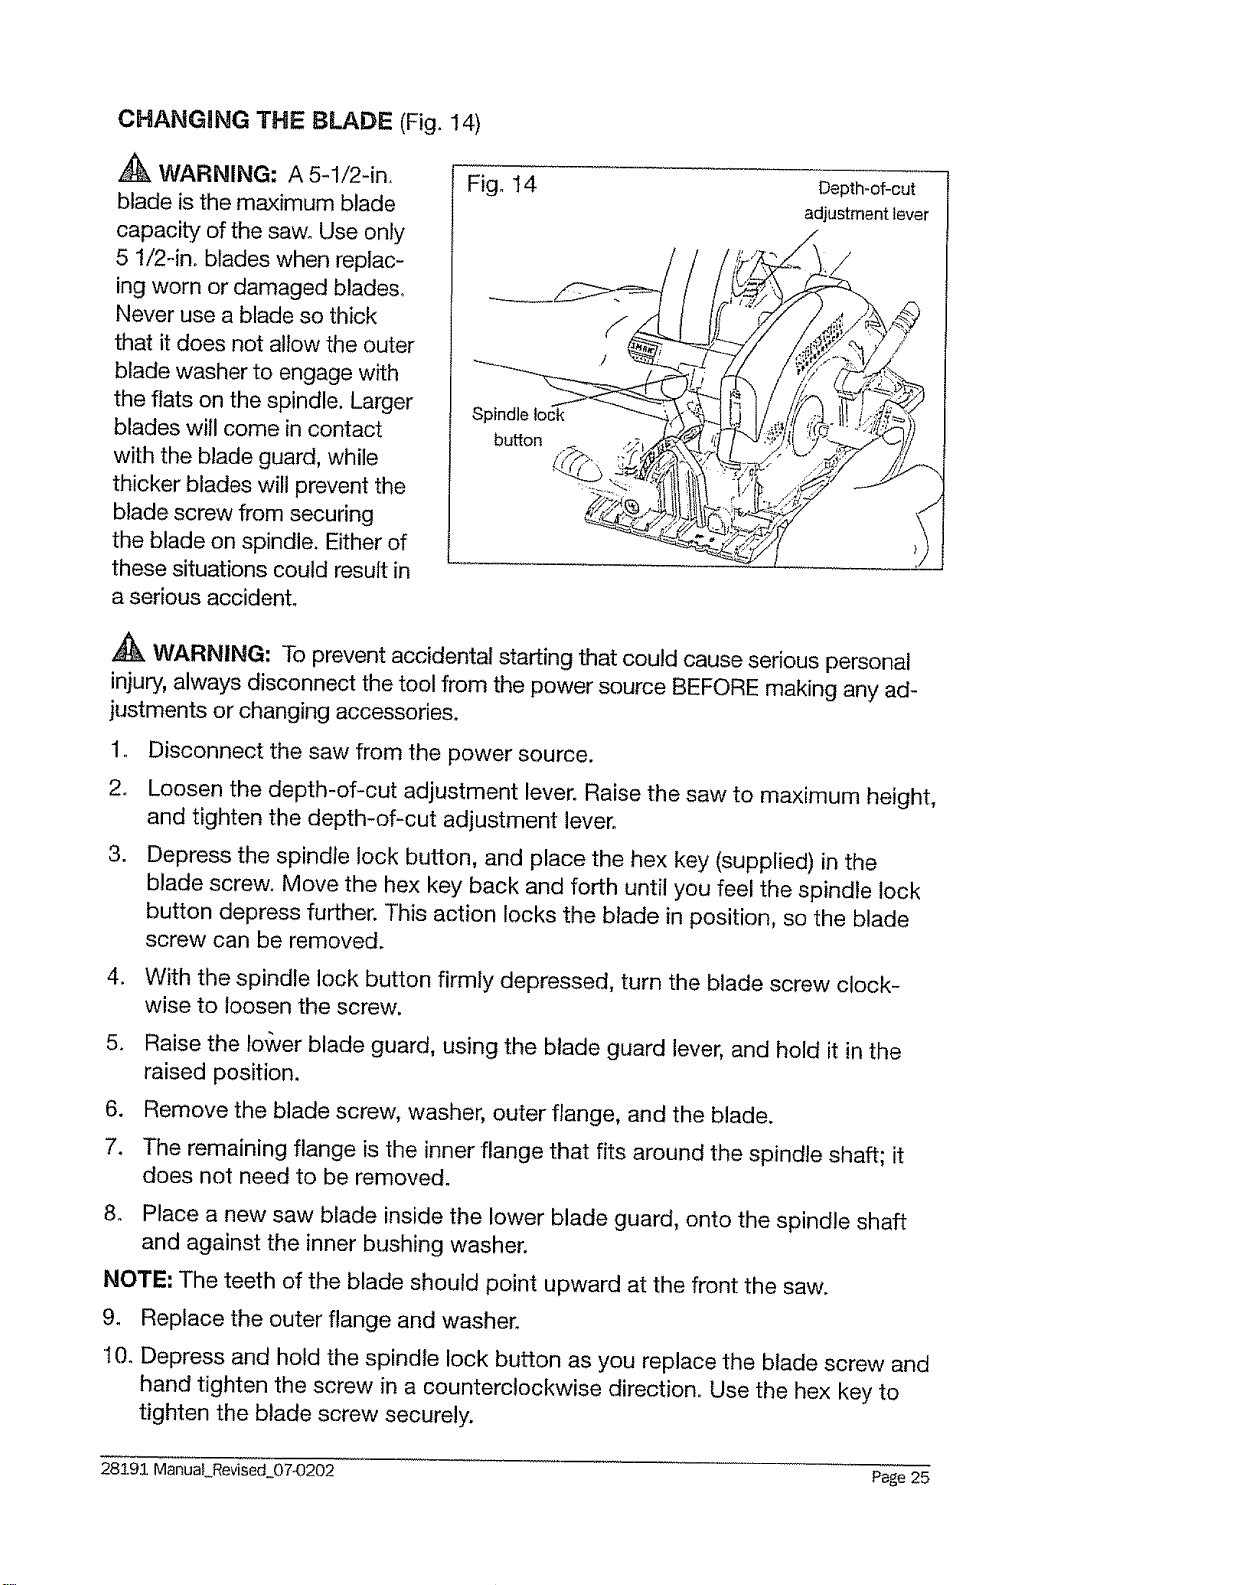
CHANGING THE BLADE (Fig. 14)
A
WARNING: A 5-1/2-in°
blade is the maximum blade
capacity of the sawn Use only
5 1/2-in° blades when replac-
ing worn or damaged blades.
Never use a blade so thick
that it does not allow the outer
blade washer to engage with
the flats on the spindle. Larger
blades will come in contact
with the blade guard, while
thicker blades will prevent the
blade screw from securing
the blade on spindle. Either of
these situations could result in
a serious accident.
Fig, 14 Depth-of-cut
adjustment lever
Spindle
button
/
,_ WARNING: To prevent accidental starting that could cause serious personal
injury, always disconnect the tool from the power source BEFORE making any ad-
justments or changing accessories,
.
2,
.
Disconnect the saw from the power source.
Loosen the depth-of-cut adjustment lever. Raise the saw to maximum height,
and tighten the depth-of-cut adjustment lever°
Depress the spindle lock button, and place the hex key (supplied) in the
blade screw. Move the hex key back and forth until you feel the spindle lock
button depress further. This action locks the blade in position, so the blade
screw can be removed.
4. With the spindle lock button firmly depressed, turn the blade screw clock-
wise to loosen the screw.
5. Raise the Io,_Jer blade guard, using the blade guard lever, and hold it in the
raised position.
6. Remove the blade screw, washer, outer flange, and the blade.
The remaining flange is the inner flange that fits around the spindle shaft; it
does not need to be removed.
8.. Place a new saw blade inside the lower blade guard, onto the spindle shaft
and against the inner bushing washer.
NOTE_ The teeth of the blade should point upward at the front the saw.
9. Replace the outer flange and washer_
10o Depress and hold the spindle lock button as you replace the blade screw and
hand tighten the screw in a counterclockwise direction° Use the hex key to
tighten the blade screw securely.
28191 Manual Revised 0743202 Page 25
Loading ...
Loading ...
Loading ...