Loading ...
Loading ...
Loading ...
3
Shooting
54
You can set the position and range of the autofocusing area (AF
area).
1 Set the autofocus mode to g or h.
2 Press c.
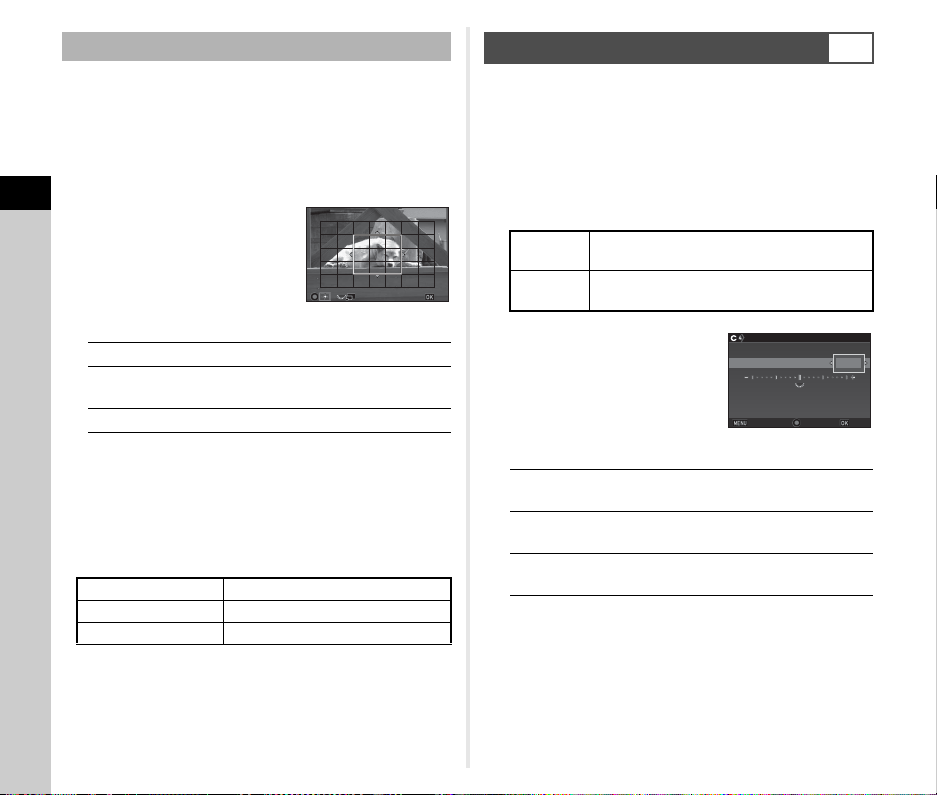
3 Select the AF area.
Use the frame that appears on
the monitor to change the
position and size of the AF area.
Available operations
4 Press E.
The AF area is set.
t Memo
• For the autofocus operation when shooting with Live View,
the following settings can be set in [Contrast Detection AF] of
the A1 and C1 menus.
When [Focus Peaking] is set to [ON], the outline of the subject
in focus is emphasized, and this makes it easier to check the
focus. This function works in both v and w modes.
You can precisely fine-tune your lenses with the camera’s
autofocus system.
1 Select [25 AF Fine Adjustment] in E4 menu and
press D.
The [25 AF Fine Adjustment] screen appears.
2 Select [Apply All] or [Apply One] and press E.
3 Select [Setting] and adjust
the value.
Available operations
4 Press E.
The adjustment value is saved.
5 Press F twice.
The camera returns to standby mode.
Selecting the Desired Focusing Area
ABCD
Changes the position of the AF area.
R
Increases/reduces the size of the AF
area (when g is selected).
M
Returns the AF area to the center.
Contrast AF e, f, g, h, i
Focus Peaking ON, OFF
Contrast AF Options Focus-priority, Release-priority
OK
OK
AF Fine Adjustment
E4
Apply All
Applies the same adjustment value to all
lenses.
Apply One
Saves an adjustment value for the lens being
used. (Up to 20 values)
D/R to the right Adjusts the focus to a closer
position.
C/R to the left Adjusts the focus to a farther
position.
M
Resets the adjustment value
to the default setting.
±0
±0
±0
±0
3
3
25
25
AF Fine Adjustment
AF Fine Adjustment
Apply One
Apply One
Setting
Setting
Reset Individual Settings
Reset Individual Settings
Save
Save
Cancel
Cancel
Loading ...
Loading ...
Loading ...