Loading ...
Loading ...
Loading ...
2
Getting Started
42
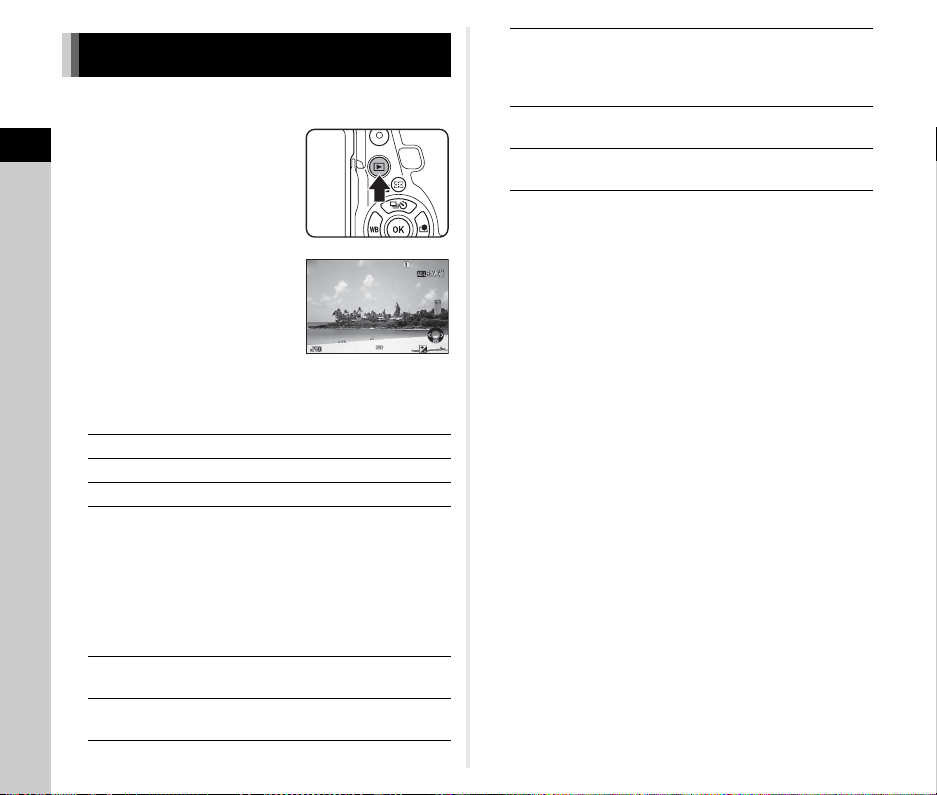
Review the captured image on the monitor.
1 Press 3.
The camera enters playback
mode and the most recently
captured image is displayed
(single image display).
2 Review the captured image.
Available operations
t Memo
• When R is turned to the right to magnify the image, the
magnification is displayed at the bottom right of the screen.
z appears when the image is displayed at the actual pixel
size (1× image display). You can set the initial magnification
when magnifying images in [Quick Zoom] of the B1 menu.
• When Hv is displayed on the monitor, the JPEG image
that was just taken can also be saved in RAW format (Save
RAW Data).
• You can display grid lines in single image display. Set in [Grid
Display] of [Image Display] in the B1 menu. (p.27)
Reviewing Images
C/Q to the left Displays the previous image.
D/Q to the right Displays the next image.
L Deletes the image.
R to the right Magnifies the image (up to
16×).
Use ABCD to change the
area to display.
Press M to return the display
area to the center.
Press E to return to the
entire image display.
R to the left Switches to the thumbnail
display (p.77).
d
Switches between the SD1
card and the SD2 card.
1/
2000
1/
2000
F2.8
F2.8
200
200
0.0
0.0
100-0001
100-0001
H Saves the RAW data (only
when a JPEG image was
taken and the data remains in
the buffer).
G
Changes the type of
information displayed (p.15).
B
Displays the playback mode
palette (p.76).
Loading ...
Loading ...
Loading ...