
Loading ...
Loading ...
Loading ...
8 | nuwavenow.com
ASSEMBLY GUIDE
1. Remove and discard any packaging material from the unit.
2. Remove all accessories from their packaging and wash them in warm, soapy water or
in the dishwasher, top rack only, except for the Probe. NEVER submerge the main unit
in water.
While most of the accessories are dishwasher-safe, the Probe is not. Hand washing is,
therefore, highly recommended. Frequent dishwasher cleaning may lead to premature
wear.
Before First Use
1. Place the Bravo on a level, even, and stable heat-resistant surface.
2. Slide the Cooking Rack(s) into Position 1, 2, 3, or 4 of the Bravo.
3. Place Baking Pan with Broiler Rack on Cooking Rack in Position 1.
4. Place the Air Fry Basket on top of Baking Pan. We recommend you use the Air Fry
Basket with the Baking
Pan to optimize cooking results.
5. Place Crumb Tray into position by sliding it into slot at bottom
of Oven. To remove, push down slightly and pull out.
6. Plug the appliance into a standard wall socket. The power plug is located in the rear of
the unit.
Notes:
Do not cover or block the air vents on the Bravo, as doing so can prevent proper ventilation.
Notes:
Use Position 1 for chicken or other large items (with the Baking Pan and Broiler Rack) as
shown above, and with pizza when you want a crispier crust.
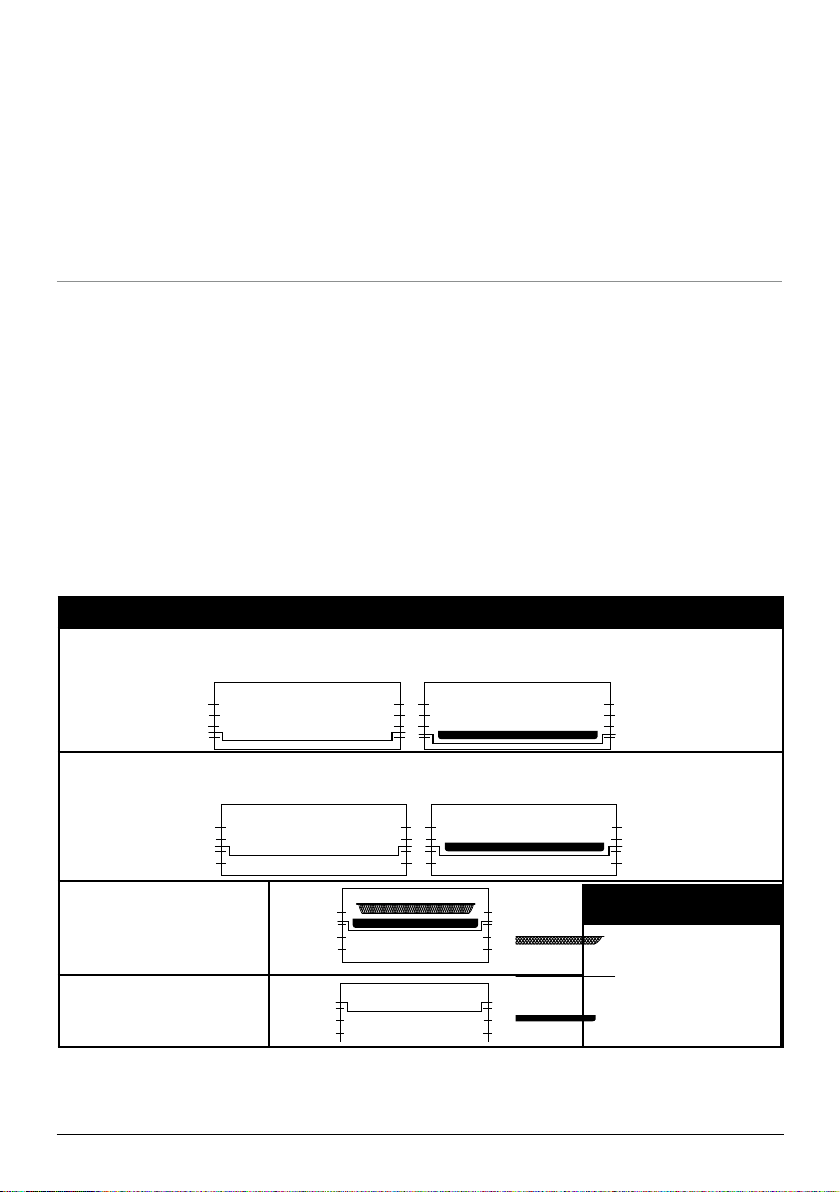
Oven Rack and Pan Positions
Position 1:
Air Fry, Bake, Broil, Dehydrate, Frozen, Grill, Pizza, Reheat, Roast, Slow Roast, & Toast
Position 2:
Air Fry, Bake, Broil, Dehydrate, Frozen, Grill, Pizza, Reheat, Roast, Slow Roast, & Toast
Position 3:
Air Fry, Reheat, Bake,
Frozen, Dehydrate,
Toast, Broil, and Roast
Position 4:
Reheat, Frozen, and
Dehydrate
Parts
Air Fry Basket
Cooking Rack
Baking Pan/
Broiler Rack
Loading ...
Loading ...
Loading ...