Loading ...
Loading ...
Loading ...
14
MOVING NOZZLES FROM FRONT TO TOP
WARNING
Disconnect power before installation. Beware that some residual voltage may remain in the
unit a er the power is disconnected. There is a risk of electric shock.
1. Turn the unit o and unplug the power cord.
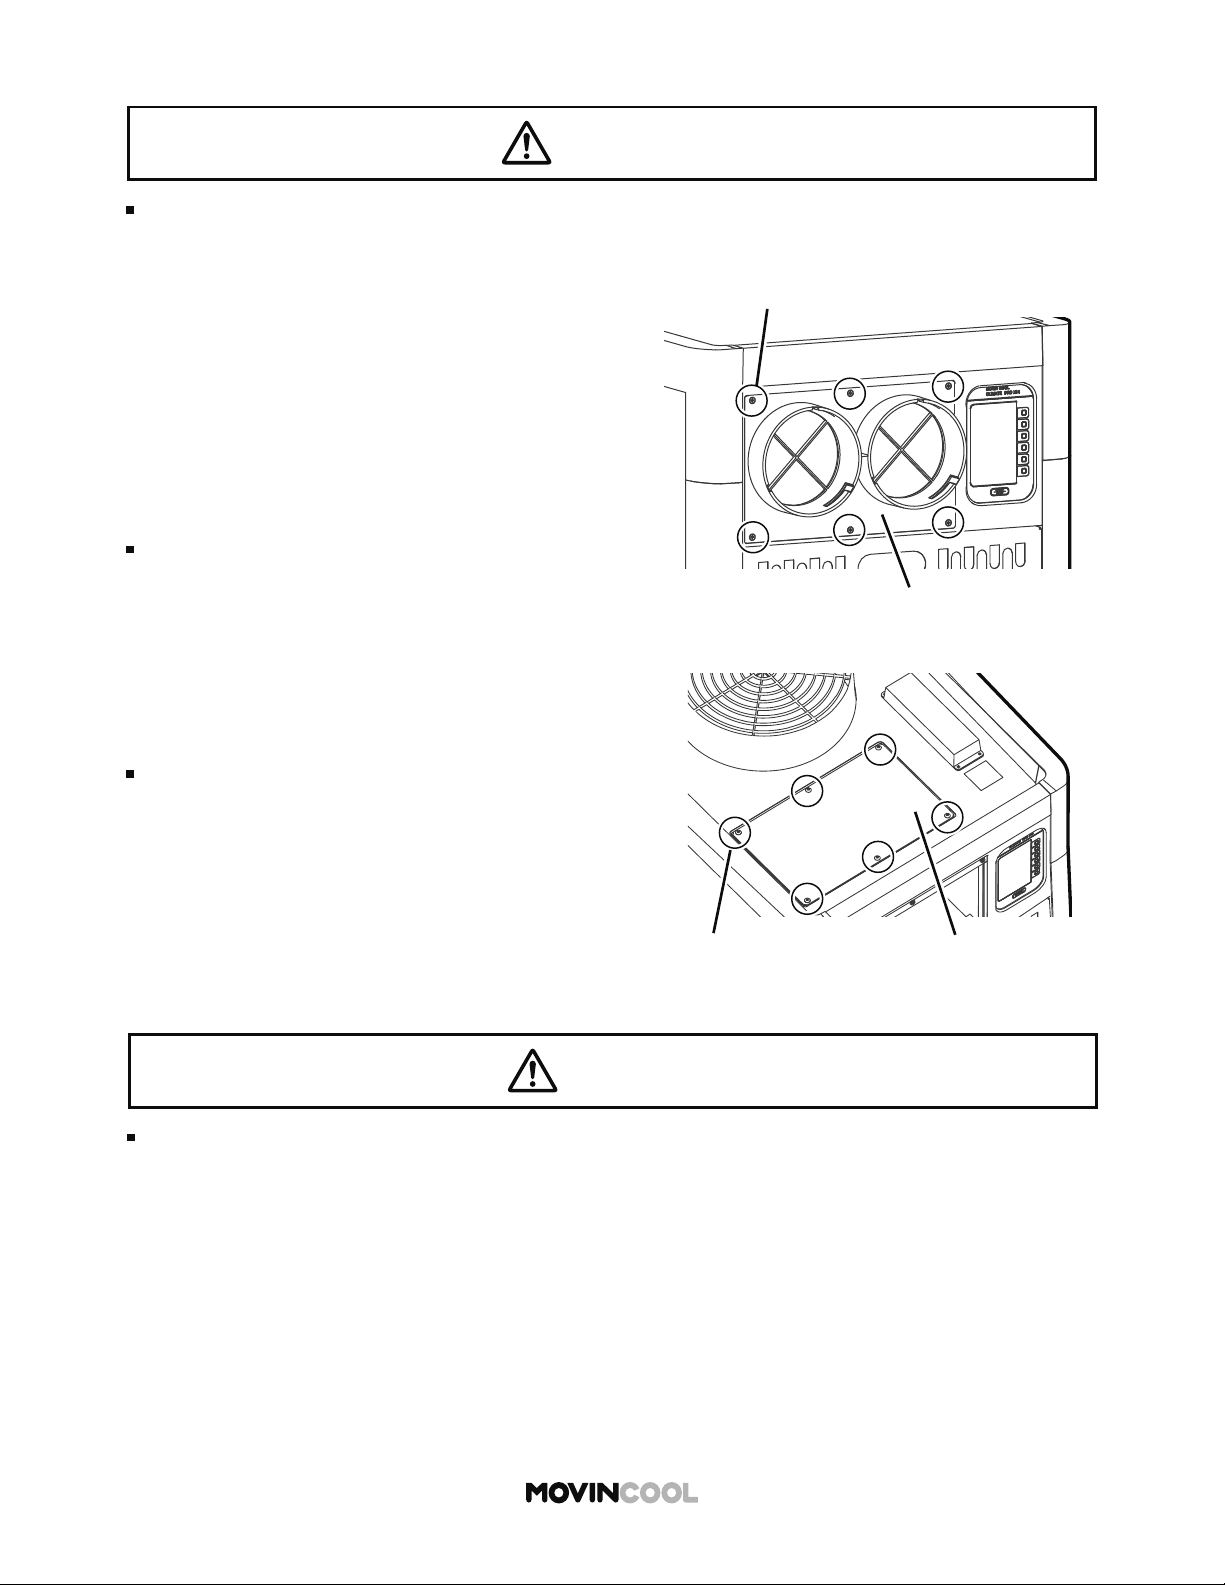
2. Remove the two nozzles by rotating
counterclockwise.
3. Take out the six (6) countersunk screws, and
then remove the nozzle adapter.
Note:
Retain the screws for installing the adapter on
the top.
4. Take out the six (6) truss screws, and then
remove the changeable panel.
Note:
Retain the screws for installing the panel to the
front side.
CAUTION
Do not drop screws or dust into the top opening. This may cause malfunction.
Do not operate the unit until the last step is completed.
Coun
tersunk screws (6)
Nozzle Adapter
T
russ screws (6)
Changeable Panel
Loading ...
Loading ...
Loading ...