Loading ...
Loading ...
Loading ...
WARNING: Do not attempt under any circumstances, to
service,repair,dismantle, or disassemble any mechanical
or electrical componentswithoutphysicallydisconnecting all
power soumes.
CLEANING
Clean off any preservative on bright (machined) parts with
appropriate solvent (mineral spirits). Avoid getting cleaning
fluid on any rubber parts as they tend to deteriorate
rubber.
• Use soap and soft water on rubber and plastic parts.
° After cleaning, lubricate unpainted surfaces with a light
application of medium consistency machine oil. This lubri-
cation should be repeated at least once every six months.
NOTE: Instead of oil, a good quality paste wax can be applied
to rip fence and table surface. Paste wax will enhance move-
ment of workpieces. In addition to providing lubrication, paste
wax will help prevent rusting.
= Keep your machine and your workshop clean. Do not allow
sawdust to accumulate on saw or inside cabinet.
Frequently vacuum or blow out any sawdust that may
accumulate within cabinet.
• Be certain motor and internal mechanisms are clean and
are frequently vacuumed or blown free of any dirt.
LUBRICATION
All bearings on the arbor are shielded ball bearings. These
bearings are permanently lubricated at the factory.
• As needed, clean the grease off the rack and worm gears
of height and tilt mechanism. Lubricate rack and gears
with a medium viscosity machine oil.
• Be sure to lubricate trunnion ways and all bushings.
• Occasionally oil all other bearing points, including bIade
guard assembly, miter gauge and rip fence.
SERVICE
• Replacebelts andworn parts as needed. If power cords
are worn,cut, ordamaged in any way,havethem
replaced immediately.
° Make sureteeth of anti-kickbackpawlsare always sharp.
• Sharpen dull teeth usinga few lightstrokesof a smooth
cutflat file.
CHANGING THE SAW BLADE
Refer to Figures 53 and 54.
WARNING: Turnthe power switch"OFF" and unplug the
powercordfrom its powersource whenchangingthe saw blade.
WARNING: When replaciqg blades, checkthe thickness
stamped ontothe rivingknife.You mustselect a bladewith a
kerf widthlargerthanthe thicknessof the rivingknife.The kerf
widthshouldbe marked onthe blade orblade package.
Thinnerblades may causethe workpieceto bind duringcutting.
WARNING: USE ONLY 10" diameter blades with %" arbor
holes, rated at or higher than 3800 R.RM.
• Remove blade guard assembly and pawl assembly.
• Remove the table insert.
• Unlock the raise!lower handwheel lock and raise saw
blade to maximum height.
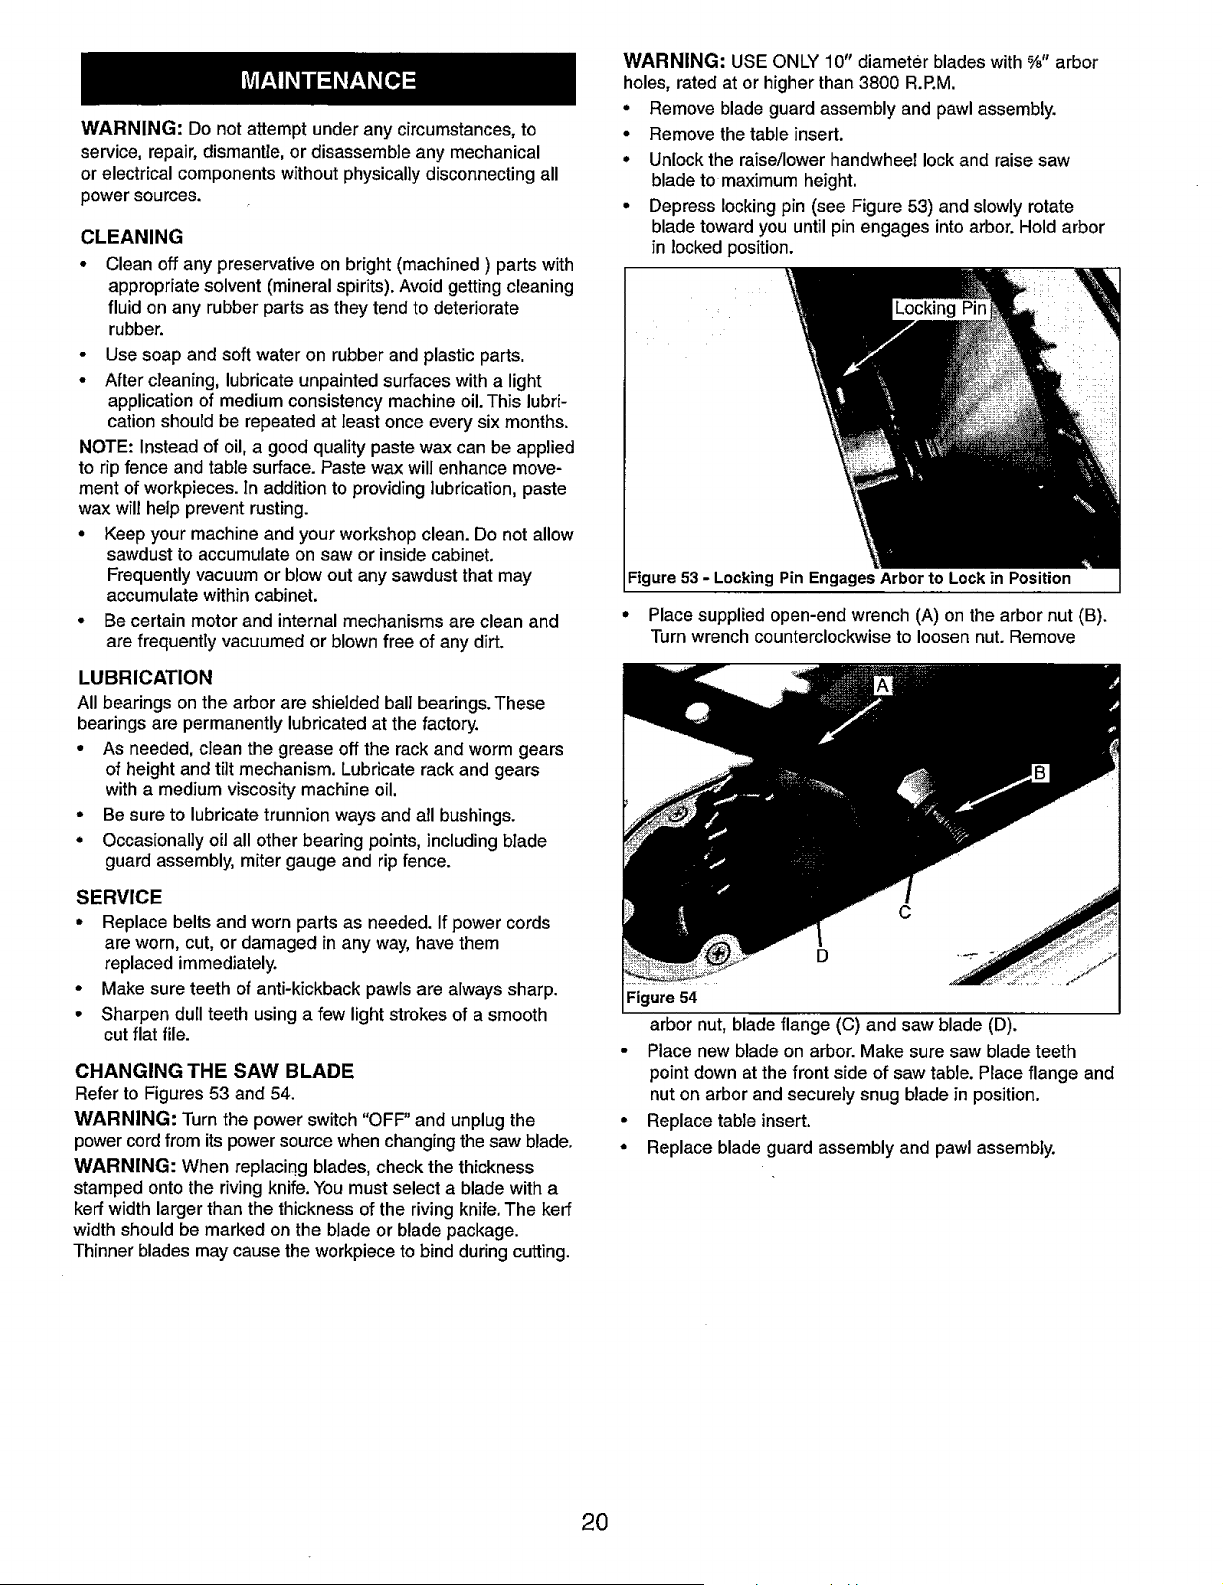
° Depress locking pin (see Figure 53) and slowly rotate
blade toward you until pin engages into arbor. Hold arbor
in locked position.
Figure 53 - Locking Pin Engages Arbor to Lock in Position
° Place supplied open-end wrench (A) on the arbor nut (B).
Turn wrench counterclockwise to loosen nut. Remove
C
D
Figure54
arbor nut,blade flange (C) and saw blade (D).
• Place new blade on arbor.Make sure saw blade teeth
pointdown at the front side of sawtable.Place flange and
nut onarbor andsecurely snugblade in position.
° Replacetableinsert.
• Replacebladeguard assembly and pawlassembly.
2O
Loading ...
Loading ...
Loading ...