
Loading ...
Loading ...
Loading ...
installation and Operation of Mol Head ,,
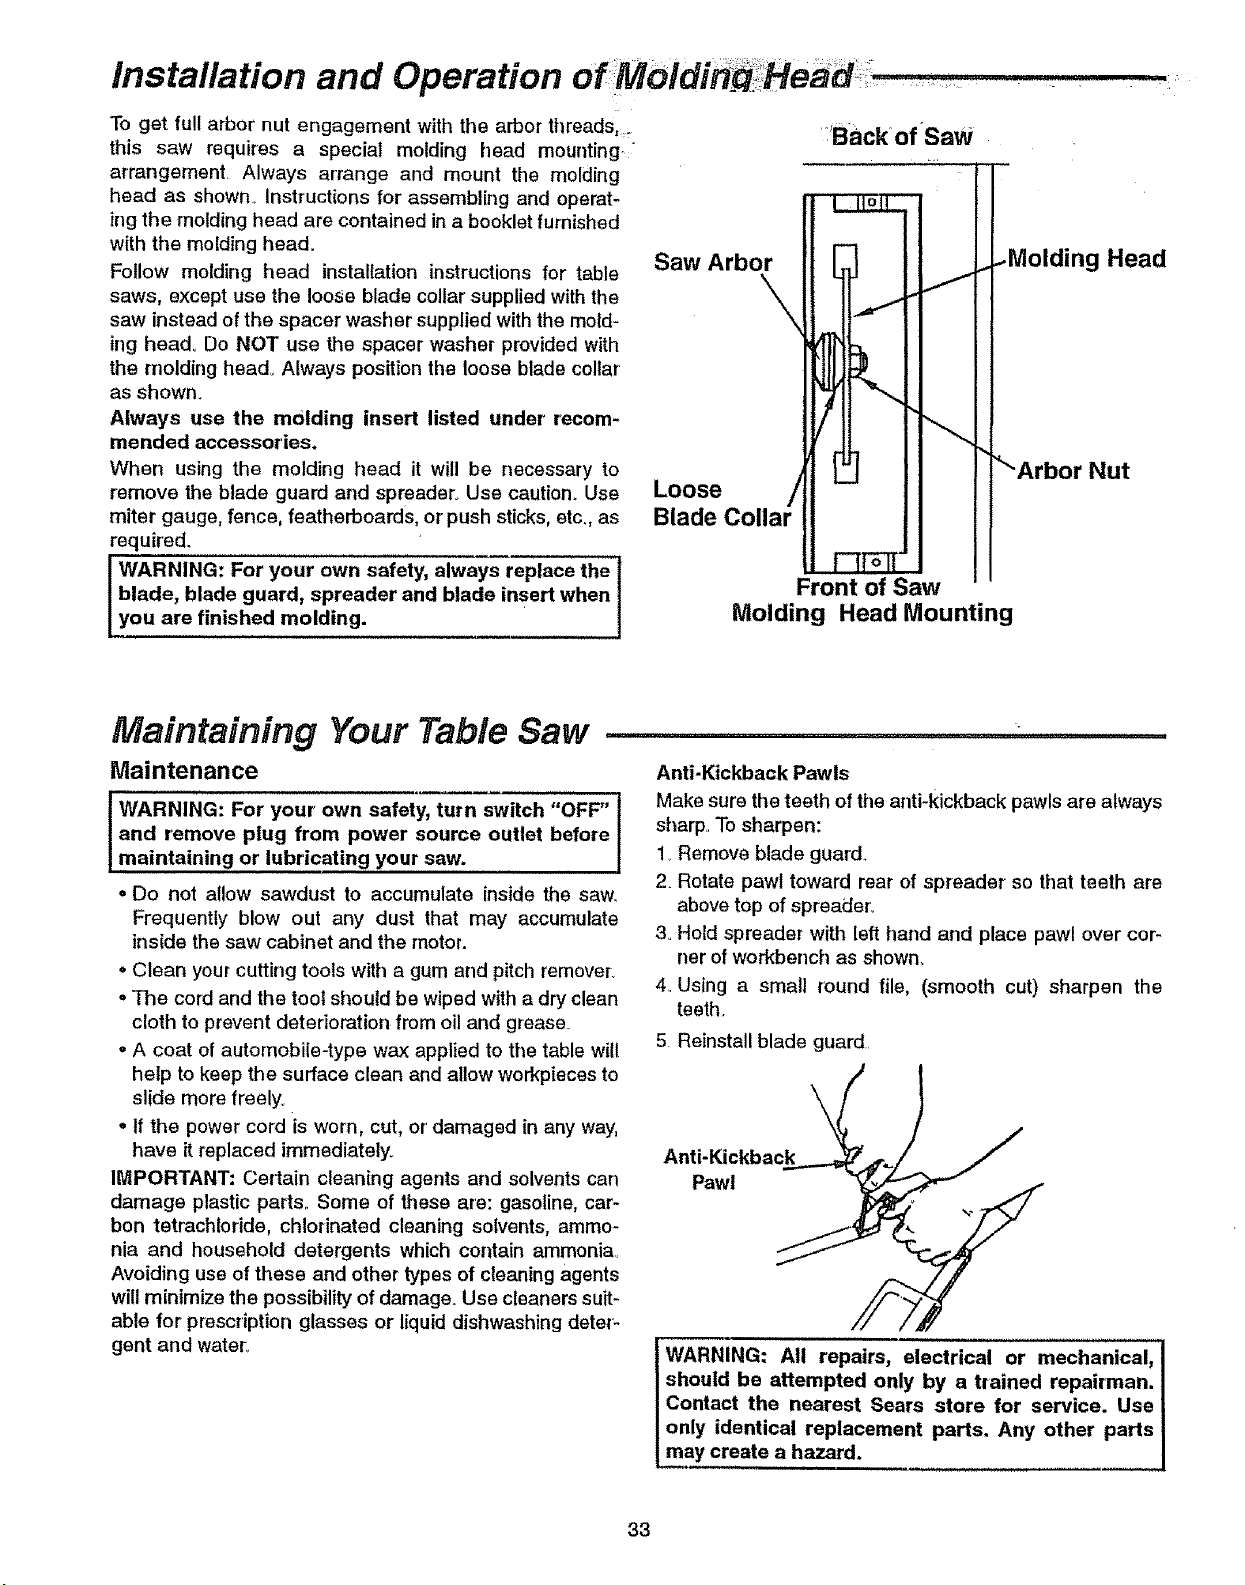
To get full arbor nut engagement with the arbor ttlreads....
this saw requires a special molding head mounting
arrangement Always arrange and mount the molding
head as shown. Instructions for assembling and operat-
ing the molding head are contained in a booklet furnished
with the molding head°
Follow molding head installation instructions for table
saws, except use the loose blade collar' supplied with the
saw instead of the spacer washer supplied with the mold-
ing head° Do NOT use the spacer washer provided with
the molding head.. Always position the loose blade collar
as shown.
Always use the molding insert listed under recom-
mended accessories.
When using the molding head it will be necessary to
remove the blade guard and spreader. Use cautien_ Use
miter gauge, fence, featherboards, or push sticks, etc., as
required.
LyWARNING: your own safety, always replace the l
For
blade, blade guard, spreader and blade insert when I
ou are finished molding. I
BackofSaW
Saw Arbor
Loose
Blade
Front of Saw
Molding Head Mounting
g Head
Nut
Maintaining Your Table Saw ..................................
Maintenance
and remove plug from power source outlet
maintaining or lubricating your saw.
o Do not a!low sawdust to accumulate inside the saw
Frequently blow out any dust that may accumulate
inside the saw cabinet and the motor:
o Clean your cutting tools with a gum and pitch remover.
° The cord and the tool should be wiped with a dry clean
cloth to prevent deterioration from oil and grease.
° A coat of automobile-type wax applied to the table will
help to keep the surface clean and allow workpieces to
slide more freely.
° If the power cord is worn, cut, or'damaged in any way,
have it replaced immediately_
IMPORTANT: Certain cleaning agents and solvents can
damage plastic parts.. Some of these are: gasoline, car-
bon tetmch!oride, chlorinated cleaning solvents, ammo-
nia and household detergents which contain ammonia_
Avoiding use of these and other types of cleaning agents
will minimize the possibility of damage. Use cleaners suit-
able for prescription glasses or liquid dishwashing deter'-
gent and water.
Anti-Kickback Pawls
Make sure the teeth oftile anti-kickback pawls are always
sharp. To sharpen:
1. Remove blade guard..
2_Rotate pawl toward rear of spreader so that teeth are
above top of spreader:
3..Hold spreader with left hand and place pawl over cor-
ner of workbench as shown.
4..Using a small round file, (smooth cut) sharpen the
teeth.
5 Reinstall blade guard
Anti-Kickback
Pawl
WARNING: All repairs, electrical or mechanical,]
should be attempted only by a trained repairman. |
Contact the nearest Sears store for service. Use I
only identical replacement parts. Any other parts |
may create a hazard. |
33
Loading ...
Loading ...
Loading ...