
Loading ...
Loading ...
Loading ...
ii IIII,Mlll ,,I,I
Blade Guard Alignment
IMPORTANT: To work properly, the spreader must
always be adjusted so the cut workpiece will pass on
either'side of the spreader without binding or'skewing to
the side.
NOTE: The spreader' is thinner than the width of the
KERF by approximately six thicknesses of newspaper,
To check if alignment is proper, slide 3 thicknesses of
newspaper between straight edge and spreader:
Readjust ifnecessary,
1,,Make two folds in a small piece (6" x 6") of ordinary
newspaper' making three thicknesses. The folded
paper'willbe used as a "spacing gauge'S
2. Raise blade to maximum height and make sure blade
"is in vertical position (straight up and down) Or at "0°"
blade angle.
3. Lay a piece of straight flat wood or straight edge
against the sawblade,, Insert folded paper between
spreader and wood strip.
4. Make sure the three hex screws are loose enough to
slide spreader bracket and to rotate spreader' support,.
5, Lift the anti-kickback pawl to clear the wood or straight
edge and hold the spreader tightly against the paper
and wood,, Make sure the wood is ,against the saw-
blade,,Tighten the three hex screws.
This will align the spreader in the middle of the cut
(KERF) made by sawblade.
NOTE: To remove the guard for non-through cuts, loosen
the wing nut and slide the guard upward off the spreader
bracket,. Do not disturb the setting of the spreader' sup-
portbracket.
When replacing the guard, slide the spreader' down onto
the spreader support bracket.. Make sure the wing nut is
tightened securely.. This lets you remove and replace the
guard without disturbing the spreader alignment.
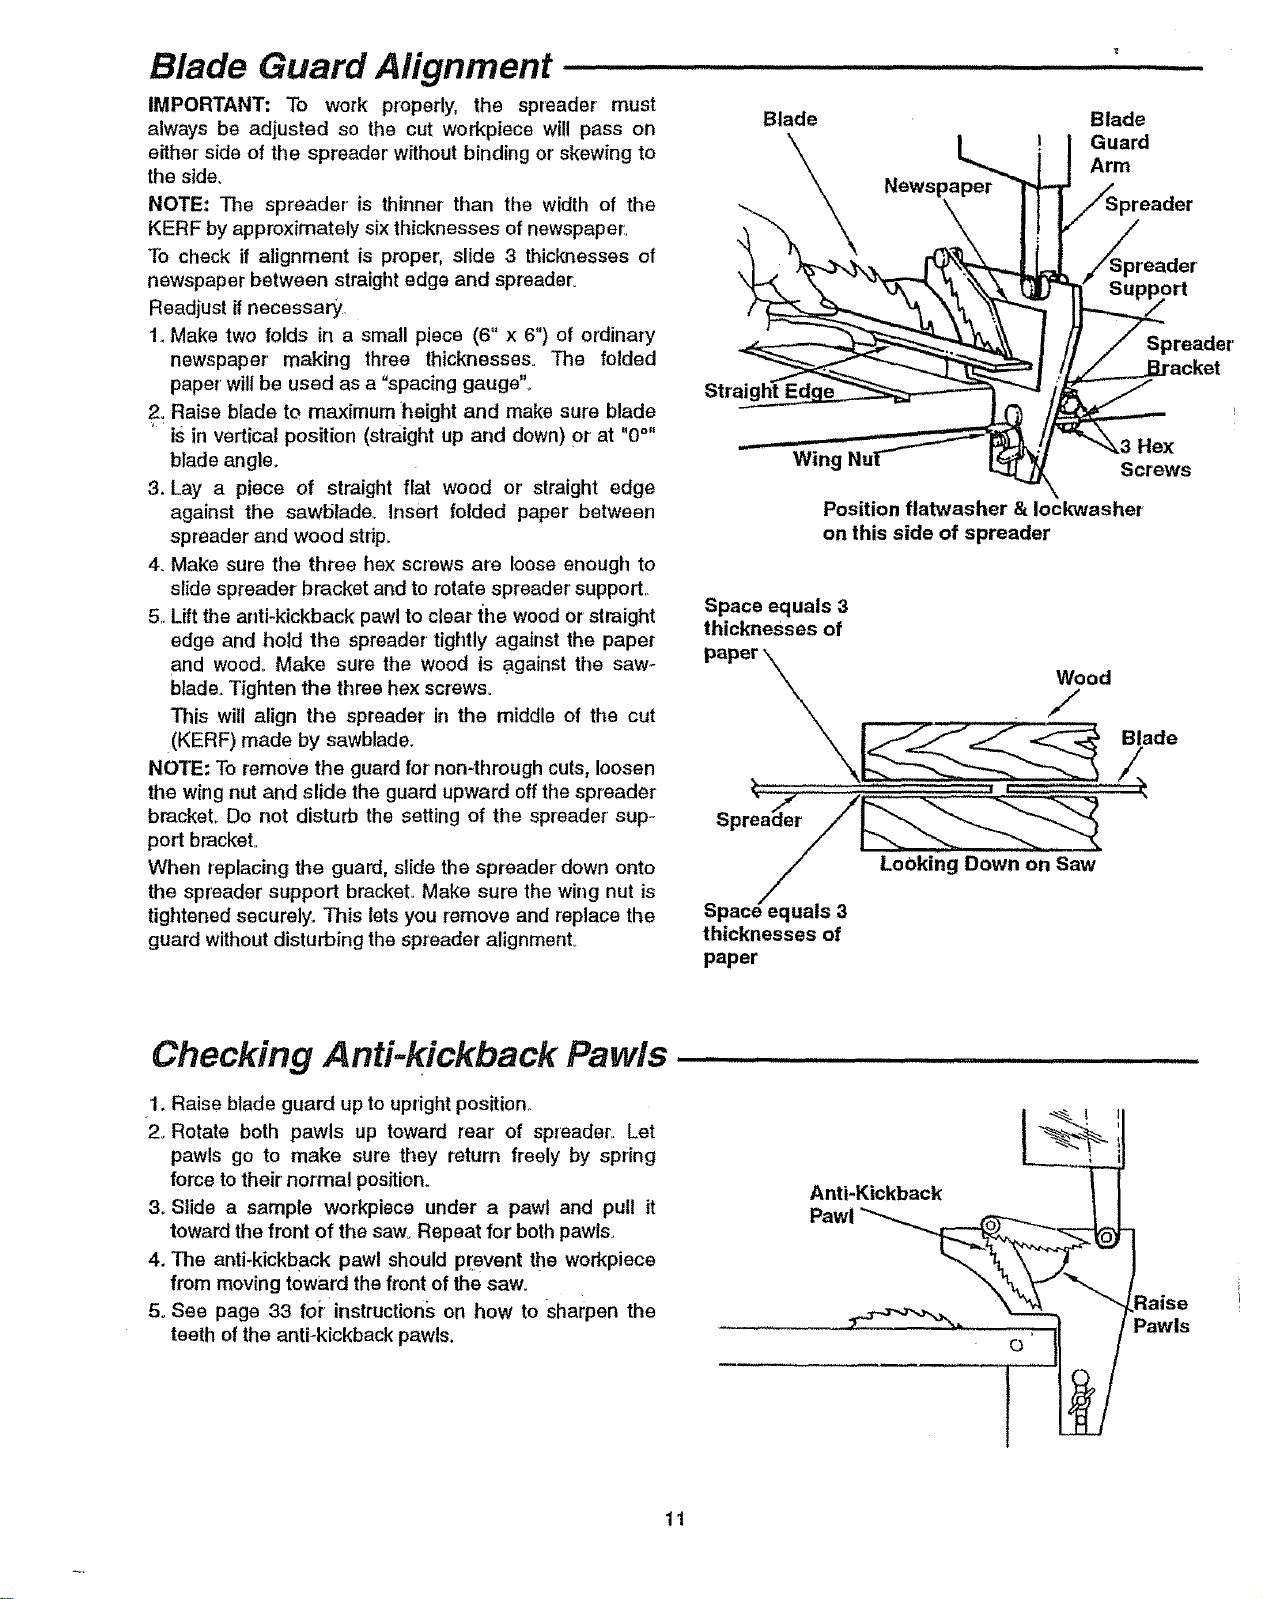
Blade Blade
Guard
Arm
Strai!
Spreader'
Wing
,tex
Screws
Position flatwasher & Iockwasher
on this side of spreader
Space equals 3
thicknesses of
/ Looking Down on Saw
/
S
pace equals 3-
thicknesses of
paper
Checking Anti-kickback Pawls,
1. Raise blade guard up to upright position..
2. Rotate both pawls up toward rear of spreader° Let
pawls go to make sure they return freely by spring
force to their normal position.
3. Slide a sample workpiece under a pawl and pull it
toward the front of the saw_Repeat for both pawls.
4. The anti-kickback pawl should pr+eventthe workpiece
from moving toward the front of the saw.
5oSee page 33 foi+instructions on how to sharpen the
teeth of the anti-kickback pawls.
"a'j"+"+°°" T
:laise
Pawls
11
Loading ...
Loading ...
Loading ...