
Loading ...
Loading ...
Loading ...
°Raisetheripfencelockinghandle,moveandreturn
thenipfenceadjacentto the mitergaugegroove,
lower'theripfencelockinghandle.
•Repeatandrechecksteps8 and9inthe"RipFence
Assemblyand Adjustment" sectien_
•The rip fence should now be parallel to the miter
gauge groove.. If not, repeat steps and recheck
NOTE: To always obtain tile best atignment'of the 'rip
fence, develop the habit of holding the front casting on
the fence back against the table top while tightening the
fence tock handle Tigilten the rip fence lock handle
securely to prevent rip fence movement while sawing.
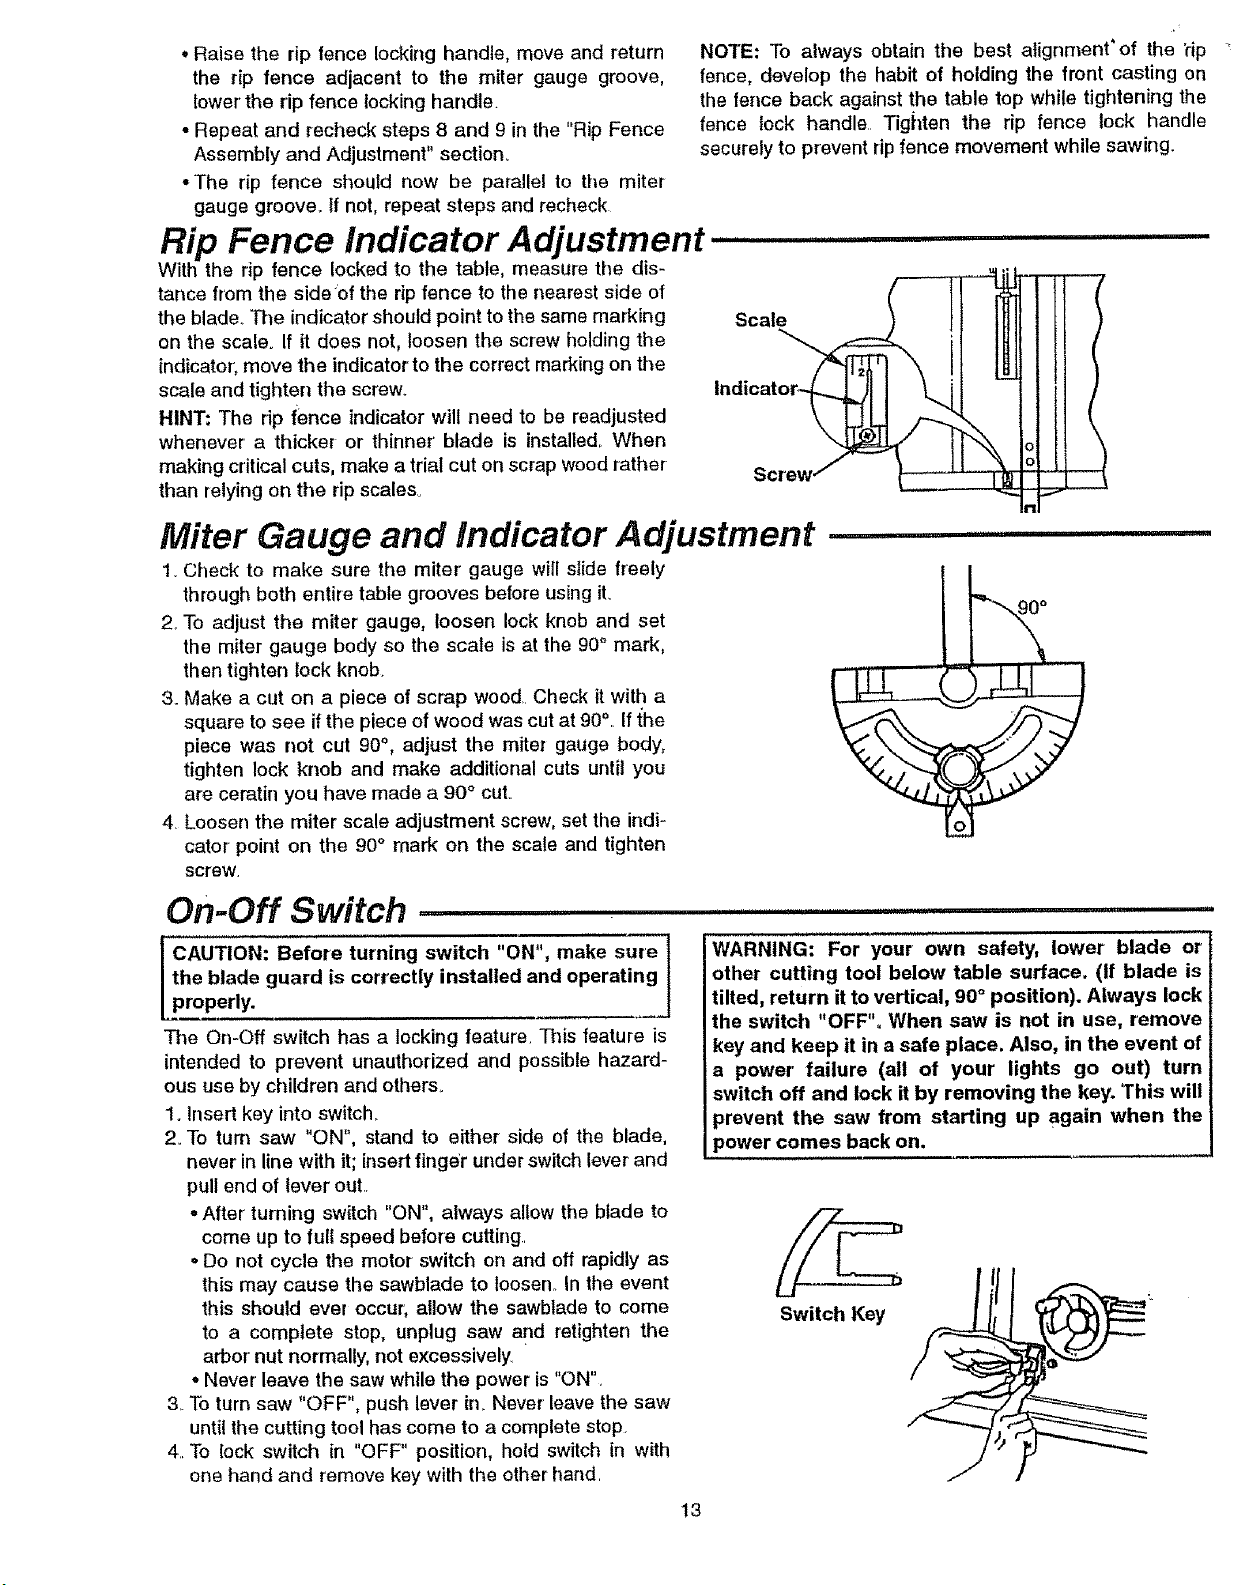
Rip Fence Indicator Adjustment .......
With the rip fence locked to the table, measure the dis-
tance from the side'of the rip fence to the nearest side of
the blade.. The indicator should point to the same marking
on the scale. If it does not, loosen the screw holding the
indicator; move the indicator to the correct marking on the
scale and tighten the screw.
HINT; The dp fence indicator will need to be readjusted
whenever a thicker or thinner' blade is installed. When
making critical cuts, make a trial cut on scrap wood rather
than relying on tile rip scales.
Scal_
screw (
Miter Gauge and Indicator Adjustment
1. Check to make sure the miter' gauge will slide freely
through both entire table grooves before using it.
2. To adjust the miter gauge, loosen lock knob and set
the miter gauge body so the scale is at the 90° mark,
then tighten lock knob.
3. Make a cut on a piece of scrap wood.. Check it with a
square to see ifthe piece of wood was cut at 90% If the
piece was not cut 90°, adjust the miter gauge body,
tighten lock knob and make additional cuts until you
are ceratin you have made a 90° cut..
4. Loosen the miter scale adjustment screw, set the indi-
cator point on the 90° mark on the scale and tighten
screw.
lUUlU,ii
90°
On-Off Switch
lc.° io.;oo,o.o,um,°0ow.c.o.., o.ol
the blade guard is correctly installed and operating
properly.
The On-Off switch has a locking feature. This feature is
intended to prevent unauthorized and possible hazard-
ous use by children and others..
1. Insert key into switch.
2. To turn saw "ON", stand to either side of the blade,
never in line with it; insert finger under switch lever and
pull end of lever out..
oAfter' turning switch "ON", always allow the blade to
come up to full speed before cutting
oDo not cycle the motor switch on and oft rapidly as
this may cause the sawblade to loosen. In the event
this should ever occur, allow the sawblade to come
to a complete stop, unplug saw and retighten the
arbor' nut normally, not excessively "
° Never leave the saw while the power is "ON".
3_To turn saw "OFF", push lever in. Never leave the saw
until the cutting tool has come to a complete stop.
4..To lock switch in "OFF" position, hold switch in with
one hand and remove key with the other hand
WARNING: For your own safety, lower blade or
other cutting tool below table surface. (If blade is
tilted, return it to vertical, 90 ° position). Always lock
the switch "OFF". When saw is not in use, remove
key and keep it in a safe place. Also, in the event of
a power' failure (all of your lights go out) turn
switch off and lock it by removing the key. 'This will
_revent the saw from starting up again when the
}ower comes back on.
Switch Key
13
Loading ...
Loading ...
Loading ...