
Loading ...
Loading ...
Loading ...
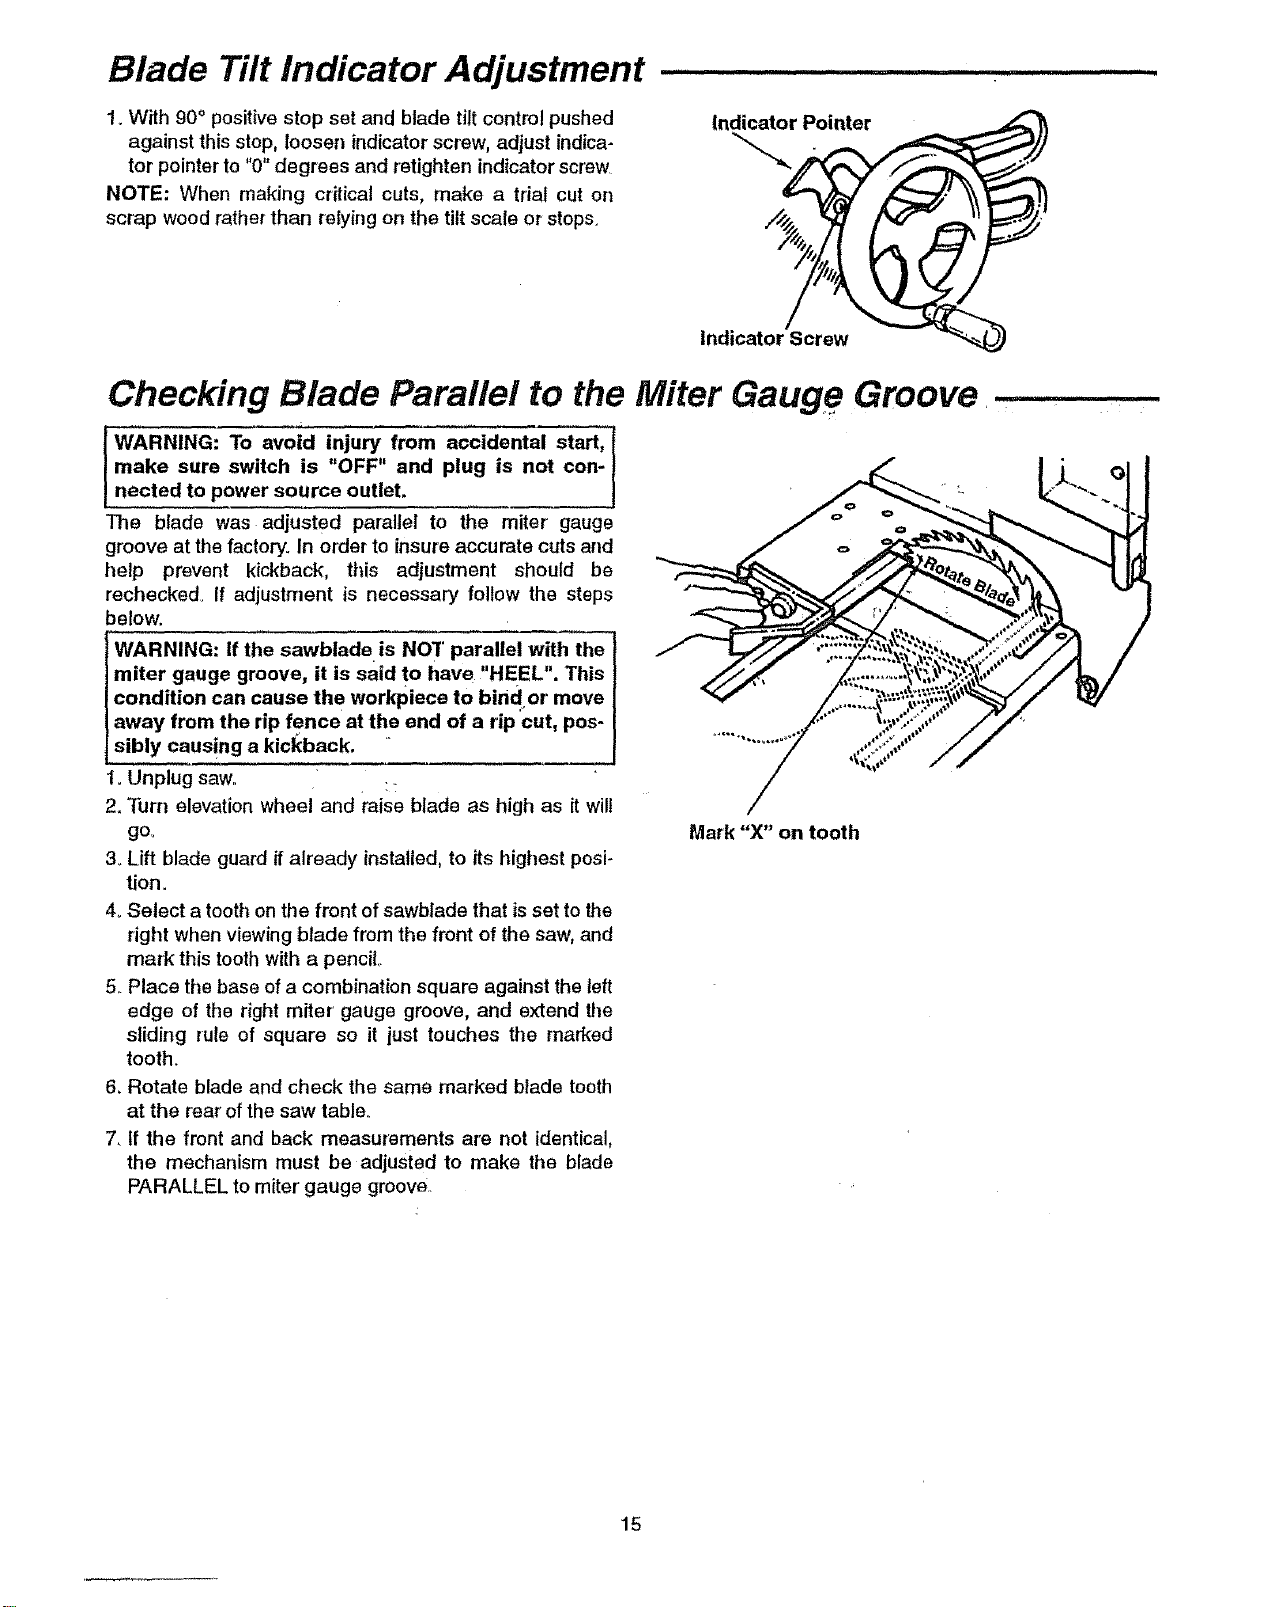
Blade Tilt Indicator Adjustment
1. With 90 ° positive stop set and blade tilt control pushed
against this stop, loosen indicator screw, adjust indica-
tor pointer to "0" degrees and retighten indicator screw
NOTE: When making critical cuts, make a trial cut on
scrap wood rather than relying on the tilt scale or stops.
Indicator Pointer
Indicator Screw
Checking Blade Parallel to the Miter Gauge Groove
I WARNING: To avoid injury, from accidental start, t
make sure switch is OFF' and plug is not con-
nected to power source outlet.
The blade was adjusted parallel to the miter gauge
groove at the factory. In order to insure accurate cuts and
help prevent kickback, this adjustment should be
rechecked° If adjustment is necessary follow the steps
below.
t WARNING: If the sawblade is NO7' parallel with the
] miter gauge groove, it is said to have "'HEEL". This
condition can cause the workpiece to birid or move
away from the rip fence at the end of a rip cut, pos-
[sibly causing a kickback.
1oUnplug saw., ::
2. Turn elevation wheel and raise blade as high as itwill
go_
3oLift blade guard if already installed, to its highest posi-
tion ..
4oSelect a tooth on the front of sawblade that is set to the
dght when viewing blade from the front of the saw, and
mark this tooth with a pencil
5. Place the base ofa combination square against the left
edge of the right miter' gauge groove, and extend the
sliding rule of square so it just touches the marked
tooth.
6, Rotate blade and check the same marked blade tooth
at the rear'of the saw table.
7. tf the front and back measurements are not identical,
the mechanism must be adjusted to make the blade
PARALLEL to miter gauge groove.
Mark "X" on tooth
15
Loading ...
Loading ...
Loading ...