Loading ...
Loading ...
Loading ...
Use & Installation Manual
28
Setting the Self-Clean Mode
To Set the Self-Clean Mode
1. Touch [UPPER/LOWER] key to select
the cavity to be cleaned, if the oven is a
double.
2. Rotate both knobs into the clean
position.
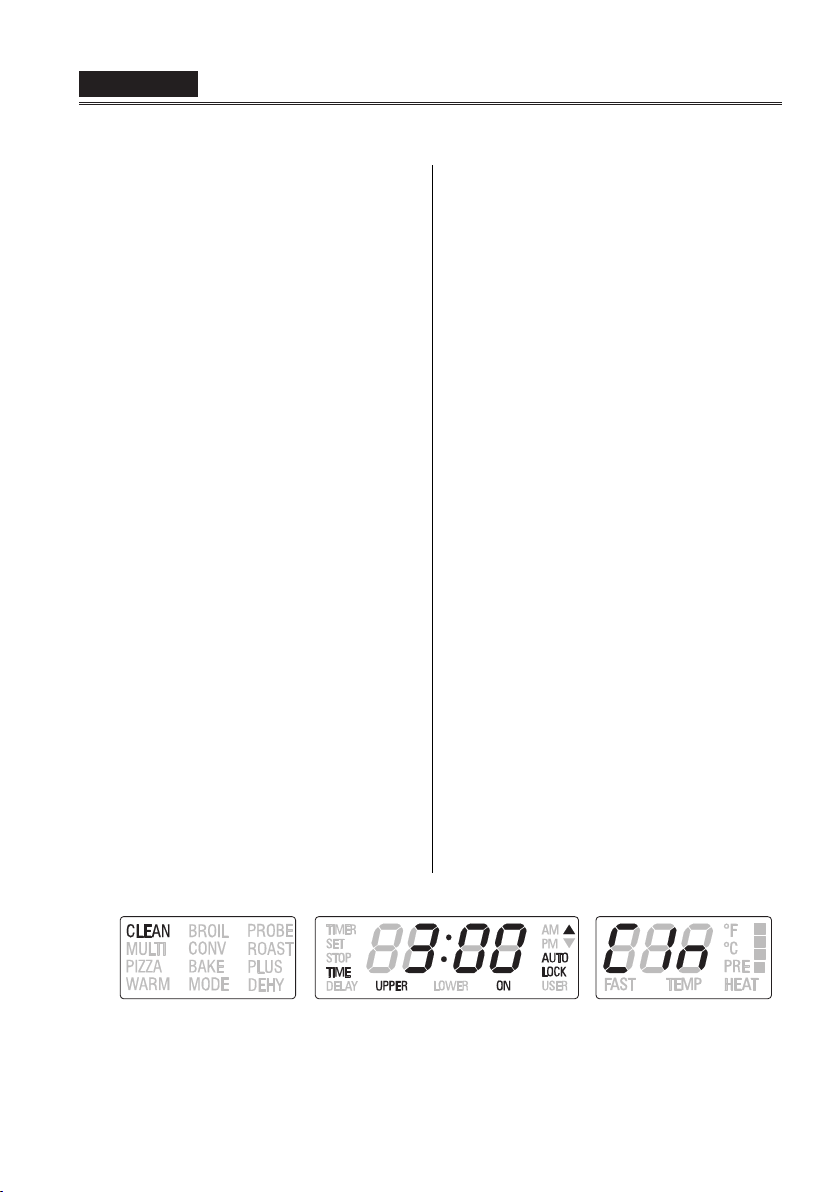
3. CLEAN & TIME appear.
4. The clean time is displayed
automatically, its standard value is 3
hours.
5. At the end of the programmed cleaning
time, the oven will automatically turn off.
6. To stop the cleaning mode at any
moment, move one of the two knobs
from the cleaning position.
Do not attempt to open the door while the door
is locked. The “AUTO LOCK” writings will flash
until the motor stops. When they are displayed,
the door cannot be opened. Check that the
door has been locked and will not open before
starting the Self-Clean mode.
If door does not lock, rotate the cooking mode
knob into the OFF position and do not start self-
clean; phone for service.
If the door is in the open position when this
mode is selected, the “AUTO LOCK” writings
will flash until the door is closed. The latch
doesn’t move.
To Change the Cleaning Time
1. To change the setting from 3 hours,
select either 2 hours for light soil or 4
hours for heavy soil immediately before
starting.
2. To change the hours, touch the [TIME]
key.
3. The hours will flash.
4. Use [INC] or [DEC] keys to change the
value.
5. To change the minutes, touch the
[TIME] key again.
6. The minutes will flash.
7. Use [INC] or [DEC] keys to change the
value. Hold the key to change by 10
minutes steps.
8. Touch [TIME] or wait a few seconds to
confirm the new value.
To Delay the Start of Cleaning
1. Follow steps 1 through 7 above.
2. Touch the [TIME] key and verify that
“STOP TIME” appears on the display.
The hours will begin flashing.
3. Use [INC] or [DEC] keys to change the
stop time value.
4. To change the minutes, touch the [TIME]
key, the minutes will flash.
5. Use [INC] or [DEC] keys to change the
value. Hold the key to change by 10
minutes steps.
6. Touch [TIME] or wait a few seconds to
confirm the new value.
7. The latch starts moving to lock the oven
door, the display shows “DELAY”.
8. When the delay time expires, self-
cleaning will start.
9. At the end of the programmed cleaning
time, the oven will automatically turn off.
10. “End” will appear on the temperature
display, “CLEAN” on the mode display
and “TIME” on the clock display will start
flashing until the [TIME] key is touched or
the knob is moved to the OFF position.
In order to check the cleaning or the stop time
during a delayed clean, simply touch the [TIME]
key until “TIME” or “STOP TIME” writings are
displayed.
Use & Installation Manual
29
Do-it-Yourself Maintenance Oven Door Removal
WARNING!
• Make sure oven is cool and power to the
oven has been turned off before removing
the door.
Failure to do so could result in electrical
shock or burns.
• The oven door is heavy and fragile.
Use both hands to remove the oven door.
The door front is glass.
Handle carefully to avoid breakage.
• Grasp only the sides of the oven door.
Do not grasp the handle as it may swing in
your hand and cause damage or injury.
• Failure to grasp the oven door firmly and
properly could result in personal injury or
product damage.
To Remove Door
1. Open the door completely.
2. Lift up the hinge bracket (1).
3. Hold the door firmly on both sides using
both hands and close the door.
4. Hold firmly; the door is heavy.
5. Place the door in a convenient location.
To Replace Door
1. Insert the upper arms (2) of both hinges into
the slots (3). The recesses (4) must hook on
the lips (5).
2. Move the hinge brackets (1) back down into
position.
3. Close and open the door slowly to assure
that it is correctly and securely in place.
Figure 7
Use & Installation Manual
28
ENGLISH
29
Loading ...
Loading ...
Loading ...