Loading ...
Loading ...
Loading ...
Alignment
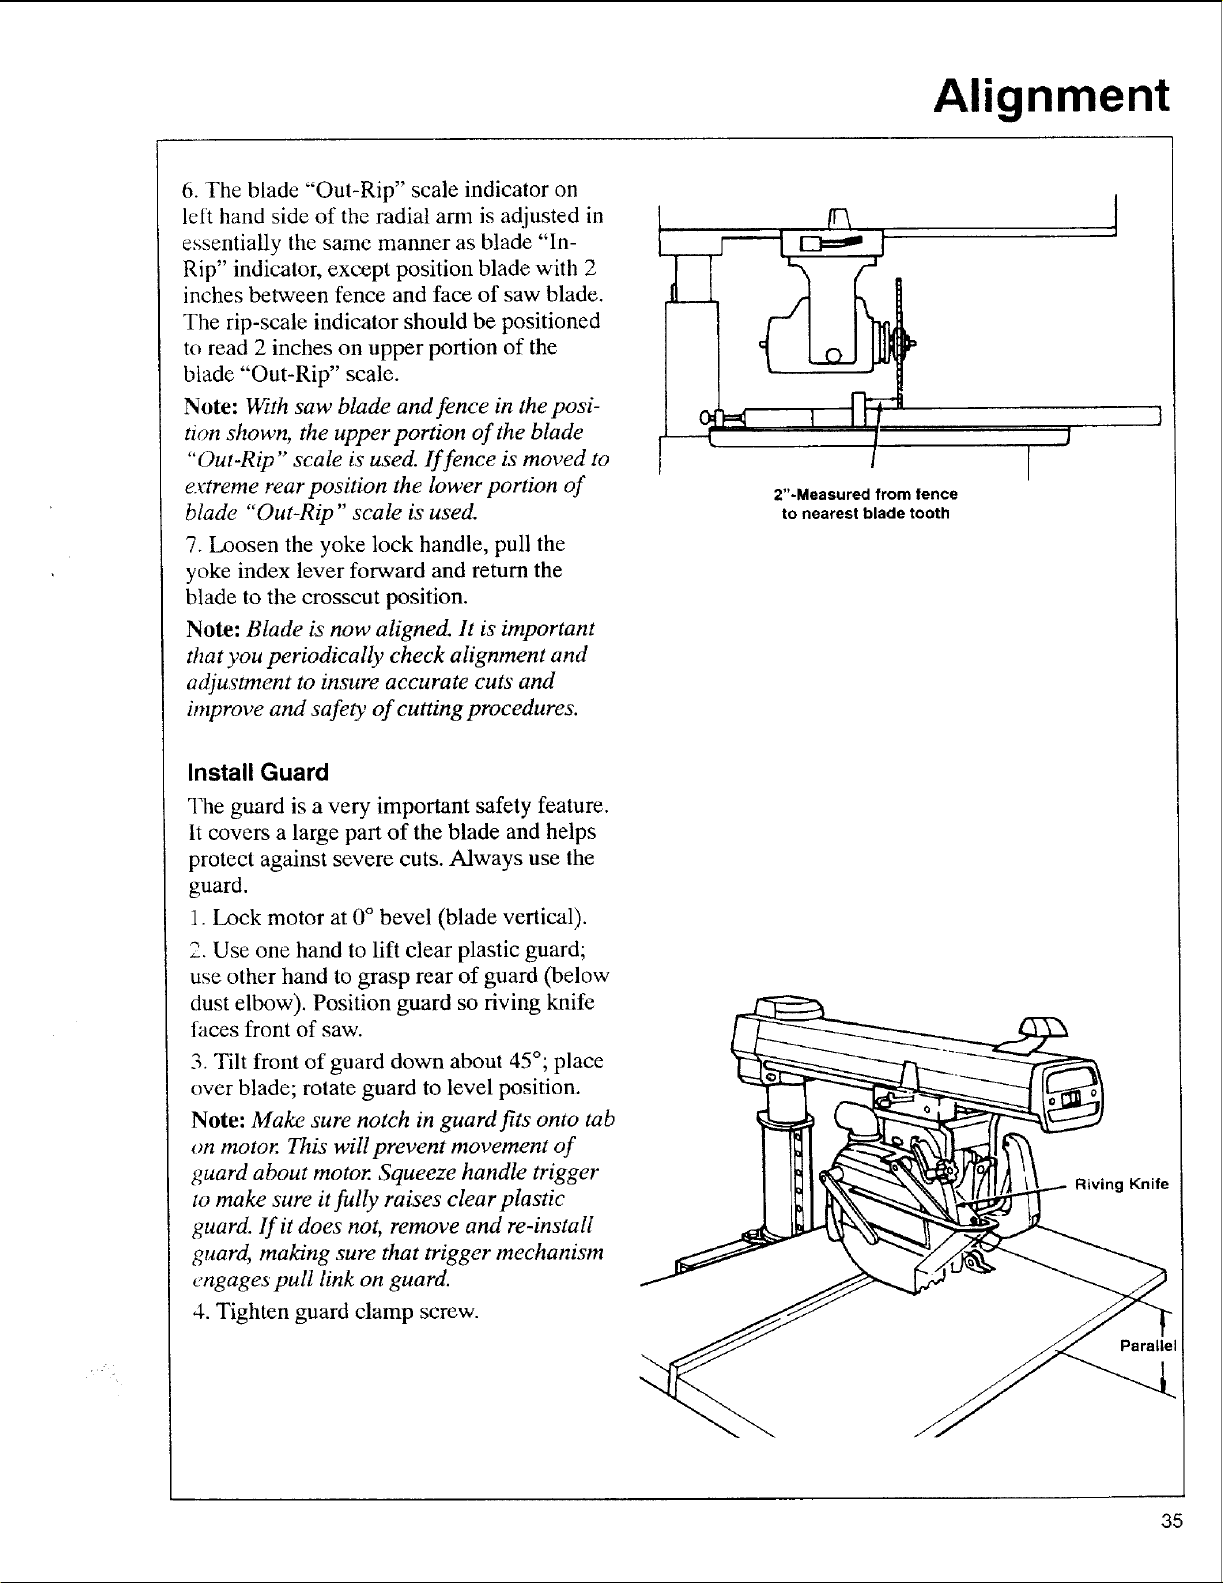
6. The blade "Out-Rip" scale indicator on
left hand side of the radial am1 is adjusted in
essentially the same manner as blade "In-
Rip" indicator, except position blade with 2
inches between fence and face of saw blade.
The rip-scale indicator should be positioned
to read 2 inches on upper portion of the
biade "Out-Rip" scale.
Note: Wtth saw blade and fence in the posi-
tion shown, the upper portion of the blade
"Out-Rip" scale is used. If fence is moved to
extreme rear position the lower portion of
blade "Out-Rip" scale is used.
7. Loosen the yoke lock handle, pull the
yoke index lever forward and return the
blade to the crosscut position.
Note: Blade is now aligned. It is important
that you periodically check alignment and
adjustment to insure accurate cuts and
improve and safety of cutting procedures.
Install Guard
The guard is a very important safety feature.
It covers a large part of the blade and helps
protect against severe cuts. Always use the
guard.
1. Lock motor at 0 ° bevel (blade vertical).
2. Use one hand to lift clear plastic guard;
use other hand to grasp rear of guard (below
dust elbow). Position guard so riving knife
faces front of saw.
3. Tilt front of guard down about 45°; place
over blade; rotate guard to level position.
Note: Make sure notch in guard fits onto tab
on motor This witl prevent movement of
guard about motor Squeeze handle trigger
Io make sure it fully raises clear plastic
guard. If it does not, remove and re-install
guard, making sure that trigger mechanism
engages pull link on guard.
4. Tighten guard clamp screw.
[ J
2"-Measured from fence
to nearest blade tooth
]
Riving Knife
Parallel
35
Loading ...
Loading ...
Loading ...