Loading ...
Loading ...
Loading ...
Adjustments
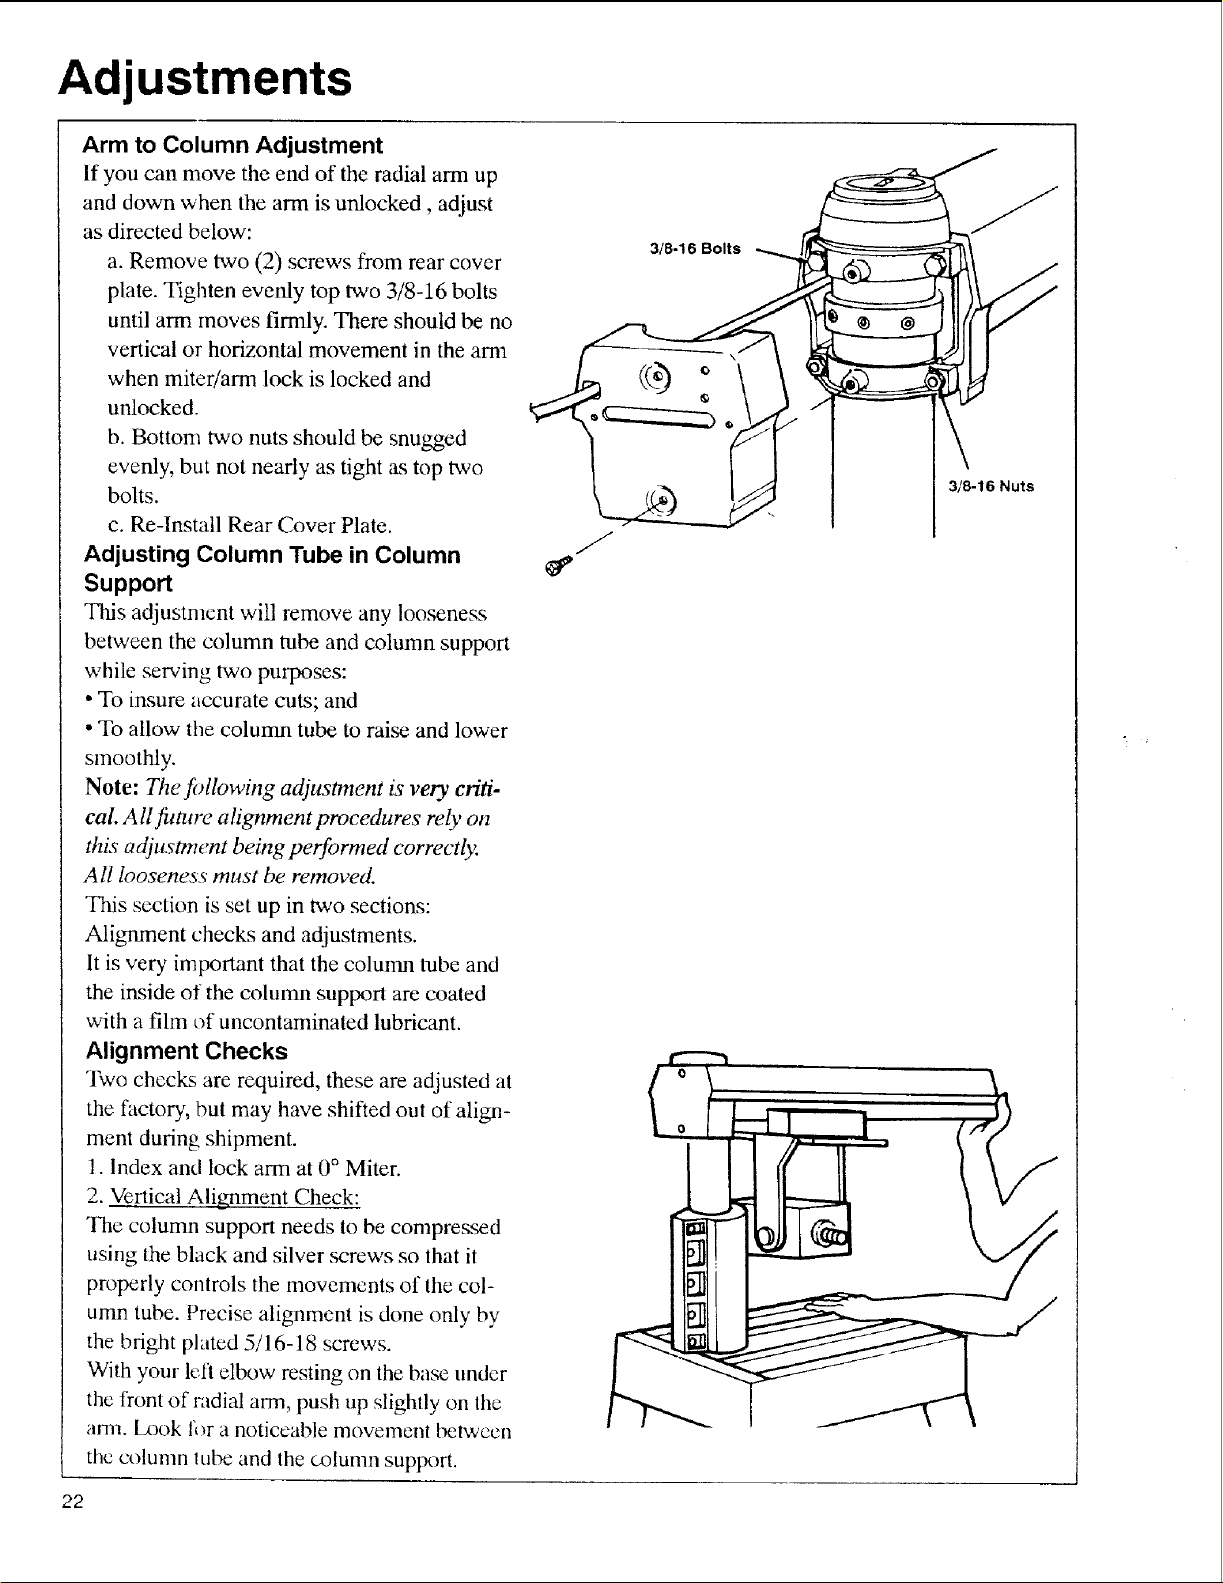
Arm to Column Adjustment
If you can move the end of the radial arm up
and down when the ann is unlocked, adjust
as directed below:
a. Remove two (2) screws from rear cover
plate. Tighten evmfly top two 3/8-16 bolts
until arm moves firmly. There should be no
vertical or horizontal movement in the arm
when miter/arm lock is locked and
unlocked.
b. Bottom two nuts should be snugged
evenly, but not nearly as tight as top two
bolts.
c. Re-lnstall Rear Cover Plate.
Adjusting Column Tube in Column
Support
This adjustment will remove any looseness
between the column tube and column support
while serving two purposes:
• To insure accurate cuts; and
• To allow the column tube to raise and lower
smoothly.
Note: The f!)llowing adjustment is very criti-
cal All _ture alignment procedures rely on
this adjustment being perforrned correctly.
All looseness must be removed.
"INs section is set up in two sections:
Alignment checks and adjustments.
It is very important that the column tube and
the inside of the column support are coated
with a film of uncontaminated lubricant.
Alignment Checks
Two checks are required, these are adjusted at
the factory, but may have shifted out of align-
ment during shipment.
1. Index and lock arm at 0 ° Miter.
2. Vertical Alignment Check:
The column support needs to be compres_d
using the black and silver screws so that it
properly controls the movements of the col-
umn tube. Precise alignment is done only by
the bright plated 5/16-18 screws.
With your lelt elbow resting on the base under
the front of radial arm, push up slightly on the
ann. [x_ok ILr a noticeable movement between
the colunm |ube and the column support.
318-16 Bolts
3/8-16 Nuts
22
Loading ...
Loading ...
Loading ...