Loading ...
Loading ...
Loading ...
General
Cleaning
FEATURE OVERVIEW
• To Remove and Replace
Warmer Drawer
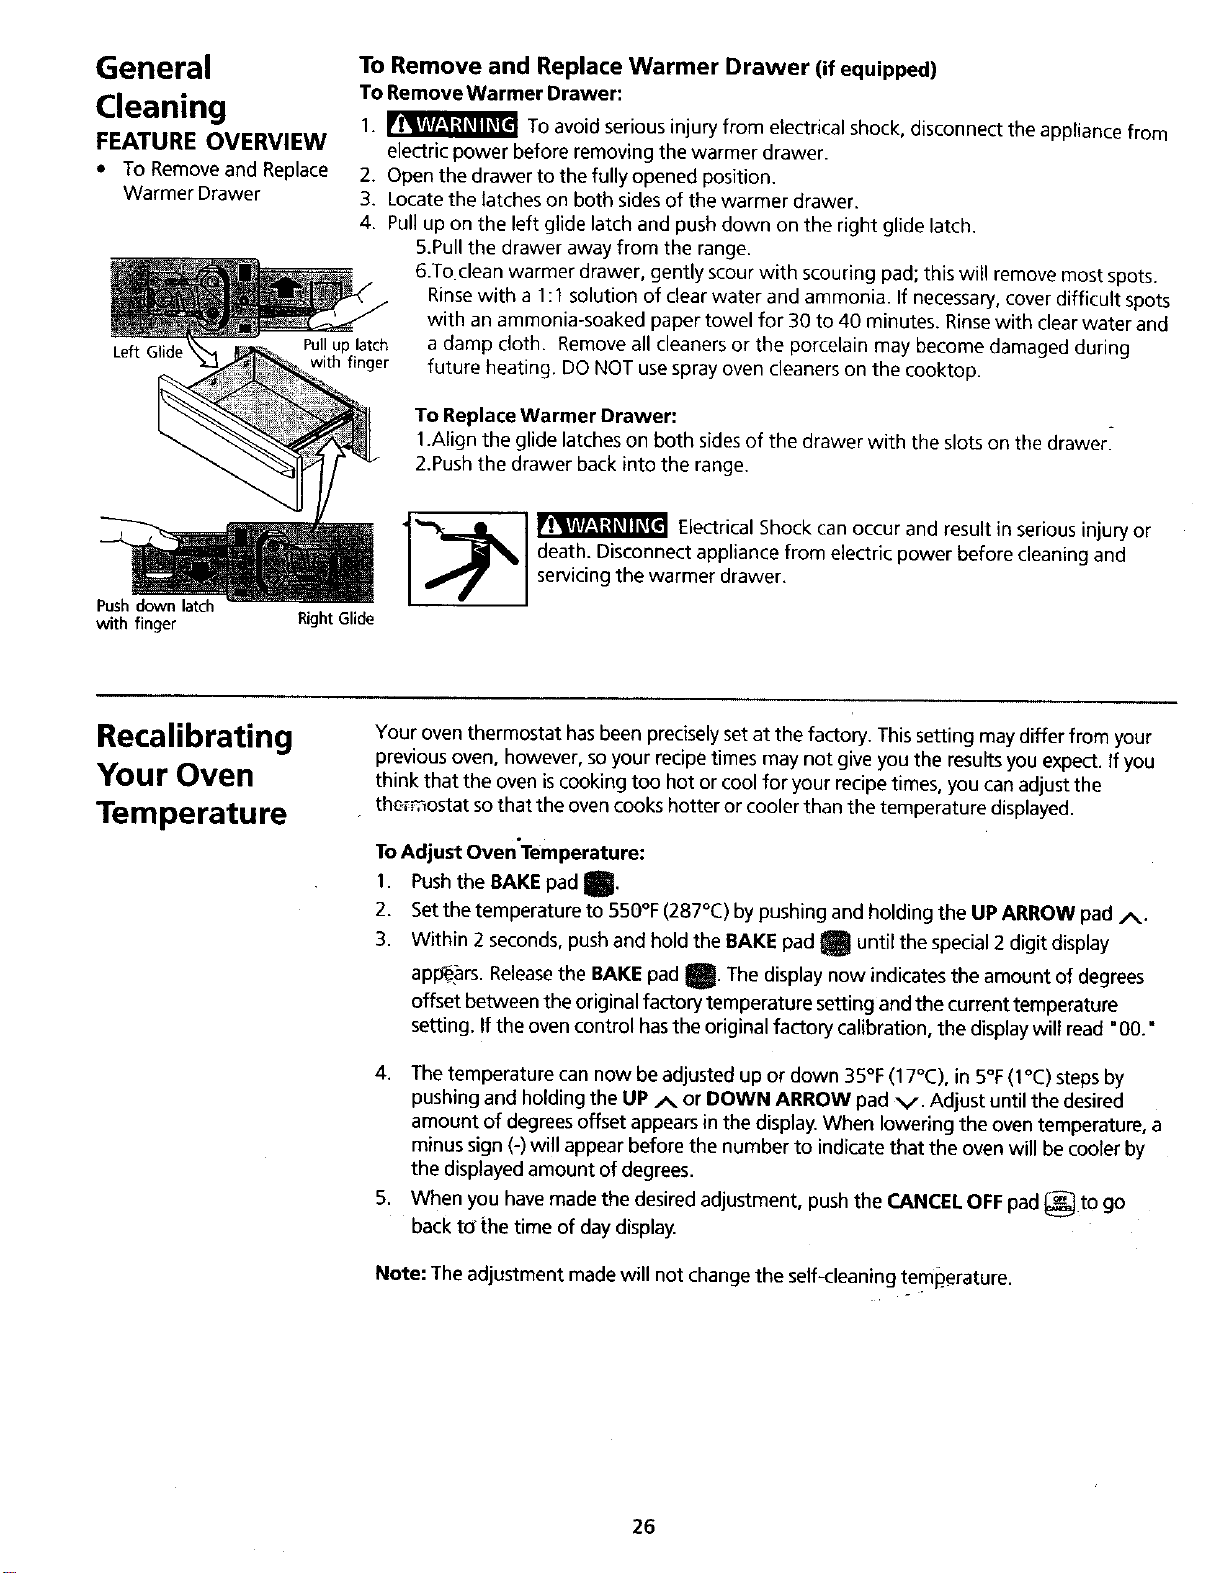
Left Glide
Pull up latch
with finger
To Remove and Replace Warmer Drawer (if equipped)
To Remove Warmer Drawer:
1. _ TOavoid serious injury from electrical shock, disconnect the appliance from
electric power before removing the warmer drawer.
2. Open the drawer to the fully opened position.
3. Locate the latches on both sides of the warmer drawer.
4. Pull up on the left glide latch and push down on the right glide latch.
5.Pull the drawer away from the range.
6.To clean warmer drawer, gently scour with scouring pad; this will remove most spots.
Rinsewith a 1:1 solution of clear water and ammonia. If necessary, cover difficult spots
with an ammonia-soaked paper towel for 30 to 40 minutes. Rinse with clear water and
a damp cloth. Remove all cleaners or the porcelain may become damaged during
future heating. DO NOT usespray oven cleaners on the cooktop.
To Replace Warmer Drawer:
1.Align the glide latches on both sides of the drawer with the slots on the drawer.
2.Push the drawer back into the range.
Push down latch
with finger
Right Glide
Electrical Shock can occur and result in serious injury or
death. Disconnect appliance from electric power before cleaning and
servicing the warmer drawer_
Recalibrating
Your Oven
Temperature
Your oven thermostat hasbeen precisely set at the factory. This setting may differ from your
previous oven, however, so your recipe times may not give you the results you expect. If you
think that the oven iscooking too hot or cool for your recipe times, you can adjust the
thermostat so that the oven cooks hotter or cooler than the temperature displayed.
To Adjust Oven'Temperature:
1. Push the BAKEpad t'
2. Set the temperature to 550°F (287°C) by pushing and holding the Up ARROW pad A.
3. Within 2 seconds, push and hold the BAKE pad m until the special 2 digit display
appears. Releasethe BAKE pad I. The display now indicates the amount of degrees
offset between the original factory temperature setting and the current temperature
setting. If the oven control hasthe original factory calibration, the display will read "00."
4. The temperature can now be adjusted up or down 35°F (I 7°C), in 5°F(I°C) steps by
pushing and holding the UP A or DOWN ARROW pad v. Adjust until the desired
amount of degrees offset appears in the display. When lowering the oven temperature, a
minus sign (-) will appear before the number to indicate that the oven will becooler by
the displayed amount of degrees.
5. When you have made the desired adjustment, push the CANCEl OFF pad _e_ to go
back tc_the time of day display.
Note: The adjustment made will not change the self-cleaning temperature
26
Loading ...
Loading ...