Loading ...
Loading ...
Loading ...
8 - ENG 200-2929
MAINTENANCE
(B). Gently move the transfer tube (C) out of the way.
3. Remove the bleeder tube (D) from the elbow (E ) located on
the side of the check valve by gently pulling it off the barbed
end.
4. Making note of the orientation for reassembly, unscrew the
check valve from the tank (counterclockwise) using a 7/8”
open end wrench.
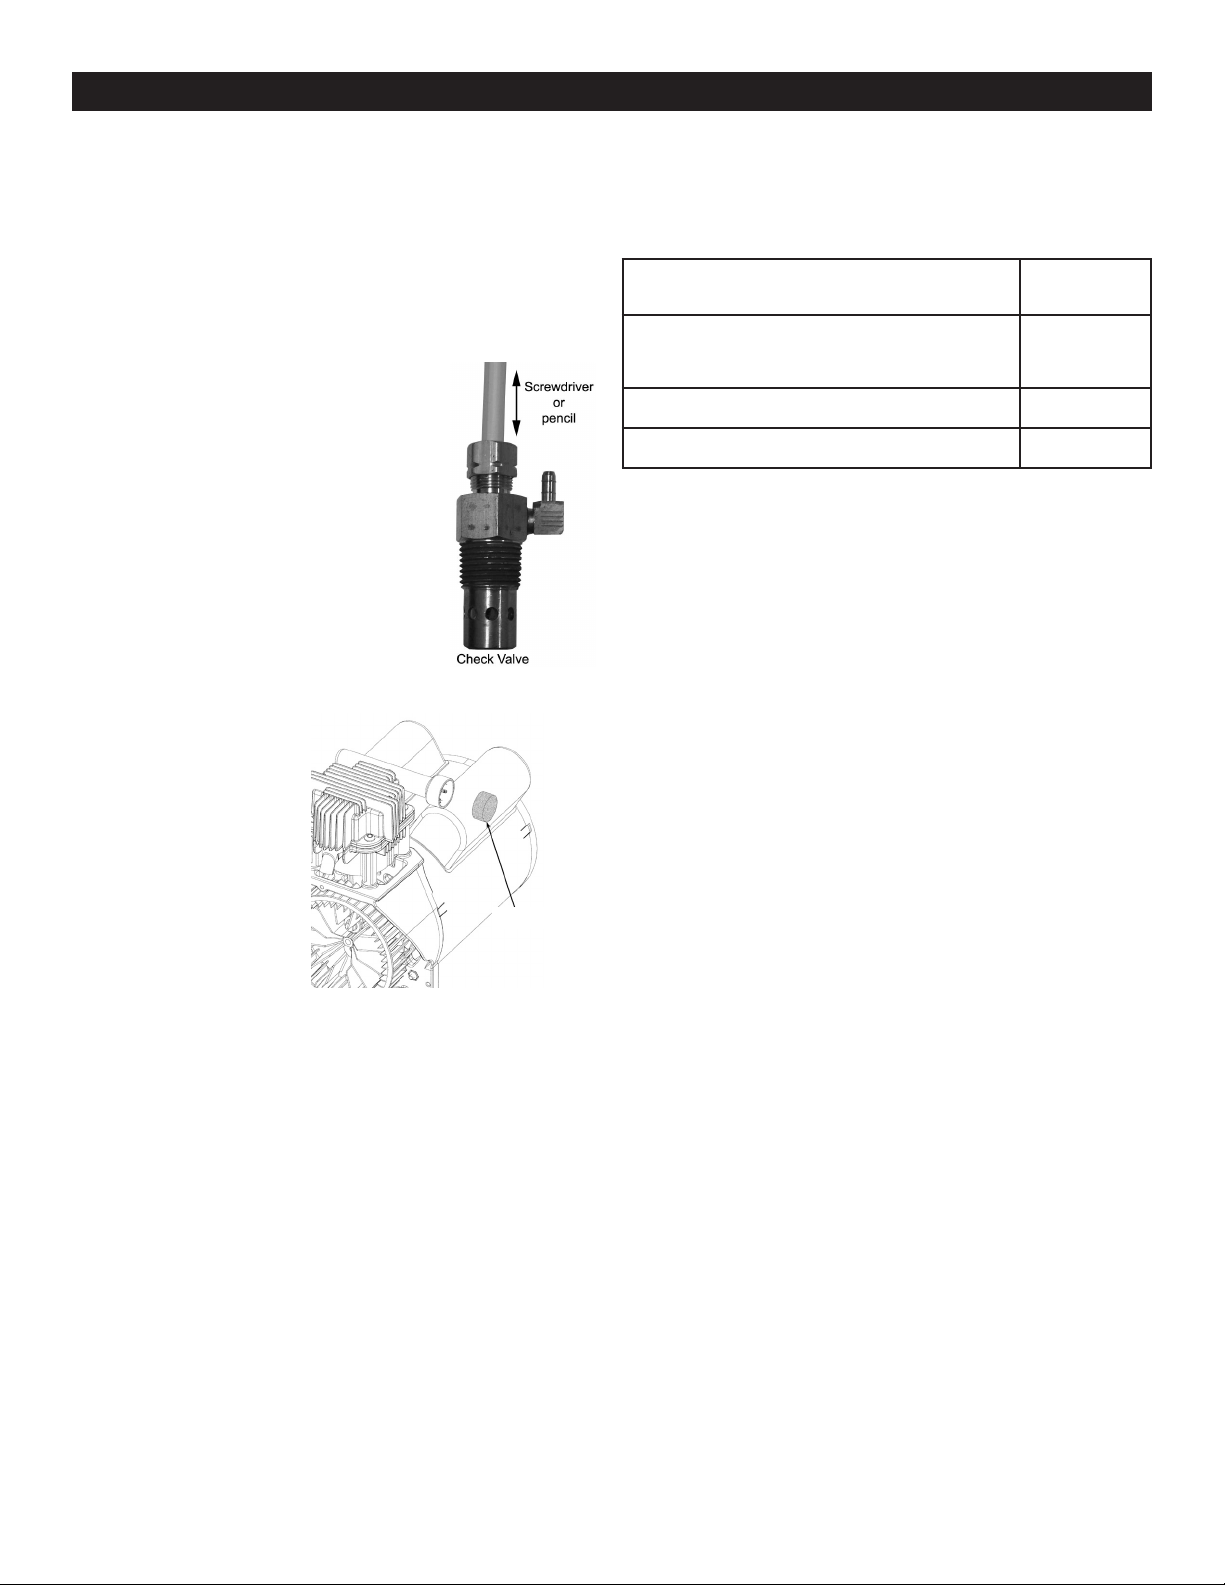
5. Using a pencil or screwdriver, carefully push the valve disc up
and down. If the valve disc does not move freely up and
down, the check valve needs to be cleaned or replaced.
6. Clean the check valve with warm soapy
water and make sure to dry thoroughly
before reinstalling. If the disc valve still
does not move freely up and down, it will
need to be replaced.
7. Apply thread sealant to the check valve
threads and reinstall into the tank by
turning clockwise. Make sure it is the
same orientation as when it was
removed.
8. Replace the bleeder tube by pushing it
back onto the barbed fitting of the elbow.
9. Replace the transfer tube and tighten
compression nut.
A dirty air filter will
reduce the compressor’s
performance and life.
To avoid any internal
contamination of the pump,
the filter should be cleaned
frequently, and replaced on
a regular basis. Felt filters
should be cleaned in warm,
soapy water, rinsed, and
allowed to air dry before
reinstallation. Paper filters
should be replaced when
dirty. Do not allow the filter to become filled with dirt or paint. If
the filter becomes filled with paint, it should be replaced. Direct
exposure to dirty conditions or painting areas will void your
warranty.
Pull the tank safety valve daily to ensure that it is operating
properly and to clear the valve of any possible obstructions.
Check that all connections are tight. A small leak in any of
the hoses, transfer tubes, or pipe connections will substantially
reduce the performance of your air compressor. If you suspect
a leak, spray a small amount of soapy water around the area
of the suspected leak with a spray bottle. If bubbles appear,
repair or replace the faulty component. Do not over tighten any
connections.
Before storing the compressor for a prolonged period, use
an air blow gun to clean all dust and debris from the compressor.
Disconnect the power cord and coil it up. Pull the tank safety
valve to release all pressure from the tank. Drain all moisture
from the tank. Clean the filter element and filter housing; replace
the element if necessary. Drain the oil from the pump crankcase
and replace it with new oil. Cover the entire unit to protect it from
moisture and dust.
CLEANINGTHEAIRFILTER
Air filter
CHECKINGTHERELIEFVALVE
TESTINGFORLEAKS
STORAGE
SERVICE INTERVAL
Perform the following maintenance at the
intervalsindicatedbelow.
Daily or after
each use
Inspect air filter (clean or replace as necessary)
When used
in dusty
conditions
Operate the tank safety valve
•
Drain tank
•
Loading ...
Loading ...
Loading ...