Loading ...
Loading ...
Loading ...
7 - ENG200-2929
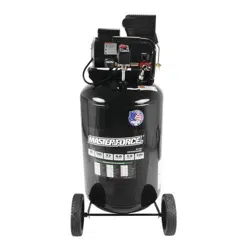
1. Turn the pressure switch to the OFF position (see C).
2. Close the tank petcock (see F). Turn in the clockwise
direction.
3. Plug in the power cord.
High temperatures are generated
bytheelectricmotorandthepump.Toprevent
burns or other injuries, DO NOT touch the
compressorwhileitisrunning.Allowittocool
beforehandlingorservicing.Keepchildrenaway
fromthecompressoratalltimes.
4. Turn the pressure switch to the AUTO position (see D).
5. Adjust the regulator to the working pressure of the tool.
NOTE: To adjust pressure setting, pull out the knob and turn
clockwise to increase pressure, and counterclockwise to decrease
pressure. To lock a pressure setting, push the knob in.
When adjusting from a higher to a
lower pressure, turn the knob counterclockwise past
the desired setting, then turn clockwise to reach the
desiredpressure.Donotexceedoperatingpressure
ofthetooloraccessorybeingused.
1. Turn the pressure switch to the OFF position (see C).
2. Unplug the power cord.
3. Reduce pressure in the tank through the outlet hose. You
can also pull the tank safety valve ring (see G) and keep it
open to relieve pressure in the tank.
4. Open the petcock (see E) to allow moisture to drain from
the tank.
CAUTION:
Escaping air and moisture can
propeldebristhatmaycauseeyeinjury.Wearsafety
goggleswhenopeningpetcock.
OPERATING INSTRUCTIONS
DAILY START-UP
SHUTDOWN
WARNING:
WARNING:
OPEN
CLOSE
E
F
G
Fig. 6
MAINTENANCE
WARNING:
To avoid personal injury, always shut off
and unplug the compressor and relieve all air pressure
from the system before performing any service on the air
compressor.
Regular maintenance will ensure trouble–free operation.
Your electric powered air compressor represents high–quality
engineering and construction; however, even high–quality
machinery requires periodic maintenance. The items listed below
should be inspected on a regular basis
Drain the moisture from the tank (for instructions, see
“Shutdown” in the operating instructions section).
WARNING:
Condensation will accumulate in
thetank.Topreventcorrosionofthetankfromthe
inside, this moisture must be drained at the end of
everyworkday.Wearprotectiveeyewear.
NOTE: In cold climates, drain the tank after each use to reduce
problems with freezing of water condensation.
WARNING:
RISKOFINJURY.Thisunitstarts
automatically.ALWAYSshutoffthecompressor,
remove the plug from the outlet, and bleed all
pressure from the system before servicing the
compressor,andwhenthecompressorisnotinuse.
Do not use the unit with the shrouds or belt guard
removed.Seriousinjurycouldoccurfromcontact
withmovingparts.
1. Turn air compressor off, remove the power cord from the
outlet or lock out the
power supply and
relieve all the air
pressure from the tank
(refer to “Shutdown” in
Operating Instructions).
Make sure the
compressor has cooled
down before servicing.
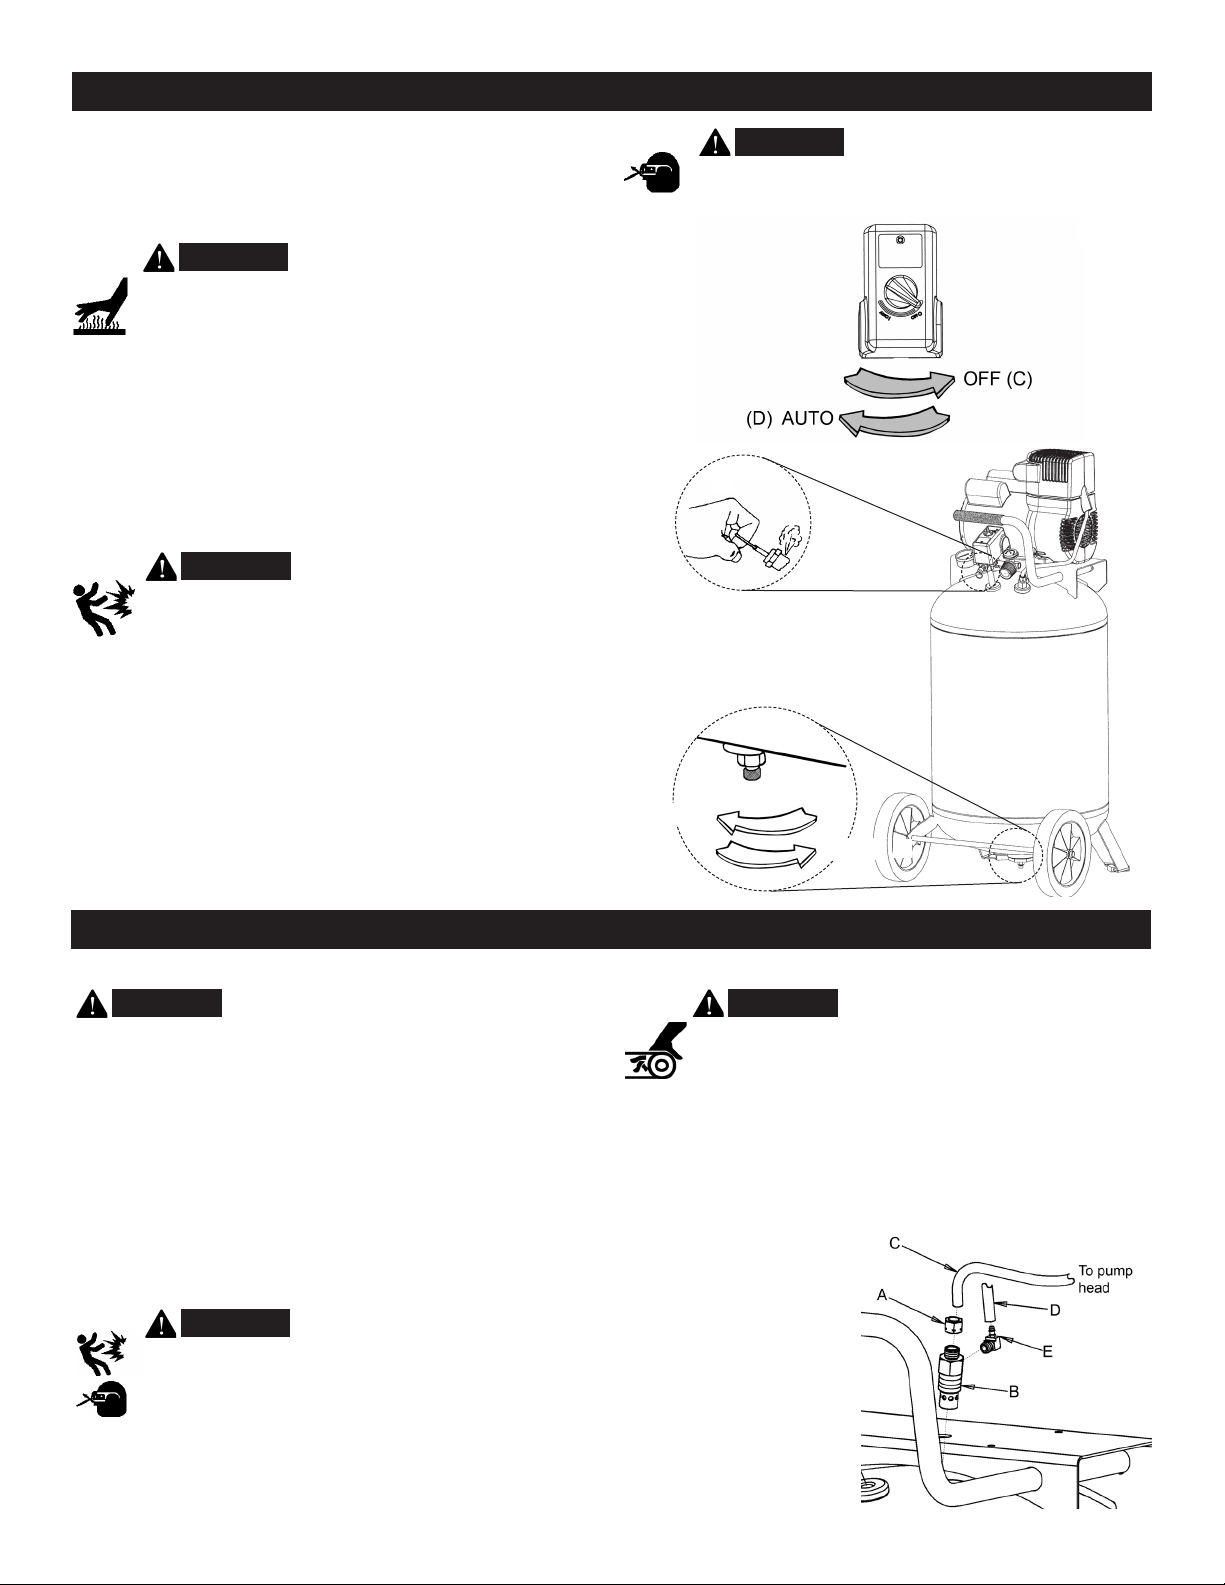
2. Using the appropriately
sized wrench, loosen the
compression nut
(A) on the check valve
MAINTENANCE
DRAINING THE TANK
TO REPLACE OR CLEAN CHECK VALVE
Loading ...
Loading ...
Loading ...