Loading ...
Loading ...
Loading ...
AP18733 REV. 3.2.17
44
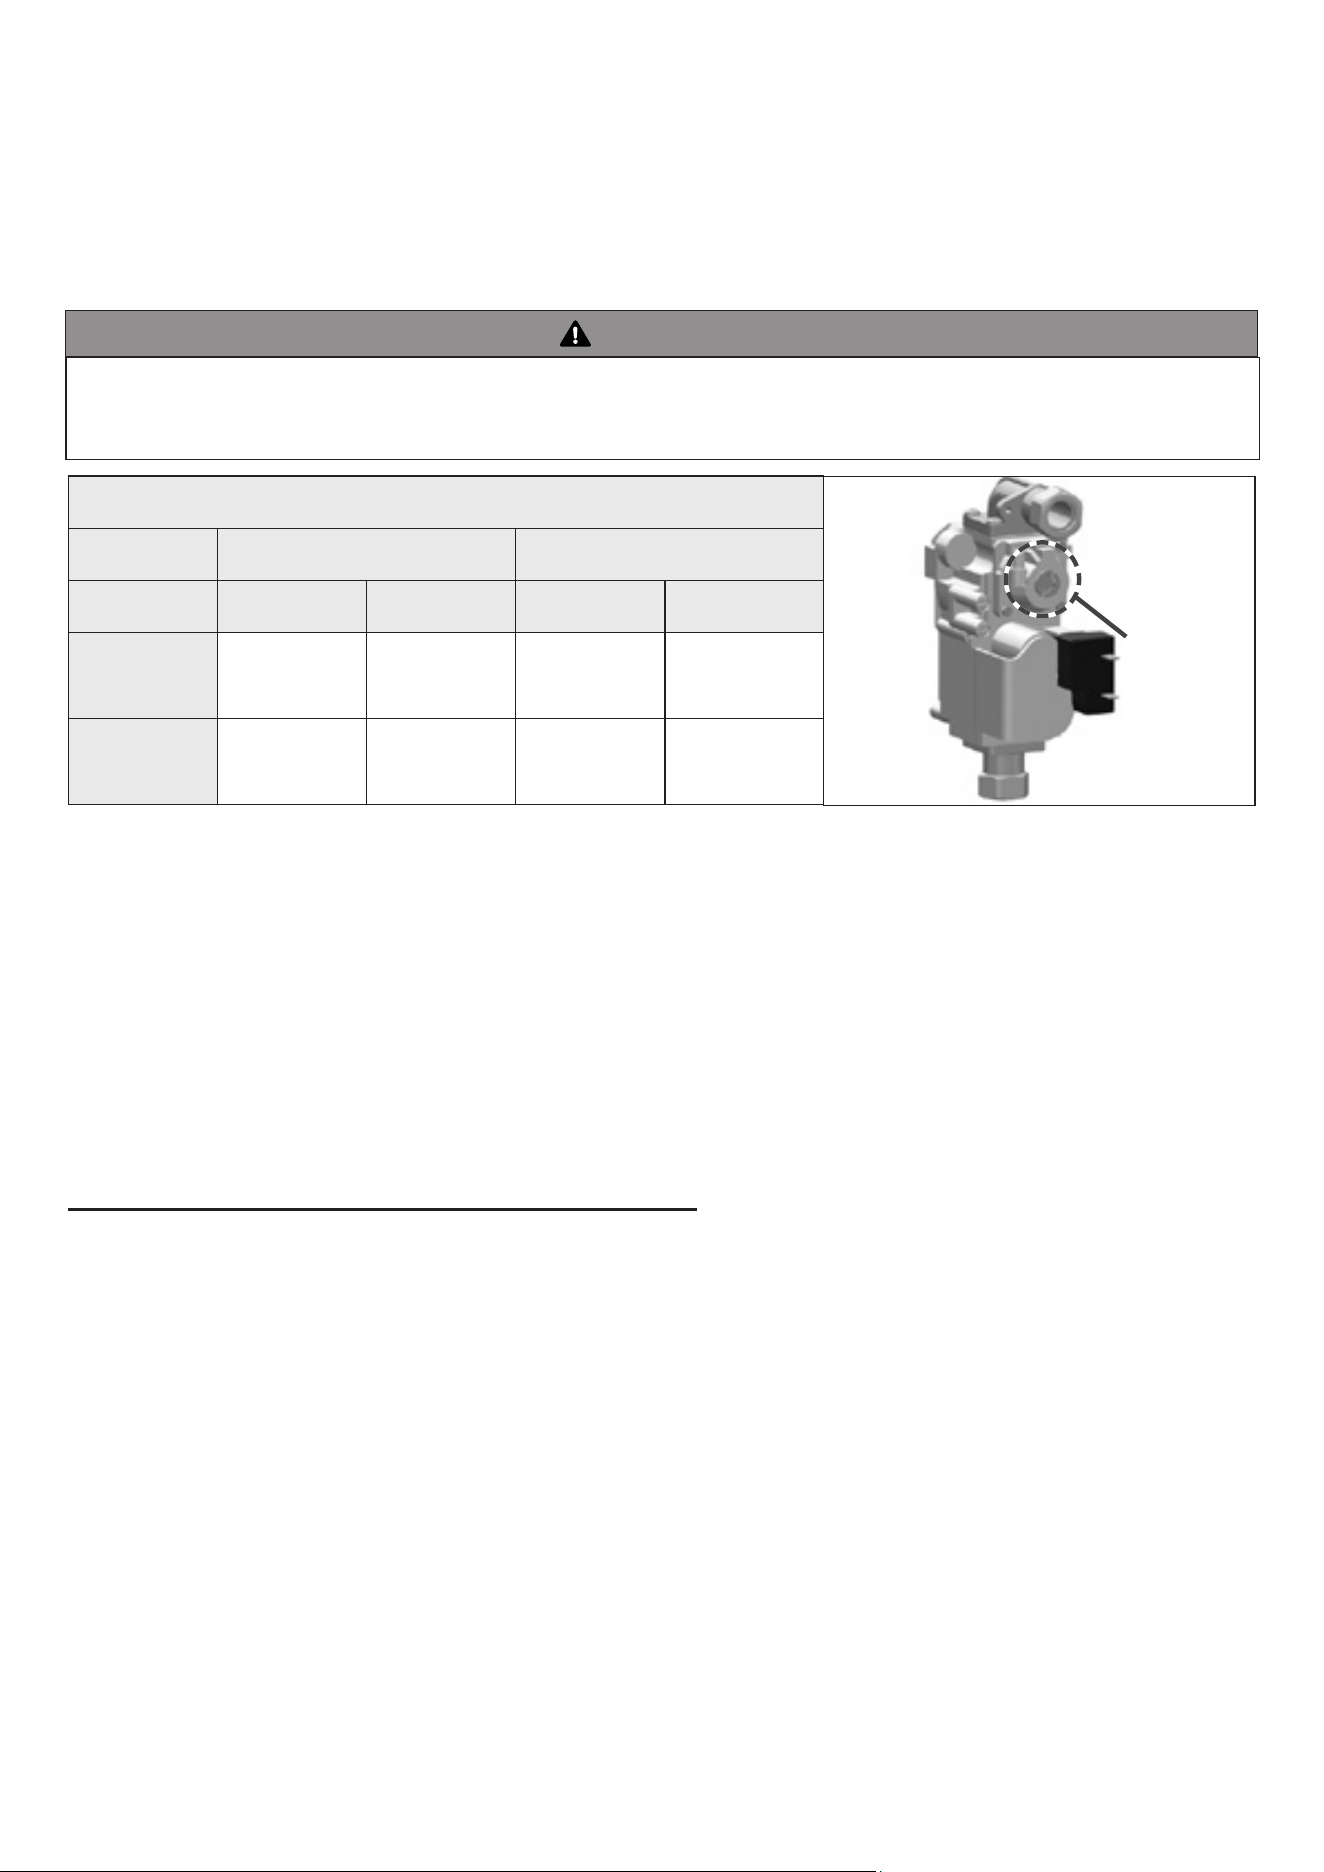
If the readings obtained are lower or higher than the combustion readings in Table 19, use a 5m Allen key to adjust the offset screw in a
clockwise (positive) or counterclockwise (negative) direction (approximately 1/4 turn). See Figure 23. Check your combustion values. Repeat
this procedure until the values obtained on the combustion analyzer agree with those stated in Table 18.
NOTE: If the appliance makes a whistling sound (harmonics) at low re, adjust the offset screw in a clockwise (positive) direction
(approximately 1/8 turn). Check your combustion values and ensure they agree with those stated in Table 19 before proceeding.
It is very important that this conversion be set within the recommended CO measurements listed in Table 19. Visually looking at the burner does
not determine combustion quality. Failure to measure combustion with a Combustion Analyzer and set the throttle within the recommended CO
measurements could result in property damage, severe personal injury, or death.
WARNING
COMBUSTION SETTINGS
NATURAL GAS LP GAS
FAN SPEED LOW HIGH LOW HIGH
CO PPM <60 <200 <60 <200
CO
2
(%) 8 - 10 8 ½ - 10 ½ 9 – 10 ½ 9 ½ - 10 ½
Offset Screw
Figure 23 – Gas Valve Offset Screw
Table 19 – Combustion Settings
2. When low re settings have been obtained, ip DIP switch seven (7) to its original (OFF) position.
This will return the appliance to normal mode.
3. Flip DIP switch six (6) to ON (high re). Again check combustion readings with a combustion analyzer.
4. When complete, ip DIP switch six (6) to its original (OFF) position. This will return the appliance to normal mode.
Shut off water at hot water faucet.
5. Allow appliance to operate normally. Ensure it is operating properly.
6. Reinstall the appliance front cover.
WATER PIPING
▪ A. GENERAL PLUMBING CONNECTION GUIDELINES
• Pipe material must be suitable to meet local codes and industry standards.
Do not use lead, PVC, iron, or any piping which has been treated with chromates, boiler seal, or other chemicals.
• Pipe runs should be kept as short as possible to keep heat loss at a minimum.
• The pipe must be cleaned and without blemish before any connections are made.
• Do not apply a torch within 12" (30 cm) of the bottom connections of the water heater. Doing so could damage the water heater.
Such damages ARE NOT covered by product warranty.
• The size of the hot water pipe should be ¾" (1.9 cm) diameter.
• Isolation (shutoff valves) are included and should be used to ease future servicing.
• All piping should be insulated.
• Ensure water pressure to the unit is within 14 (96 kPa) to 70 psi (483 kPa). If water pressure is too low or high, the water heater will not be
able to perform to its full capacity and could be damaged. Such damages are not covered by product warranty.
• If the unit is installed on an upper level to supply water to the levels below, ensure the water pressure to the unit does not fall below 29 psi
(200 kPa). It may be necessary to install a pump system to ensure that the water pressure is maintained at this level.
• If feed water pressure is too high take measures to prevent water hammer (such as installing a pressure regulating valve).
• If this water heater will be installed in an application where the supply water is hard, the water must be treated with a water softener.
Water softeners may be regulated by the local codes. Consult with the Authority Having Jurisdiction for codes, sizing,
and installation guidelines.
Loading ...
Loading ...
Loading ...