Loading ...
Loading ...
Loading ...
AP18733 REV. 3.2.17
31
1. Maximum Vent Length (Intake/outlet)
Number of 90º elbows
Maximum length of 2"
straight pipe
Maximum length of 3"
straight pipe
0 or 1 50ft.(15.24m) 100ft. (30m)
2 42ft. (12.8m) 95ft. (29m)
3 34ft. (10.4m) 90ft. (27.4m)
4 26ft. (7.9m) 85ft. (25.9m)
5 18ft. (5.4m) 80ft. (24.4m)
6 Not Available 75ft. (22.9m)
A. 3 inch diameter 90º elbow is equivalent to 5ft. (1.5m) of straight pipe.
A. 2 inch diameter 90º elbow is equivalent to 8ft. (2.4m) of straight pipe.
A. 3 inch diameter 45º elbow is equivalent to 2.5ft. (0.75m) of straight pipe.
A. 2 inch diameter 45º elbow is equivalent to 4ft. (1.2m) of straight pipe.
Number of 90º elbows
Minimum length of 2"
straight pipe
Minimum length of 3"
straight pipe
1 7ft. (2.1m) 7ft. (2.1m)
2. Maximum Vent Length (Intake/outlet)
▪ C. Allowed Schedule 40 Vent Length (PVC, CPVC, PP)
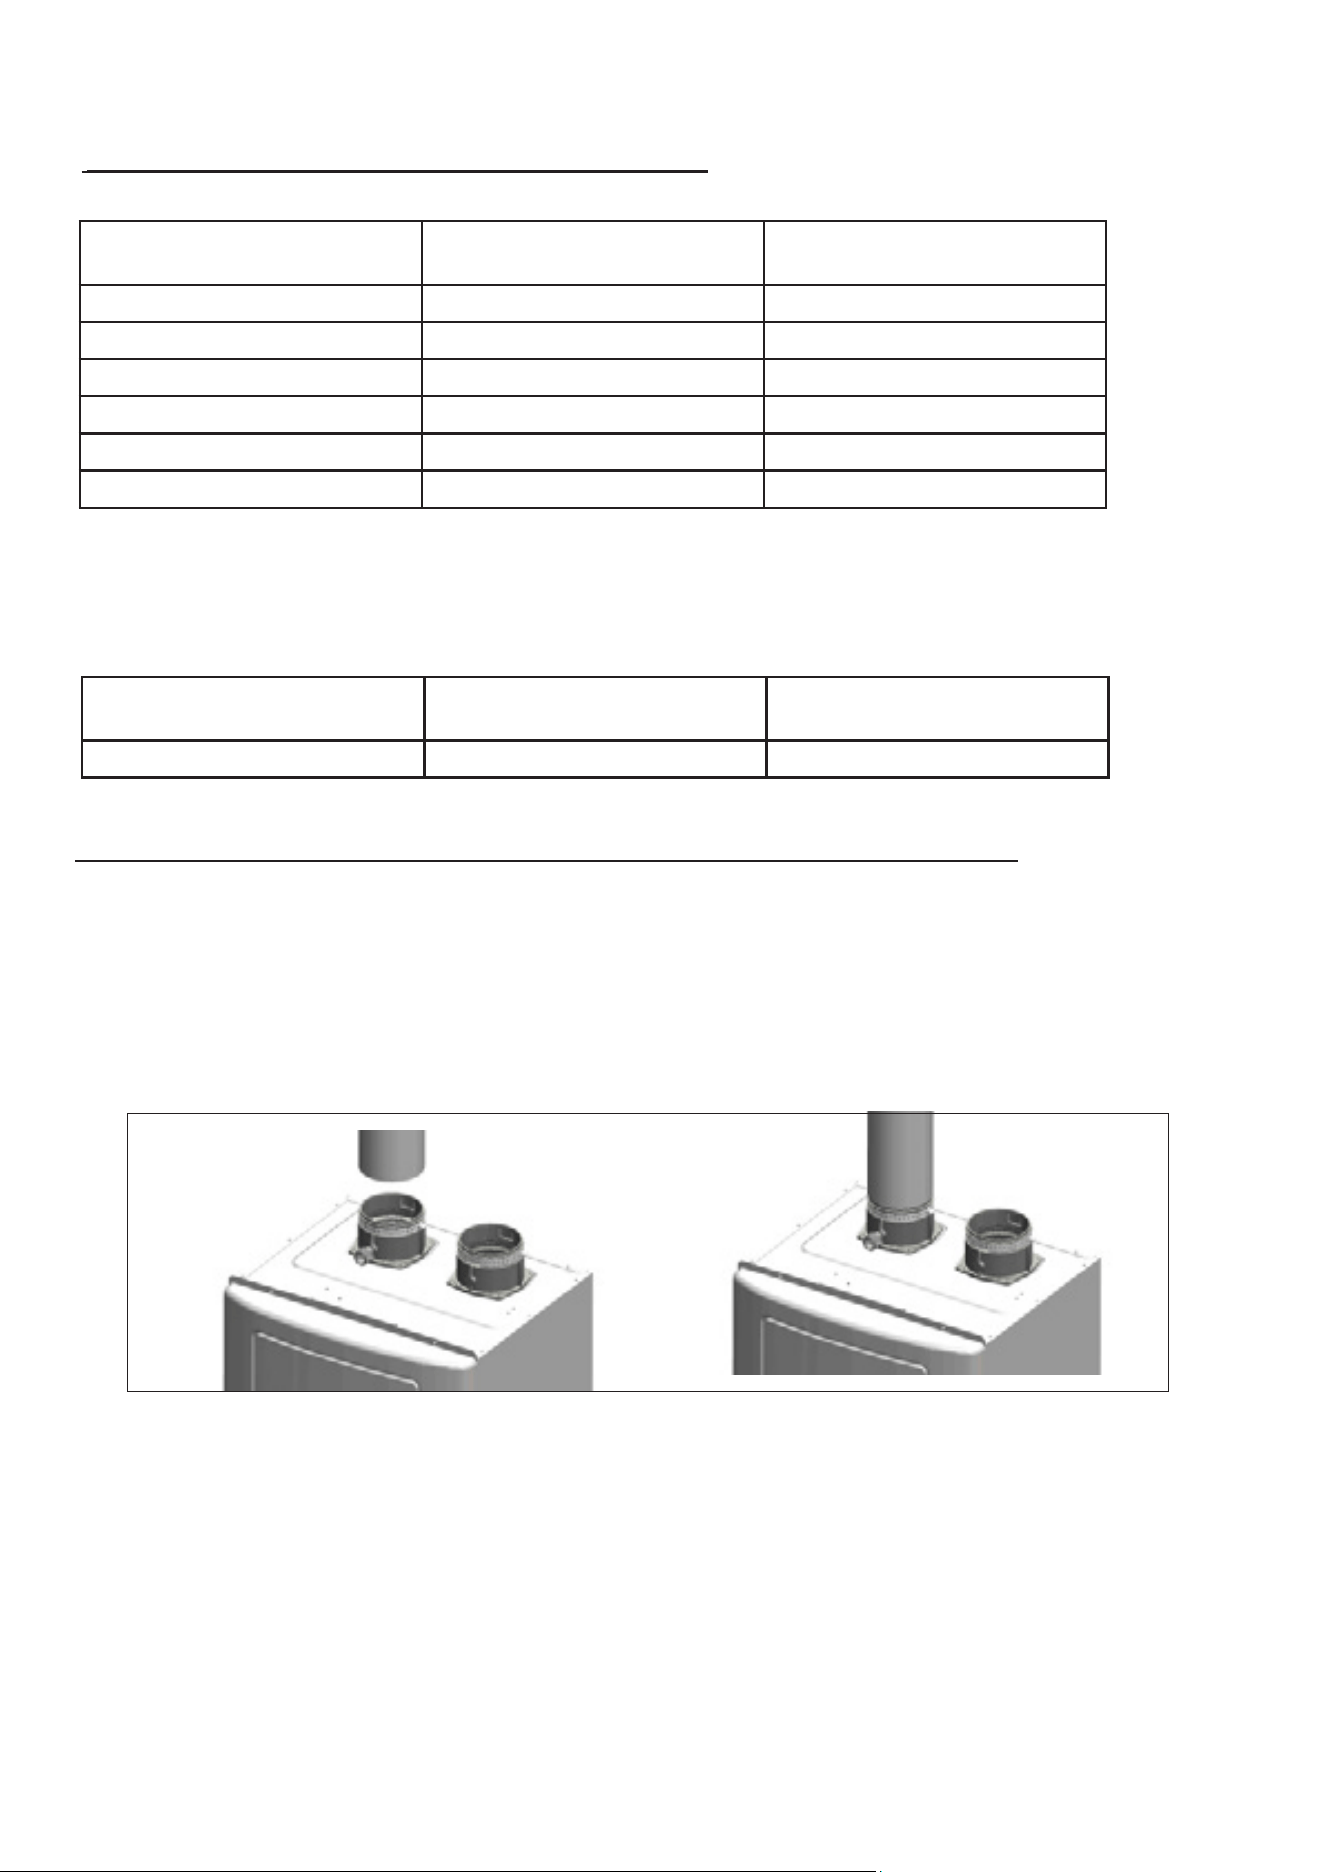
▪ D. TIGHTENING WATER HEATER COLLAR TO EXHAUST VENT AND INTAKE PIPE
This appliance uses 2" (5.1 cm) or 3" (7.6 cm) diameter pipe for exhaust vent and intake pipe. In order to use 2" (5.1 cm) pipe, it is required to
reduce pipe size in a vertical length of pipe with a 3" (7.6 cm) x 2" (5.1 cm) reducing coupling (not included). Follow the steps below to install 3" (7.6
cm) pipe into the appliance collar. See Figure 7 for additional details.
1. Clean and dry the appliance connection. DO NOT use primer or cement on the appliance connection.
2. Push the length of pipe into the connection until it touches the bottom of the fitting.
3. Tighten the clamps using a screwdriver.
4. Ensure the pipe is secure before continuing installation.
5. For 2" (5.1 cm) installations, install the reducing coupling in a vertical section of pipe. At least a 6" (15.2 cm) length of 3" (7.6 cm) pipe
MUST BE INSTALLED before reducing to 2" (5.1 cm). See Figure 8
Figure 7 – Correct Installation into the Water Heater Collar
Loading ...
Loading ...
Loading ...