Loading ...
Loading ...
Loading ...
22
HOOD ASSEMBLY INSTRUCTIONS
HOOD ASSEMBLY INSTRUCTIONS
Preheating Guide
2, 3, 4 and 5 burner barbecue Turn on desired number of
burners to the High position for approximately ten minutes
or until the cooking surfaces are heated�
Cooking with optional the BeefEater
Indirect cooking method
Indirect cooking is where the heat circulates around the food,
cooking by convection� This is similar to a conventional oven
and is recommended for rotisserie cooking, roasts, poultry,
casseroles vegetables and whole fish� The indirect method
of cooking can also be used to cook such items as thick cuts
of meat and fish steaks that have been quickly seared on
the grill by the direct method (to seal in the natural juices)
then completed by the indirect method� The key to success in
indirect barbecue cooking is to cook slowly�
NOTE: Opening the Hood: The more the roasting hood is
opened to attend to cooking food the more heat will be lost,
lengthening the cooking time�
Lighting
NOTE: Always open the roasting hood before lighting the
barbecue�
Light the outside burners, ie: one burner at each end of
the barbecue� After lighting, close the hood and allow the
barbecue to reach the desired cooking temperature�
Preheating guide
2 burner barbecue – turn both burners down fractionally
below medium�
3 burner barbecue – turn the central burner off and reduce
the two outside burners to medium�
4 burner barbecue – turn the two inside burners off and
reduce the two outside burners to medium�
5 burner barbecue – turn the three inside burners off, leave
one outside burner on high and reduce the other outside
burner to medium�
When the desired temperature is reached, open the roasting
hood and sit the roast on a roast rack and place this into
a baking dish� Place the baking dish over the unlit, center
portion of the cooking surface�
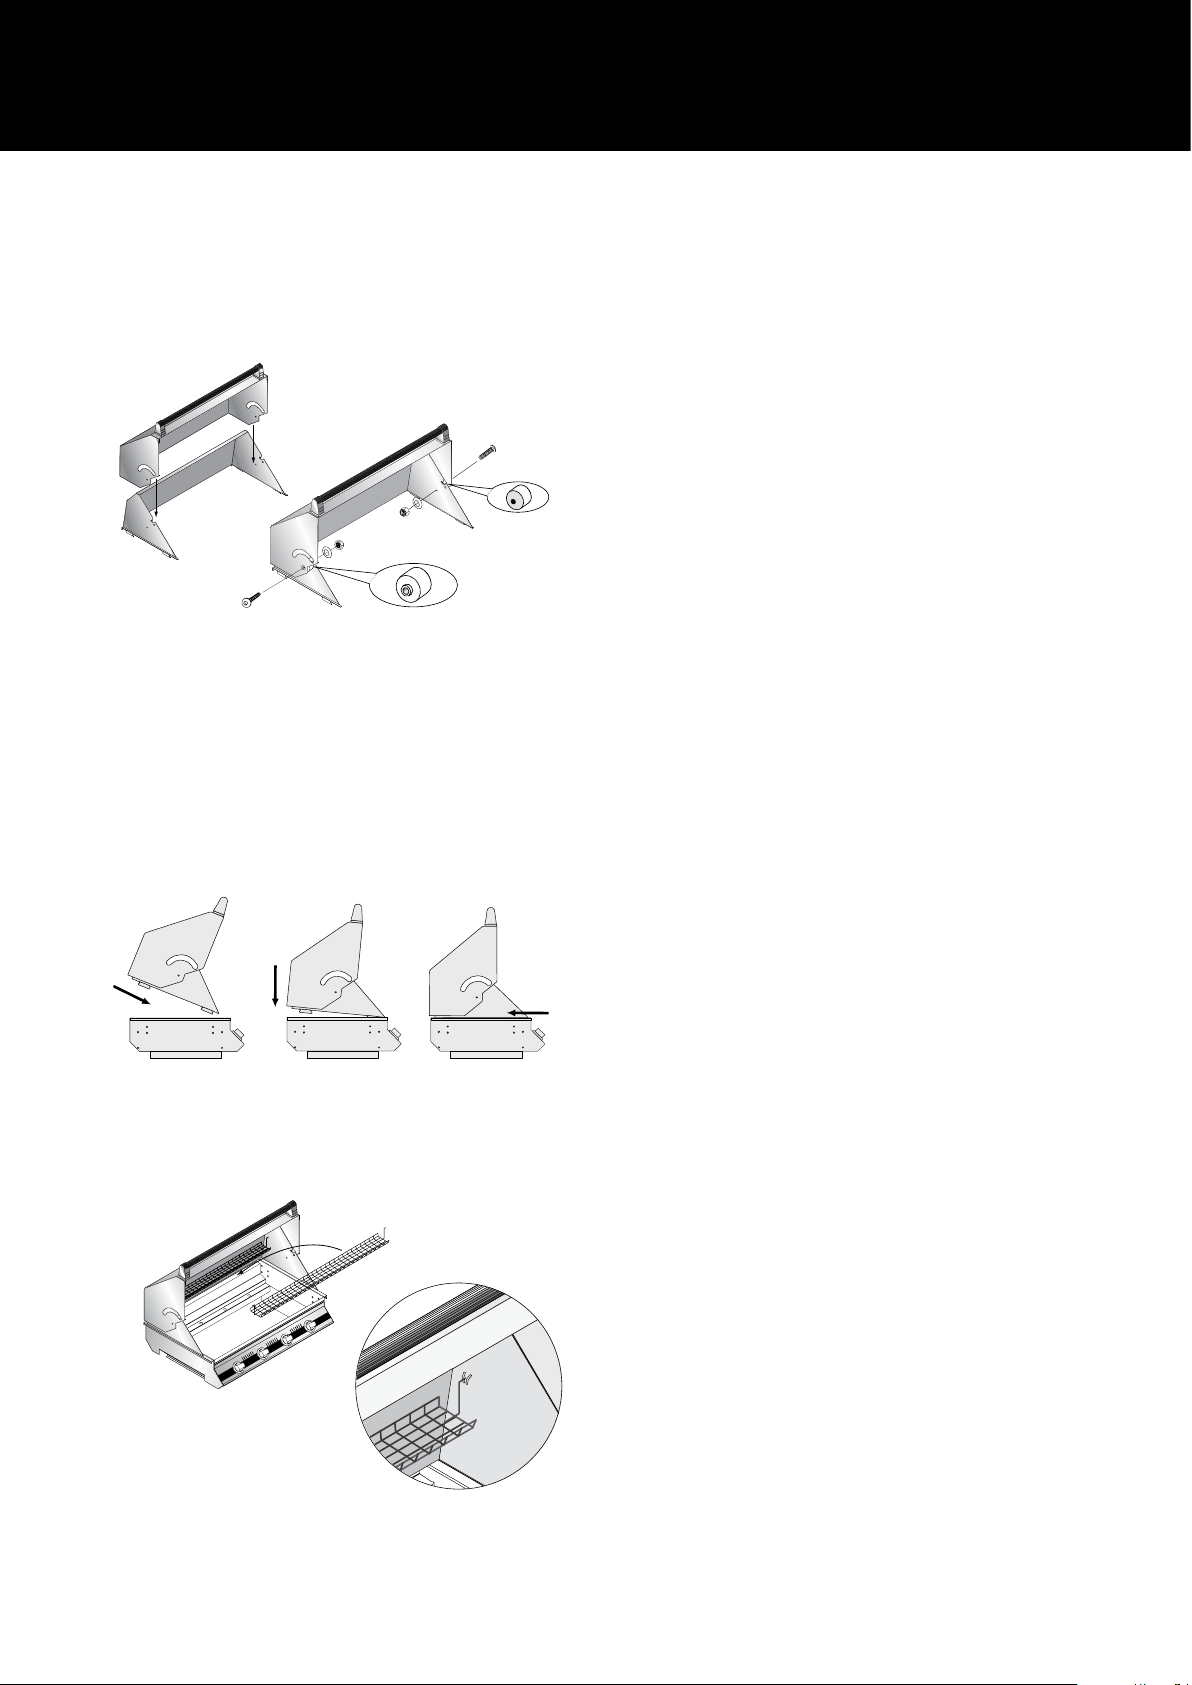
Attach the hood top to the hood base (if required)
The screws go in from the outside, a washer and nut is used
on the inside� The spacers go between the hood top and
base� The raised part of the spacer points to the outside of
the hood, the flat side points inwards�
Attach the hood to the barbecue
The tabs on the bottom of the hood base slip into slots on
the sides of the barbecue frame�
It is best to do this with a 3 stage manoeuvre:
1� Tilt the front of the hood into the slots,
2� Lower the back till the hood sits flat,
3� Push the hood back to lock it into place�
Put the warming rack in
The warming rack needs no screws� It sits on two notches on
the insides of the hood�
Loading ...
Loading ...
Loading ...