Loading ...
Loading ...
Loading ...
11ASSEMBLY INSTRUCTIONS FOR TROLLEY
ASSEMBLY INSTRUCTIONS
FOR TROLLEY
Test gas pressure by removing the last burner from the
left hand side of the barbecue and attaching a hose and
pressure gauge to the end of the gas valve�Turn on 2
burners and check the pressure�Inlet pressure should be
11�0” WC or 2�75 kPa�
Fixed Installation - Natural Gas
(Natural Gas installation should be carried out by a qualified
gas fitter)�
BeefEater Natural Gas barbecues are designed as low-
pressure appliances (4�0” WC, 1�00KPa)�
Fit the natural gas regulator supplied directly to the
barbecue inlet located on the right side of the appliance
using either hard plumbing, or a flexible hose connected to
a bayonet point, also known as a quick connect fitting�Refer
to AS 5601 or your local installation code for pipe sizing
details�Secure all joints spanner (wrench) tight but do not
over-tighten�
Test gas pressure by removing the last burner from the
left hand side of the barbecue and attaching a hose and
pressure gauge to the end of the gas valve�Turn on 2
burners and check the pressure�Inlet pressure should be
4�0” WC or 1�00 kPa�
Australia only (applies to all gas types) : Where a mobile
appliance is to be connected to a fixed gas supply via a
flexible hose connection, a retaining tether of adequate
strength shall be fixed to the appliance and be suitable to
be fixed to the wall within 50mm of each connection
point� The length of the tether shall not exceed 80% of the
length of the hose assembly� In this way, if the barbecue
is accidentally moved, the chain stops the barbecue from
stretching the hose�
The barbecue appliance must be isolated from the gas
supply piping system by closing its manual shutoff valve
during any pressure testing of the gas supply piping system�
Before You Start
Note the tools you will need before you begin�
Check for damaged or missing parts, and consult your
retailer if necessary�
Many components and panels are covered with a protective
sheet of plastic� You will need to remove this plastic covering
from all surfaces, especially where two panels join� It is
a good idea to leave some plastic on the panels during
assembly to protect the stainless steel during the assembly
process� Ensure however that all plastic covering is removed
on completion�
Always assemble on a clean, smooth, flat working surface
that will not scratch the surface of the stainless steel�
Allen Key Adjustable
spanner/
wrench
Phillips head
screwdriver
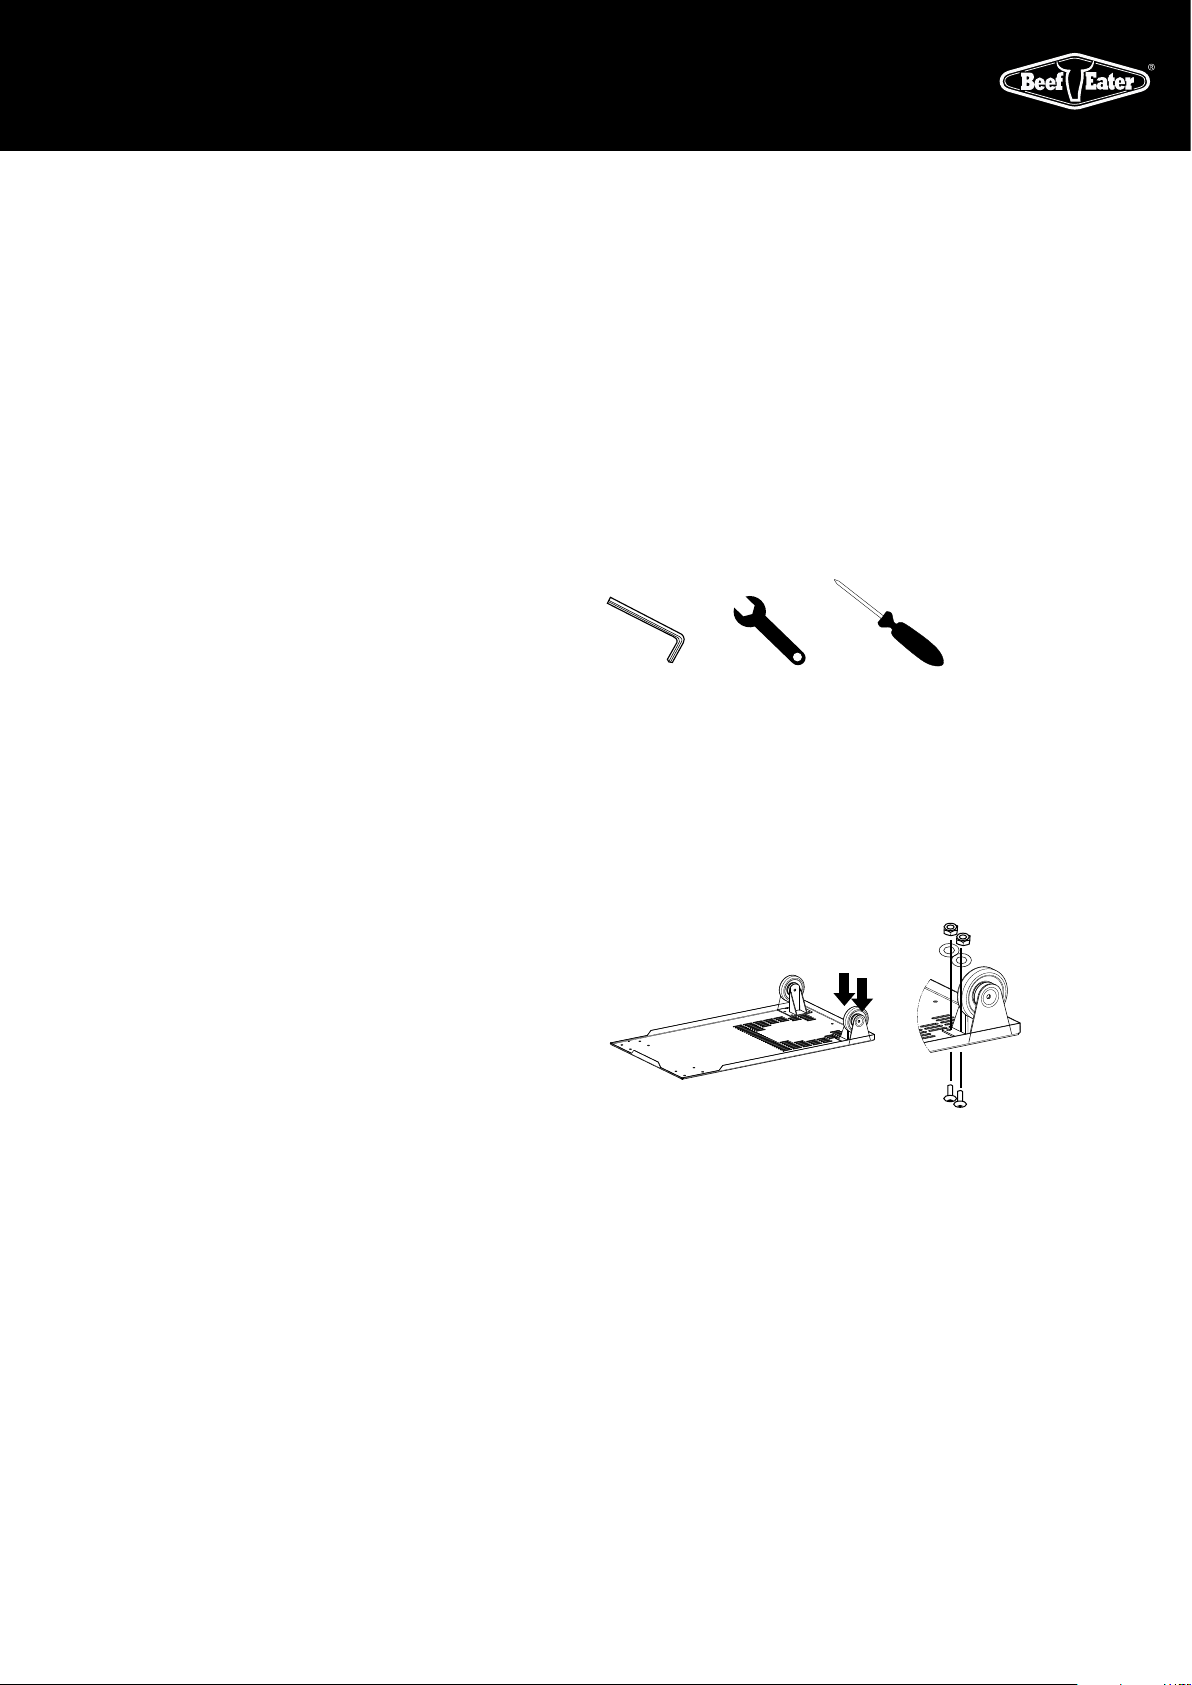
1) Fit The Fixed Castors
Fit the fixed castors into the holes in the bottom of the base�
At this step, use only two Allen head screws, washers and
nuts for each castor in the positions shown� The two outside
screws will be put on in step 3�
Spanner/wrench tighten immediately�
Note lip
ends here
Loading ...
Loading ...
Loading ...