Loading ...
Loading ...
Loading ...
10
Installation
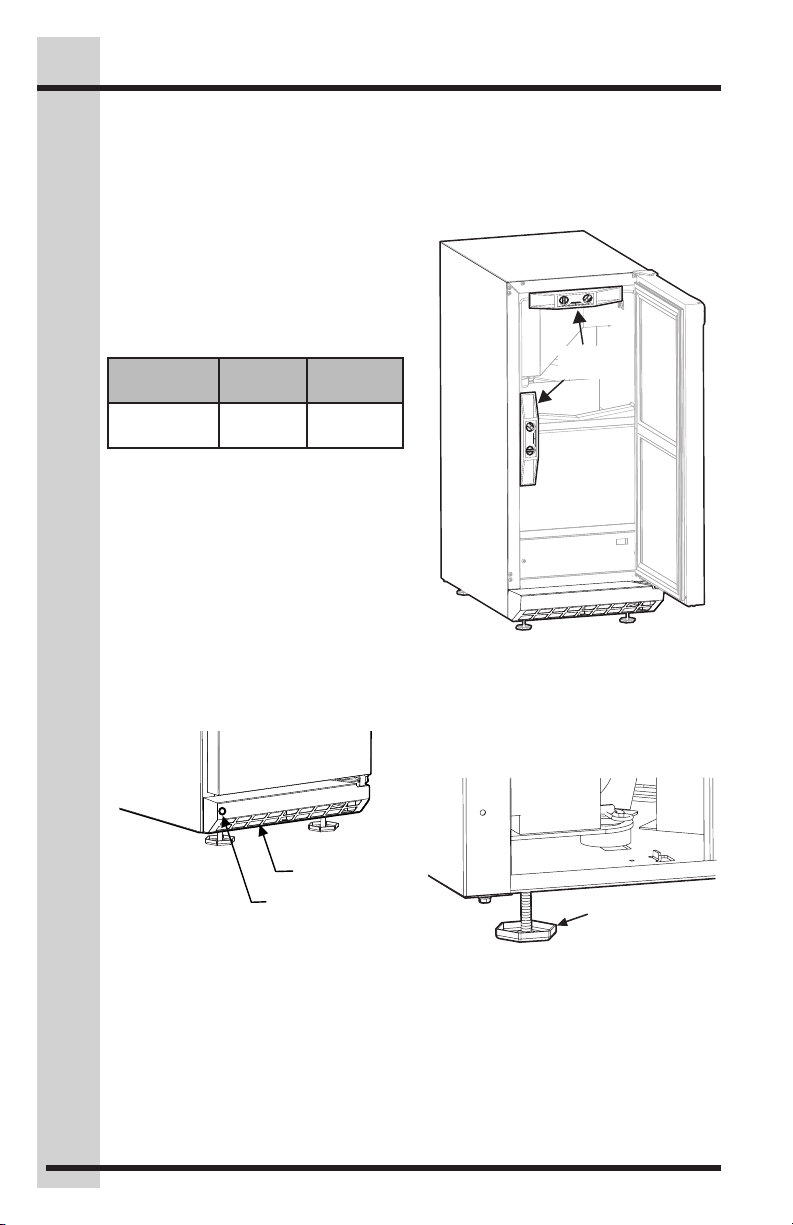
Leveling Legs
Adjustable legs at the front and rear corners
of the appliance should be set so the unit is
firmly positioned on the floor and level from
side-to-side and front-to-back. The overall
height of your appliance may be adjusted
to higher (by turning the leveling leg out,
counter clockwise) and lower (by turning
the leveling leg in, clockwise) dimensions as
shown in Table "A".
Table A
Models
Minimum
Height
Maximum
Height
UR15IM20RS
UL15IM20RS
33
5
⁄8"
(85.4 cm)
34
3
⁄4"
(88.3 cm)
Figure 9
Front grille
Front grille screw
To adjust the leveling legs, place the
appliance on a solid surface and protect
the floor beneath the legs to avoid
scratching the floor. With the assistance of
another person, lean the appliance back
to access the front leveling legs. Raise or
lower the legs to the required dimension
by turning the legs. Repeat this process
for the rear by tilting the appliance forward
using caution. On a level surface check
the appliance for levelness and adjust
accordingly.
Leveling the unit
1 Use a level to check the levelness of
the ice maker from front to back and
from side to side (Figure 10).
2 If the ice maker is not level, adjust
the feet on the corners of the unit as
necessary (Figure 11).
3 Check the levelness after each
adjustment and repeat the previous
steps until the unit is level.
Figure 10
Check
Level
Figure 11
Turn Foot
to Adjust
Loading ...
Loading ...
Loading ...