Documents: Go to download!
User Manual
- User Manual - (English, French, Spanish)
- Specification Sheet - (English)
- WHAT’S IN THE BOX
- GETTING TO KNOW ROGUE™
- OPERATING ROGUE™: CHARGING
- OPERATING ROGUE™: CLEANING
- MAINTAINING ROGUE™
- TROUBLESHOOTING
Table of contents
User manual Robot Vacuum Cleaners
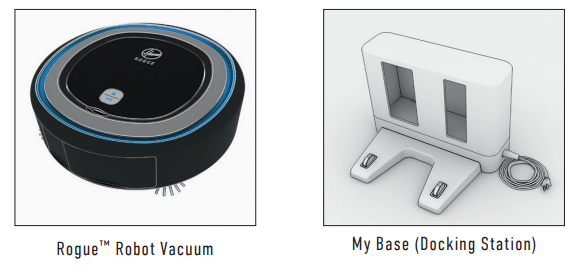
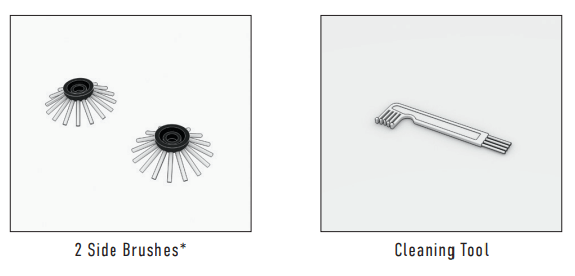
WHAT’S IN THE BOX
I’m Rogue™, of course I come with accessories.
GETTING TO KNOW ROGUE™
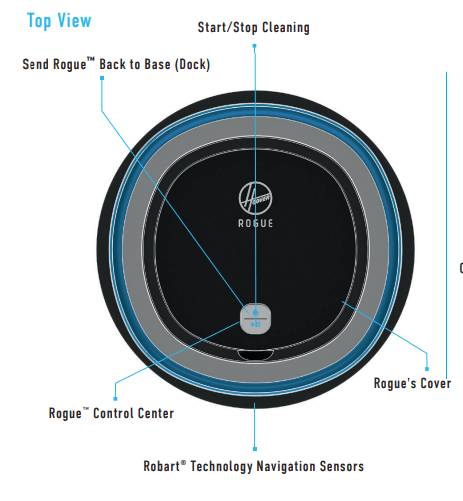
Rogue™ Control Center
These icons are located on my lid and will light up when active
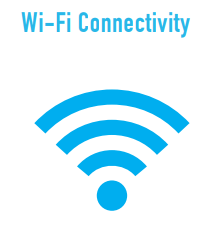
This blue Wi-Fi symbol will light up when you are connected to Wi-Fi through the Hoover Home App. If it’s not lit, I’m not connected.
To set up a connection, turn to page 8.
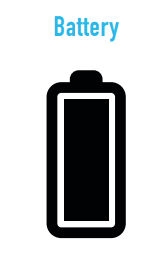
This battery symbol lets you know my battery status. If you don’t see it lit up, I have enough battery life. When it starts blinking, I’m going to head back to my base to recharge.
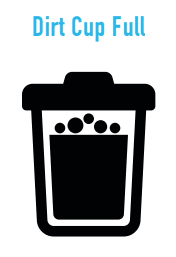
When you see this symbol, it means my dirt cup is full. Please make sure to empty it so I can continue cleaning. The light will disappear once you empty the dirt cup and press the  .
.

When you see this symbol flashing, I’m in trouble. It might be as simple as something stuck in my brush roll or it could be an internal error.
Turn to page 19 for some common errors I might encounter and how you can help me.
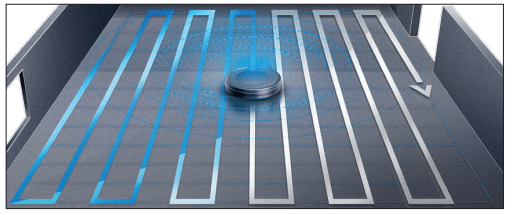
Robart ® Technology with Memory Navigation
I utilize a high-tech laser to map and navigate your home because I'm highly intelligent. I will also remember your home's floor plan so you can customize how I clean (See SmartWall™ Technology on page 10).
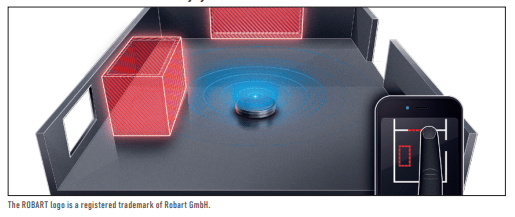
SmartWall™ Technology
Through the Hoover Home App, you can designate rooms and areas as off limits but I don’t know why you would want to.
Voice Control
I’ve got a pretty good relationship with Amazon Alexa* and Google Home Assistant*. If you own an Amazon Alexa product or a Google Home Assistant, you can use them to communicate with me. Download the skill set in the Amazon Alexa or Google Home App.

NOTE: The Hoover Home App is required to interact with Amazon Alexa and Google Home Assistant. Be on the look out for new skills/commands coming soon.
*Amazon Alexa and Google Home Assistant sold separately.
Amazon, Alexa and all related logos are trademarks of Amazon.com, Inc. or its affiliates. Google Home is a trademark of Google Inc.
OPERATING ROGUE™: CHARGING
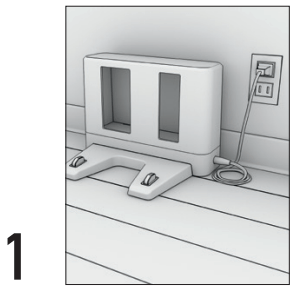 Find a good spot for my base. I would prefer to have 4 ft. on each side. Plug in the AC adaptor to the side of the dock and into a wall outlet.
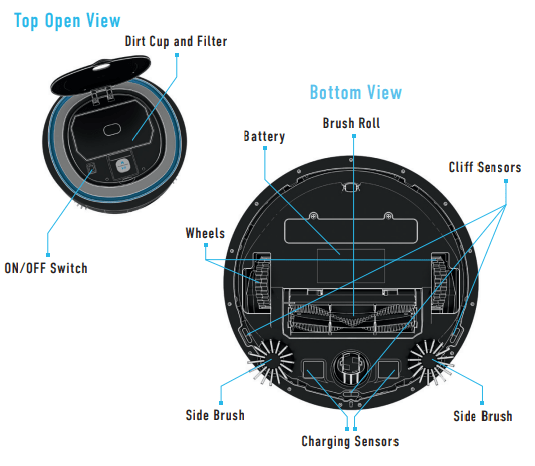
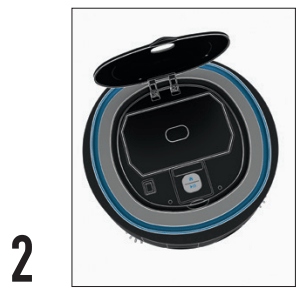 To power me ON, open my lid and flip the power switch.
 To make sure I’m charged and ready to clean, manually place me on my base. I’ll flash my charging light and give a beep to let you know I’m aligned correctly
 I only need about 3 hours to fully charge (impressive, right?). When I’m ready to go, my charging light will stop flashing.
TIP: I perform best if my base is set up on hard floor.
NOTE: I arrive with limited battery life (traveling can be exhausting). To get the most out of my first clean, I recommend charging me for approximately 3 hours.
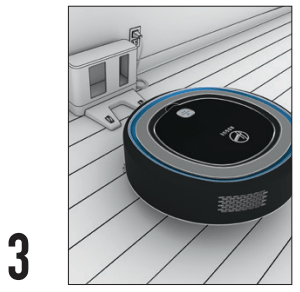
 After I complete cleaning missions, I will automatically make my way back to the base to recharge.
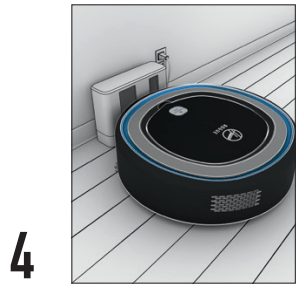
 If I didn’t complete my cleaning mission before my battery ran out, no worries! Once I am charged, I will automatically go back out to where I left off to finish cleaning.
OPERATING ROGUE™: CLEANING
 When you’re ready to send me on a cleaning mission, press the
  button. I’ll beep and start up to let you know I’ve accepted the mission.
 If you want me to take a break or pause mid-cleaning, press the
  button again.
 If you want me to terminate the cleaning mission completely, press my
  button and I’ll start traveling back to my base.
FIRST CLEANING MISSION
During my first mission, I will go into Recon Mode and explore my new surroundings. Once I’m done with my Recon and mapping, I’ll head back to my base. Download the Hoover Home App to see your floor plan or press  to send me out on a mission to clean your mapped home.
MAINTAINING ROGUE™
MAINTAINING ROGUE™: EMPTYING THE DIRT CUP
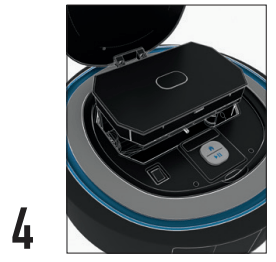
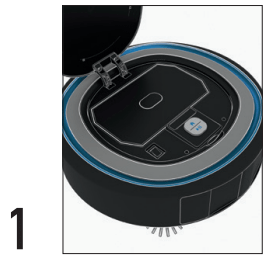 Lift my lid and push the button in the center to access my dirt cup (the dirt cup is that square container filled with all the dirt, dust and pet hair I just picked up for you).
 Lift the lid upwards and remove all the dirt inside. I would prefer you did this after every cleaning mission.
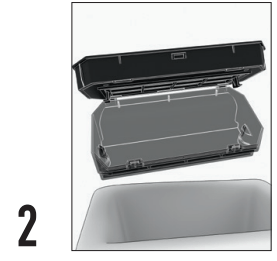
 My filter is attached to the inside of the dirt cup, this should be cleaned too. You can pull the tabs on the side of the filter to remove - the filter is rinsable to ensure extended filter life. NOTE: Please ensure the filter is completely dry before reinserting into Rogue™.
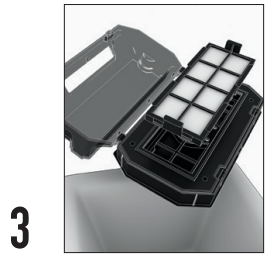
 After you've emptied the dirt cup and cleaned the filter, reinsert into Rogue™ and firmly snap into place.
MAINTAINING ROGUE™: CLEANING/CHANGING THE SIDE BRUSHES
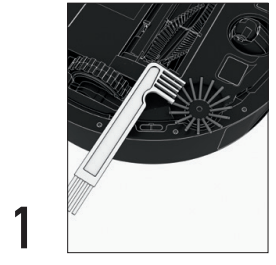 Remove any dirt, dust and pet hair from my side brush with the cleaning tool provided.
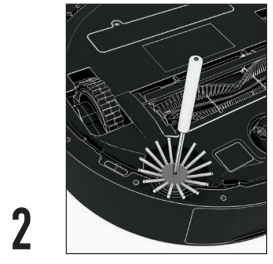 To change my side brushes, use a Philips head screwdriver to unscrew the screw in the middle of my side brush. Be careful it’s small and easy to lose.
MAINTAINING ROGUE™: CLEANING/CHANGING THE BRUSH ROLL
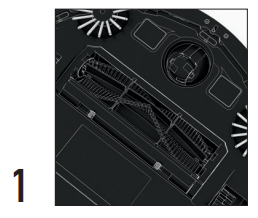 Press the two blue tabs to remove my brush roll cover.
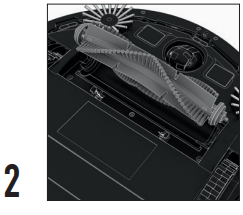 Lift out my brush roll to clean it or replace it.
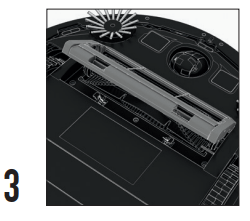 Replace the cover by snapping it back into place.
MAINTAINING ROGUE™: CLEANING THE WHEELS
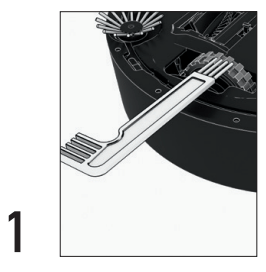 Clean my wheels regularly to remove any dirt, dust and pet hair by using the cleaning tool I came with. Please do this so I can move effectively on my cleaning missions.
MAINTAINING ROGUE™: CLEANING THE SENSORS
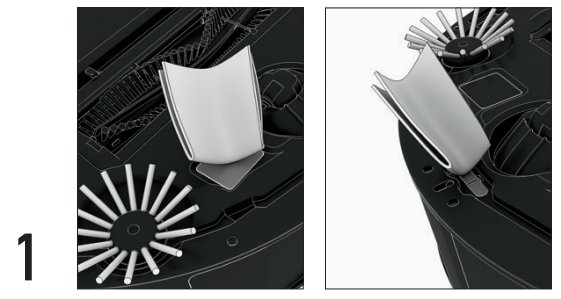
Use a clean, dry cloth to clean my sensors. This ensures I continue to run smoothly by being able to see.
TROUBLESHOOTING
Am I causing trouble?
Visit Hoover.com for FAQs and additional troubleshooting.
The Problem | The Cause | The Action |
| Error - Cliff Sensor | Cliff sensor is covered with dirt. Rogue™ is stuck at a drop-off. | See page 18 for instructions on cleaning the sensors. Move Rogue™ to another location. |
| Error - Main brush | Brush roll is stuck or not spinning properly. | Clean the brush roll of any dirt, lint or hair. See page 14 for instructions |
| Error - Suction motor | There is something blocking the suction path. | Remove brush roll and dirt cup (see pages 13 & 14 for instructions) and remove any obstructions. |
| Error - Critically low battery | Battery is too low and unable to return to docking station to recharge. | Manually place Rogue™ on the docking station to charge. See page 10 for instructions |
| Error - Wheel stuck | Wheel is stuck or not spinning properly. | Clean the wheels of any dirt, lint or hair. See page 18 for instructions. |
| Error - No Dust bin | Dirt cup is not installed or is installed incorrectly. | See page 16 for instructions. |
| Error - Unit picked up | Rogue™ is lifted off the ground or the wheel is elevated excessively. | Place unit back on the ground properly. |
| Error - Side brush | stuck Side brush is stuck or not spinning properly. | Clean the side brush off of any dirt, lint or hair. See page 14 for instructions. |
| Error - Electrical disconnection | Internal software connection was lost. | Factory reset. See page 20 for instructions. |
| Error - Firmware update failure | Connection was lost. | Ensure stable Wi-Fi connection and redownload the firmware from the Hoover Home App. |
| Error - Wi-Fi chip failure | Can’t establish a connection. | Ensure Wi-Fi router is broadcasting 2.4Ghz (not 5Ghz). |
| Error - Robot stuck error | Rogue™ is stuck. | Manually move Rogue™. |
| Error - Bumper error | Something is obstructing the bumper. | Remove any obstruction in the bumper. |
FACTORY RESET
Sometimes I might just need a hard reset. If nothing on the last page works to solve my issues, follow these instructions to reset. Be warned, this is a factory reset so it will erase everything!
• Press  button and hold for 10 seconds.
• All indicator lights will shut off for 1-2 seconds.
• Rogue™ will then reboot and all indicator lights will illuminate
See other models: UH72511PC UH73301PC UH73510PC UH72405 BH53310
