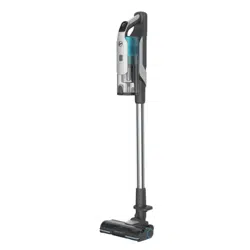
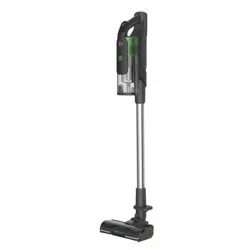
User Manual for Cordless Stick Vacuum Cleaner
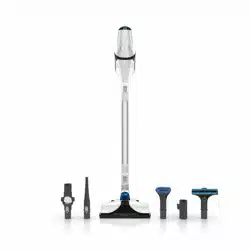
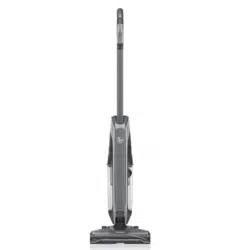
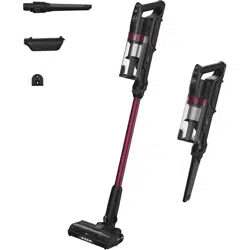
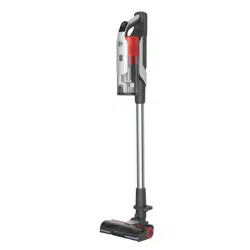
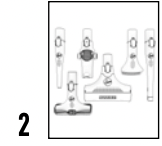
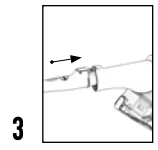
Getting to know your Hoover® REACT™ Cordless Vacuum
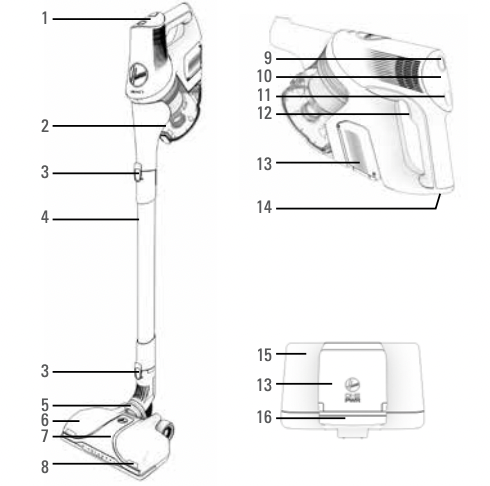
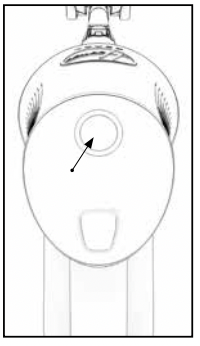
1. Hoover ® Dashboard
2. XL Easy Empty Dirt Cup
3. Release Button
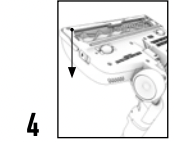
4. Reach Wand
5. Advanced Swivel Steering
6. Easy Clean Brush Roll
7. Powered Nozzle with WindTunnel Surge™
8. High Intensity LED Headlights
9. Battery Level Indicator
10. Mode Indicator
11. Mode Button
12. Power Trigger
13. ONE PWR ™ Lithium Battery
14. ONE PWR ™ Lithium Battery Release Button
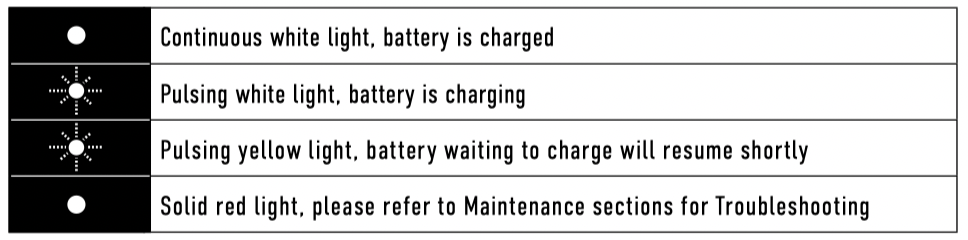
15. ONE PWR ™ Charger
16. Charger Indicator
Assembly
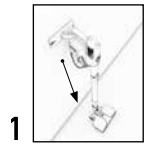
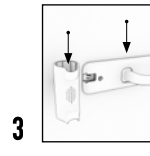
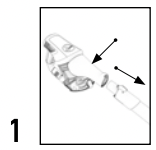
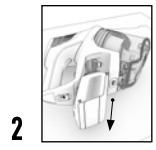
Push the Reach Wand down onto the Powered Nozzle until it clicks into place.
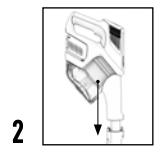
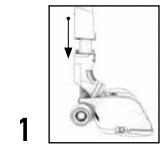
Push the Handheld down onto the Reach Wand until it clicks into place.
Before first use be sure to fully charge the battery.
TIP: Charging your ONE PWR™ Lithium Battery may take up to 3 hours.
WARNING
To reduce the risk of personal injury, remove battery before cleaning or servicing.
IMPORTANT
This vacuum cleaner is not free standing. In between uses or when carrying out any maintenance always lie flat on the floor in a suitable location so it does not become a trip hazard or can be stepped on.
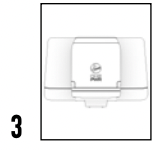
Mounting the Wall Bracket
First, fully assemble the vacuum but do not attach the battery.
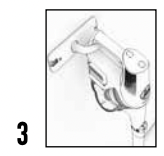
Install the Wall Bracket arm to the Wall Bracket. Hold the vacuum against the wall. Position the Wall Bracket behind the Handheld so that the hook holds the vacuum.
TIP: The Floor Nozzle must be flat on the ground for proper wall mounting.
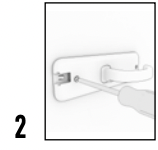
Set the vacuum aside. Mark the Wall Anchor locations. Install the anchors and screw the Wall Bracket to the wall.
IMPORTANT: Use BOTH screws to mount the Wall Bracket to wall.
Slide Tool Storage Part into the slot on the Wall Mount Bracket until it locks into place.
Charging your ONE PWR ™ Lithium Battery
Charge the battery fully before first use, this will take up to 3 hours.
NOTE: Due to federal regulations the battery does not come fully charged.
When charging, the charger will illuminate to indicate charging progress. See below for charger indicator explanation.
Once charge is complete, remove the ONE PWR ™ Lithium Battery from the charger and place it into the handheld for cleaning.
Hoover ® Dashboard and FloorSense ™ Technology
TIP: To allow FloorSense™ to determine floor type and optimize brush roll speed automatically, ensure FloorSense™ is illuminated on the Hoover ® Dashboard.
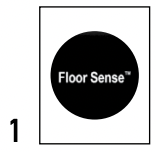
The Hoover ® Dashboard will indicate “FloorSense”. In FloorSense ™ mode, brush roll speed automatically adjusts for the best results on any floor type.
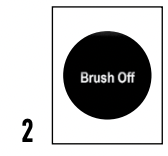
The Hoover ® Dashboard will indicate “Brush Off”. In “Brush Off” mode, brush roll turns OFF to prevent scattering of dirt and debris across hard floors and area rugs.
When the mode button has been pressed and no words illuminate on the Hoover ® Dashboard, the brush roll is ON and perfect for lifting and removing deep-down dirt on carpet.
The Hoover ® Dashboard will light up, if there is a system error. Refer to the Maintenance section for further information.
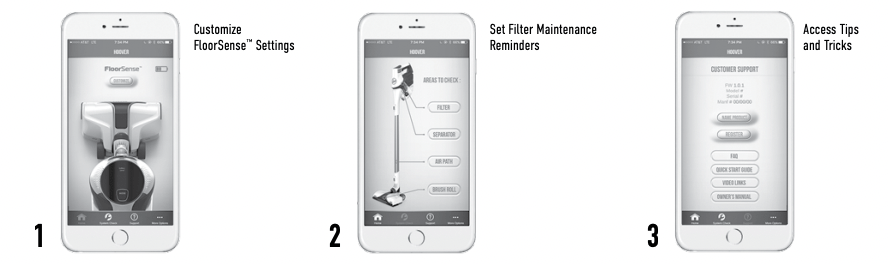
Using the Hoover ® App
TIP: Pull power trigger to illuminate the Hoover ® Dashboard and connect to the Hoover ® App.
Hoover ® REACT ™ vacuums are compatible with the Hoover ® App. Download the Hoover ® App to:
1. Register your new vacuum
2. Customize FloorSense ™ settings
3. Troubleshoot System Maintenance
4. Access tips and tricks
IMPORTANT
Read all instructions before using this appliance.
Quick Start
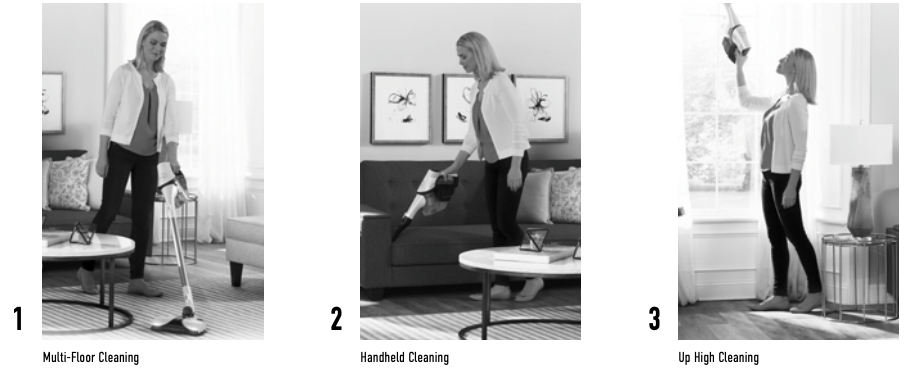
Using your Vacuum
1. Squeeze the trigger to turn the vacuum ON. Release the trigger to shut the vacuum OFF.
NOTE: When power is ON, the Hoover® Dashboard will light up.

2. For continuous power, double-click the trigger. Power should remain ON. Pull trigger again to power OFF.
3. Push the “Mode” button on the Hoover® Dashboard if you’d like to change from FloorSense™ . The vacuum will default to “FloorSense” mode.
4. When in use, the Hoover ® Dashboard will display the battery level and selected mode. When the battery level is getting low, recharge the battery.
WARNING This vacuum cleaner has a constantly rotating brush roll when FloorSense™ is ON. Never leave the vacuum in one spot for an extended period of time as this may damage the floor surface.
WARNING Risk of personal injury – the brush roll may suddenly restart. Turn power switch OFF and remove the battery before cleaning or servicing the brush roll.
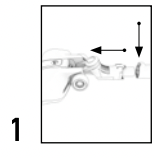
Using your Vacuum as a Handheld
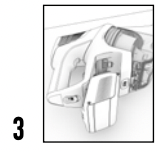
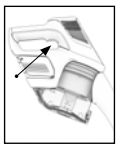
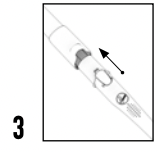
Press the Handheld release button. Pull to separate the Handheld from the Reach Wand.
Choose an accessory. (All accessories not available on all models).
Push the chosen accessory into the Handheld until it clicks into place.
TIP: All available accessories can be attached directly onto the Handheld.
IMPORTANT
Not to be used for grooming a pet.
IMPORTANT
This vacuum cleaner is not free standing. In between uses or when carrying out any maintenance always lie flat on the floor in a suitable location so it does not become a trip hazard or can be stepped on.
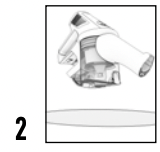
Using your Vacuum to Clean Up High
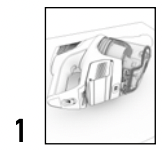
Press the Powered Nozzle release button and pull to remove the Powered Nozzle from the Reach Wand.
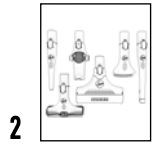
Choose an accessory (all accessories not available on all models).
Push the chosen accessory into the Reach Wand until it clicks into place.
TIP: The Reach Wand can be used for hard-to-reach places.
IMPORTANT
This vacuum cleaner is not free standing. In between uses or when carrying out any maintenance always lie flat on the floor in a suitable location so it does not become a trip hazard or can be stepped on.
Maintenance
Removing the ONE PWR ™ Lithium Battery
Lie the Handheld on its side on a flat stable surface. Pull the “Battery Release Button” back to release the ONE PWR™ Lithium Battery.
Slide the ONE PWR ™ Lithium Battery out from the bottom of the Handheld.
Place ONE PWR ™ Lithium Battery on charger.
WARNING
To reduce the risk of personal injury, remove battery before maintaining or servicing your vacuum.
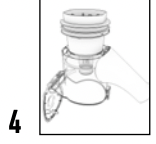
Emptying the Dirt Cup
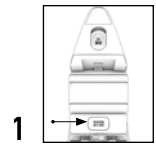
Press the Handheld release button. Pull to separate the Handheld from the Reach Wand.
Ensure the ONE PWR ™ Lithium Battery has been removed and hold the Handheld over a trash bin.
TIP: Wrap bag around dirt cup to capture dirt and dust.
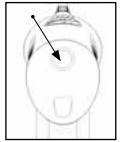
Press the dirt empty button.
WARNING
To reduce the risk of personal injury, remove battery before maintaining or servicing your vacuum.
IMPORTANT
This vacuum cleaner is not free standing. In between uses or when carrying out any maintenance always lie flat on the floor in a suitable location so it does not become a trip hazard or can be stepped on.
Cleaning the Filter, Dirt Cup and Separator
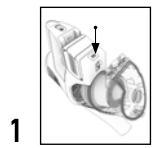
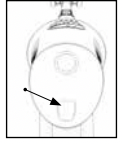
Remove the Reach Wand. Press the dirt cup release button and pull the dirt cup away.

Pull the filter away and tap over a trash bin to remove dirt. Rinse filter under warm water until water is clear. Allow filter to dry for 24 hours or until completely dry before reinstalling.
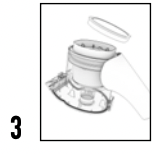
To clean the separator, lift to remove. Clean dirt & debris, then place back into dirt cup.
To reassemble, align the hook to the front. Push the dirt cup backwards, until it locks in place.
WARNING
To reduce the risk of personal injury, remove battery before maintaining or servicing your vacuum.
IMPORTANT
DO NOT USE SOAP OR OTHER CHEMICALS TO CLEAN. DRY FILTER COMPLETELY, FOR UP TO 24 HOURS, BEFORE REINSTALLING INTO THE PRODUCT.
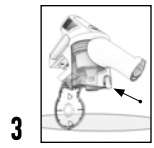
Removing and Replacing the Brush Roll
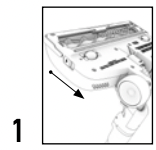
Remove Powered Nozzle from Reach Wand. Turn the Powered Nozzle upside down. Slide the Brush Roll Release Button.
Lift the end of brush roll to remove from the Powered Nozzle.

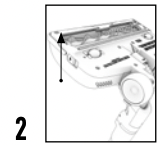
Clear any threads or hair from both ends of the brush roll and any dirt or debris inside the housing of the Powered Nozzle.
Re-fit the brush roll into the housing.
WARNING
Risk of personal injury – the brush roll may suddenly restart. Turn power OFF and remove the battery before cleaning or servicing the brush roll.