Loading ...
Loading ...
Loading ...
CSP-170/CSP-150 Owner’s Manual
35
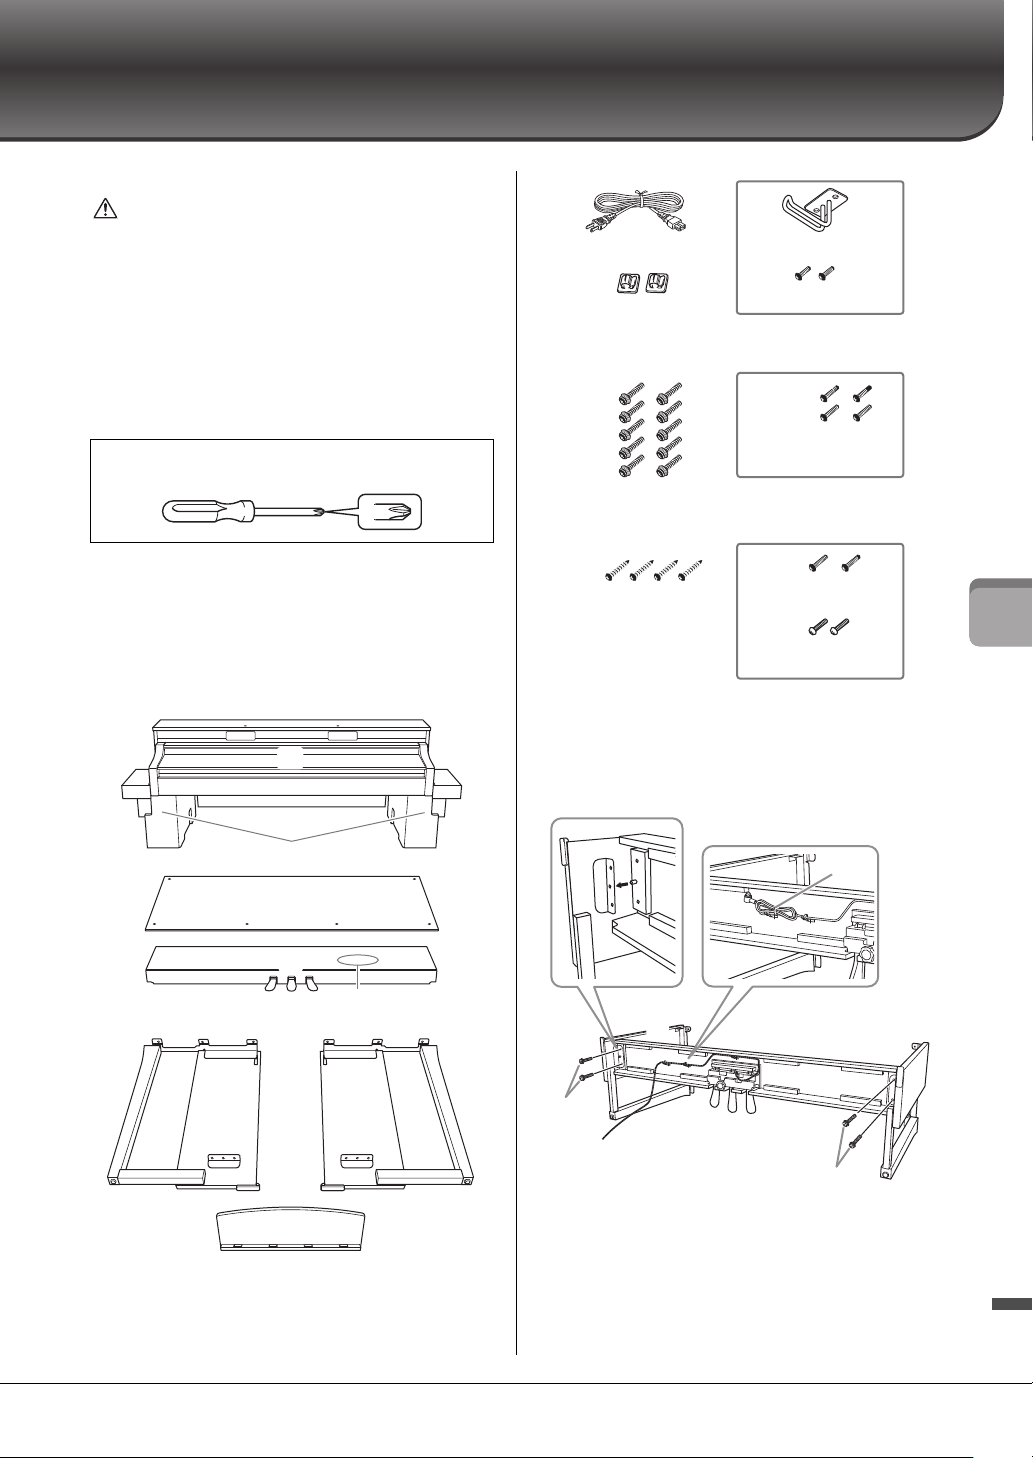
Assembly
Assembly
This illustration shows the CSP-170.
CAUTION
• Assemble the unit on a hard and flat floor with ample space.
• Be careful not to confuse parts, and be sure to install all parts
in the correct orientation. Please assemble the unit in
accordance with the sequence given below.
• Assembly should be carried out by at least two persons.
• Be sure to use only the included screws of the specified sizes.
Do not use any other screws. Use of incorrect screws can cause
damage or malfunction of the product.
• Be sure to tighten all screws upon completing assembly of the
unit.
• To disassemble the unit, reverse the assembly sequence given
below.
Remove all parts from the package and make sure you have all
of the items.
Remove polystyrene foam pads from the package, position
them on the floor, then place A on top of them.
Position the pads so that they will not block the speaker box or
connector on the bottom of A.
1 Attach C to D and E.
1 Untie and straighten out the bundled pedal cord.
Do not discard the vinyl tie. You will need it later in step 5.
2 Insert the protrusions into the holes on the brackets, then
attach D and E to C by tightening G (x 4).
Have a Phillips-head (+) screwdriver of the appropriate
size ready.
C
DE
F
B
A
Polystyrene foam pads
Bundled pedal cord inside
G
H, J
K
CSP-150B / CSP-150PE
CSP-170B / CSP-170PE
H
J
CSP-150WH
CSP-170WH
4 x 12 mm x 2
4 x 12 mm x 4
6 x 20 mm x 10
4 x 20 mm x 4
4 x 12 mm x 2
4 x 10 mm x 2
L
Power cord
Cord holders x 2
Headphone hanger
Black
Black
Silver
2
2
E
G
G
C
D
2
1
Loading ...
Loading ...
Loading ...