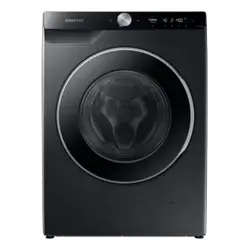
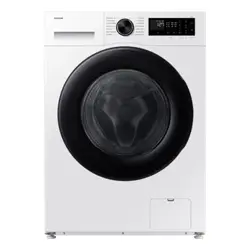
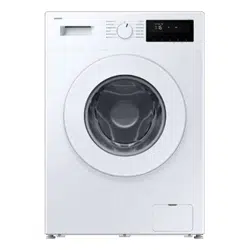
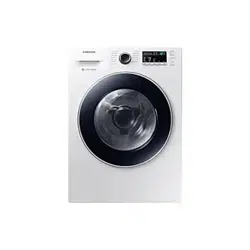
Unpack your washer and inspect it for shipping damage. Make sure you have received all the items shown below. If your washer was damaged during shipping, or you do not have all of the items, contact 1-800-SAMSUNG (1-800-726-7864). To prevent personal injury or strain, wear protective gloves whenever lifting or carrying the unit.
Washing a load of laundry
To reduce the risk of fire, electric shock, or injury to persons, read the IMPORTANT SAFETY
WARNING INSTRUCTIONS before operating this appliance.
LOADING YOUR WASHER
Fill the tub with dry, unfolded clothes evenly around in order to enhance washing efficiency and prevent excess wear, or wrinkling of the load.
Wash delicate items such as bras, hosiery, and other lingerie in the Delicates cycle with similar lightweight items.
When washing big bulky items or a few smaller items that don’t fill the tub completely - a rug, a pillow, stuffed toys, or one or two sweaters, for example - add a few towels to improve tumbling and spin performance.
During the spin cycle, the washer may add water to to redistribute the clothes and correct an inbalance inside the adrum.
To ensure good cleaning results when washing heavily soiled loads, do not overload your washer.
To add a forgotten item:
Press the Power button.
Press the Start/Pause Button.
Wait for the Door Lock light to go out (5 seconds).
Add the item, close the door, and press the Start/Pause Button. After a 10-second pause, the cycle resumes.
Getting started
Load your washer.
Close the door.
Press the Power button.
Add detergent and additives to the dispenser (see pages 23~24).
Select the appropriate cycle and options for the load (see pages 19~20).
Press the Start/Pause Button.
The Wash Indicator light illuminates.
The estimated cycle time appears in the display. The time may fluctuate as the cycle progresses and cycle conditions change.
Before your washer starts to fill, it will make a series of clicking noises to check the door lock and do a quick drain.
The actual time required for a cycle may differ from the estimated time in the display depending on the water pressure, water temperature, detergent, and laundry.
When the cycle is complete, the Door Lock light goes out and “End” appears in the display.
DO NOT attempt to open the door until the Door Lock light is off. To add a forgotten item, see the
Loading your washer” section. (page 19)
When you restart your washer after a pause, expect a delay of up to 15 seconds before the cycle continues.
Pressing Power cancels the cycle and stops your washer.
The Wash, Rinse, and Spin indicator lights illuminate during those portions of the cycle
Overview of the control panel
1. Cycle Selector
Select the appropriate cycle for the type of load.
This will determine the tumble pattern and spin speed for the cycle.
Normal - For most fabrics including cottons, linens, and normally soiled garments.
Heavy Duty - For sturdy, colorfast fabrics, and heavily soiled garments.
Perm Press - For wash-and-wear, synthetic fabrics, and lightly to normally soiled garments.
To minimize wrinkling of laundry, select the Perm Press cycle.
Sanitize - For heavily soiled, colorfast garments. This cycle heats the water to 150 °F to eliminate bacteria.
Self Clean - Use to clean dirt and mold from the drum. Regular use (after every 40 washes) is recommended.
Delicates/Hand Wash - For sheer fabrics, bras, lingerie silk, and other hand wash-only fabrics. For best results, use liquid detergent.
Wool - For machine-washable wool. Loads should be under 8 pounds. For best results, we recommend a load of 4.4 pounds or less.
• The Wool cycle washes laundry by moving the wash drum horizontally to maintain the characteristics of the wool fibers and to prevent damage to the cloth. It then stops for a while to allow the laundry to soak in the water. This pause in the operation of the Wool cycle is normal.
• We recommend you use a neutral detergent to prevent damage to the cloth and to improve the washing results.
Quick Wash - For lightly soiled garments needed quickly.
Rinse + spin - Use for loads that need rinsing only or to add rinse-added fabric softener to a load.
2. Digital graphic display
Displays the remaining cycle time, all cycle information, and error messages.
3. Steam button
Press this button to use the steam wash function. Steam wash is available with Normal, Heavy Duty, Perm Press, Sanitize cycles. For heavily soiled, colorfast garments, steam wash improves stain treatment and use less water of each cycle
4 Temp selection - button
Press the Temp button repeatedly to cycle through the different water temperature options.
Hot - Whites and heavily soiled, colorfast items.
Warm - Colorfast items. When you select warm rinse, only the final rinse will be warm. The other rinses will be cold to conserve energy.
Eco Warm - Moderately soiled, colorfast items; most wrinkle-free items.
Cold- Brightly colored, very lightly soiled items.
5. Spin selection button
Press the Spin button repeatedly to cycle through the different spin speed options. High - Use for underwear, t-shirts, jeans, and sturdy cottons.
Medium - Use for jeans, wrinkle-free or wash-and-wear items, and synthetics.
Low - Use for delicate items needing a slow spin speed.
Spin Only - Only the spin cycle is executed.
6. Soil Level _ selection button
Press the Soil Level button to select the Soil Level/washing time.
Heavy - For heavily soiled loads.
Normal - For moderately soiled loads. This setting is best for most loads.
Light - For lightly soiled loads.
7. Delay Start button
You can delay any cycle for up to 19 hours in one-hour increments. Displayed hour indicates the time at which the wash will be started.
8. Start/pause selection button
Press to pause and restart programs.
9. Power button
Press once to turn your washer on. Press again to turn your washer off. If the washer is left on for more than 10 minutes without any buttons being touched, the power automatically turns off.
Child Lock
Child Lock prevents children from playing with your washer.
Activating the Child Lock function
Press and hold both the Spin and Soil Level buttons simultaneously for approximately 3 seconds.
When you activate the Child Lock function, the door locks and the “Child Lock []” lamp illuminates.
If you press the Start/Pause button after you have activated the Child Lock function, none of the buttons will work except for the Power button.
If you press a button when the buttons are locked, the “Child Lock []” lamp blinks.
Pausing the Child Lock function
When the door is locked or the buttons are locked by the Child Lock function, you can pause the
Child Lock operation for 1 minute by pressing and holding both the Spin and Soil Level buttons simultaneously for approximately 3 seconds.
If you pause the Child Lock mode temporarily, the door lock is released for 1 minute for user convenience. During this period, the “Child Lock []” lamp blinks.
If you open the door after the minute is over, an alarm sounds for up to 2 minutes.
If you close the door within the 2 minutes, the door is locked and the Child Lock function is reactivated. If you close the door after the 2 minutes, the door is not locked automatically and no alarm sounds.
Deactivating the Child Lock function
Press and hold both the Spin and Soil Level buttons simultaneously for approximately 6 seconds.
When you deactivate the Child Lock function, the door is unlocked and the “Child Lock [ ]” is turned off.
To add laundry after you have activated the Child Lock function, you must first pause or deactivate the Child Lock function.
If you want to open the door of the washing machine when the Child Lock function is activated:
Pause or deactivate the Child Lock function.
Spin Only
If you press the Power button and then press and hold the Spin button for 2 seconds, the spin time will be displayed on the display panel.
Then, press the Spin button repeatedly until the required spin level is selected, and then press the Start/Pause button.
Before pressing the Spin Only button to use the Spin Only function, you can select a cycle with the Cycle Selector. If you have selected a cycle, you can only select the spin level corresponding to the selected cycle.
Garment+
You can add or take out laundry items even after the wash has started, as long as the “Garment+ ” light is turned on. Pressing the Start/Pause button unlocks the door, unless the water is too hot or if there is too much water in your washer. If you are able to unlock the door and wish to continue the wash cycle, close the door, and then press the Start/Pause button.
Using steam wash
If you select steam, the steam acts at the most effective times for the detected amount of laundry, maximizing the effect of the steam, increasing the wash temperature, enhancing the Soak effect, and improving wash performance.
Load the washer.
Press the Power button.
Turn the Cycle Selector and select a steam compatible cycle.
Press the Steam button.
Add detergent into the dispenser tray for a wash, and add fabric softener up to the marked line.
Press the Start/Pause button. The washer automatically selects the optimal wash conditions by sensing the weight of the laundry
Steam may not necessarily be visible during the steam cycles and may not be present during an entire steam wash cycle.
ATC (Auto Temperature Control)
The ATC function controls wash water temperature.
By reacting to changes in external and internal temperatures, the ATC function maintains the correct wash temperature for each cycle, providing the best washing performance while using the least amount of energy.
New washers must reduce the amount of energy usage as a first priority. When you use the most commonly used wash cycles, Normal and Heady Duty, you will notice more cold water entering the washer as an energy saving step. This is normal.
In the Normal and Heavy Duty cycles, the hot water temperature is similar to acceptable adult bath water temperature and warm water temperature is similar to comfortable swimming-pool water temperature. If you want to wash clothes at different water temperatures, you should choose a different cycle, and then choose a specific temperature (Hot/Warm/Eco Warm).
Detergent use
Your washer is designed to use high efficiency (HE) detergents.
For best cleaning results, use high efficiency detergents such as Tide HE, Wisk HE, Cheer HE or Gain HE*. High efficiency detergents contain suds suppressors that reduce or eliminate suds. When fewer suds are produced, the load tumbles more efficiently and cleaning is maximized.
Reducing the amount of detergent may reduce the quality of cleaning. It is important to pre–treat stains, sort carefully by color and soil level, and avoid overloading.
* Brand names are trademarks of their respective manufacturers
FEATURES
Automatic dispenser
Your washer has separate compartments for dispensing detergent and color-safe bleach, chlorine bleach, and fabric softener. Add all laundry additives to their respective compartments before starting your washer.
The automatic dispenser MUST ALWAYS be in place before starting your washer.
When using powdered detergent, remove the liquid detergent compartment from the detergent drawer. The washer will not dispense powdered detergent from the liquid detergent compartment.
Detergent compartment
1. Pour the recommended amount of laundry detergent directly into the detergent compartment before starting your washer.
2. If you are using color-safe bleach, add it with the detergent to the detergent compartment.
When adding color-safe bleach with detergent, it is best if both laundry products are in the same form - powdered or liquid
Bleach compartment
(Liquid chlorine bleach only)
Add chlorine bleach to the bleach compartment. DO NOT exceed the MAX FILL line.
Avoid splashing or over-filling the compartment.
Your washer automatically dispenses bleach into the tub at the appropriate time.
The dispenser automatically dilutes liquid chlorine bleach before it reaches the wash load.
Never pour undiluted liquid chlorine bleach directly onto the load or into the tub. It is a powerful chemical and can cause fabric damage, such as weakening of the fibers or color loss, if not used properly.
Oxi-type boosters or color-safe bleach can be added to the drum prior to adding laundry.
Put the laundry into the drum only after confirming that all the oxi-type boosters or color-safe bleach has entered the drum.
To use powdered detergent and powder oxi-type boosters or powdered color-safe bleach at the same time, it is more effective to put them in the drum together before adding the laundry. When you use powdered detergent, remember to remove the Liquid Detergent holder from the detergent compartment.
Fabric softener compartment
Pour the recommended amount of liquid fabric softener into the softener compartment. For smaller loads, use less than one capful.
The dispenser automatically releases liquid fabric softener at the proper time during the rinse cycle.
Use the softener compartment ONLY for liquid fabric softeners.
If the Fabric Softener is highly concentrated, (thick) it could remain in the Fabric Softener compartment after the wash cycle is completed. If the Fabric Softener being used is highly concentrated, dilute it with water. Then, add the diluted mixture up to the MAX FILL line in the Fabric Softener compartment.
DO NOT use the Downy Ball* in the fabric softener compartment with this washer. It will not add fabric softener at the appropriate time.
Use the detergent compartment.
Do not use liquid fabric softener that is too sticky as it may not mix with the water sufficiently.
Brand names are trademarks of their respective manufacturers.
Cleaning and maintaining your washer
Keeping your washer clean improves its performance, wards off unnecessary repairs, and lengthens its life.
CLEANING THE EXTERIOR
Turn off the water faucets after finishing the day’s washing.
This will shut off the water supply to your washer and prevent the unlikely possibility of damage from escaping water. Leave the door open to allow the inside of your washer to dry out.
Use a soft cloth to wipe up all detergent, bleach, or other spills as they occur.
Clean the following as recommended:
Control Panel - Clean with a soft, damp cloth. Do not use abrasive powders or cleaning pads. Do not spray cleaners directly on the panel.
Cabinet - Clean with soap and water.
CLEANING THE INTERIOR
Clean the interior of your washer periodically to remove any dirt, soil, odor, mold, mildew, or bacterial residue that may remain in your washer as a result of washing clothes.
Failure to follow these instructions may result in unpleasant conditions, including odors and/or permanent stains on your washer or laundry.
Hard water deposits may be removed, if needed. Use a cleanser labeled “Washer safe”.
CLEANING THE DISPENSERS
You may need to clean the Automatic Dispenser periodically to remove laundry additive buildup.
Pull the detergent liquid holder out of the detergent compartment.
Remove the Siphon Cap from the fabric softener and bleach compartments.
Wash all of the parts under running water.
Clean the dispenser recess with a soft brush.
Reinsert the Siphon Cap, and push it firmly into place.
Push the dispenser back into place.
Run a Rinse + Spin cycle without any load in your washer.
Storing your washer
Washers can be damaged if water is not removed from hoses and internal components before storage. To prepare your washer for storage, follow these steps:
Select the Quick Wash cycle and add bleach to the automatic dispenser. Run your washer through the cycle without a load.
Turn the water faucets off and disconnect the inlet hoses.
Unplug your washer from the electrical outlet and leave your washer door open to let air circulate inside the tumbler.
Cleaning the debris filter
We recommend cleaning the debris filter when water does not drain well or the “nd” error message is displayed.
1. Open the filter cover by pressing and then pulling the handle of the filter cover with your finger.
2. Holding the drain cap, pull the drain tube that is hooked on the guide hook to the front. Do not pull the drain tube with excessive force.
3. Place a bowl under the washing machine to catch any remaining water. Then, hold the drain tube with one hand, and turn the drain cap counter clockwise with the other hand to separate it from the drain tube.
4. Drain the remaining water completely
5. Turn the debris cap counterclockwise, and then pull the debris cap and debris filter assembly out of the washer.
6. Wash any dirt or other material from the debris filter. Make sure the drain pump propeller behind the debris filter is not blocked.
7. When you have finished cleaning the filter, insert the debris cap and filter assembly back into the washer. Turn the debris filter cap clockwise until the indicator on the debris filter cap is in the 12 o’clock position, pointing to the indicator on the washer.
8. Re-attach the emergency drain cap to the drain tube, and then hook the tube to the hook guide.
9. Re-install the filter cover.
Cleaning the door seal/bellow
1. Open the washer door and remove any clothing or items from the washer.
2. Inspect the gray colored seal/bellow between the door opening and the basket for stained areas. Pull back the seal/bellow to inspect all areas under the seal/bellow and to check for foreign objects
3. If you find stained areas, wipe down these areas of the seal/bellow using the procedure below:
a) Mix a dilute solution containing ¾ cup (177 mL) of liquid chlorine bleach and 1 gal. (3.8 L) of warm tap water.
b) Wipe the seal/bellow area with the dilute solution using a damp cloth.
c) Let stand 5 minutes.
d) Wipe down the area thoroughly with a dry cloth and let the washer interior air dry with the door open.
Self clean
Self Clean is a self-cleaning cycle that removes any mold from inside the washing machine.
Press the Power button.
Press the Self Clean button. Once you have pressed the Self Clean button, the only function you can set is the Delay Start function.
Press the Start/Pause button. The Self Clean+ cycle will start.
The Self Clean Auto Indicator Function
If the “Self Clean” button is lit after a wash, it indicates that tub (drum) cleaning is required. In this case, remove the laundry from the washing machine, turn the power on, and clean the drum by running Self Clean.
If you do not run Self Clean after every 40 washes,the “Self Clean” indicator turns off after one hour. However, the “Self Clean” indicator will light again after five washes. Not running Self Clean at this point will not cause a problem with the washing machine.
Although the Self Clean Auto Indicator appears once a month or so, the frequency may differ depending on the number of times the washing machine is used.
Troubleshooting and information codes
Check these solutions if your washer…
PROBLEM
SOLUTION
Does not start.
• Make sure the washing machine is plugged in.
• Make sure the door is properly closed.
• Make sure the water taps are open.
• Make sure to press or tap Start/Pause to start the washing machine.
• Make sure Child Lock is not activated.
• Before the washing machine starts to fill, it makes a series of clicking noises to check the door lock and then does a quick drain.
• Check the fuse or reset the circuit breaker.
Water supply is insufficient, or no water is supplied.
• Fully open the water tap.
• Make sure the door is properly closed.
• Make sure the water supply hose is not frozen.
• Make sure the water supply hose is not kinked or clogged.
• Make sure there is sufficient water pressure.
after a cycle, detergent remains in the detergent drawer.
• Make sure the washing machine is running with sufficient water pressure.
• Make sure the detergent is added to the center of the detergent drawer.
• Make sure the rinse cap is inserted properly.
• If using powdered detergent, make sure the detergent selector is in the upper position.
• Remove the rinse cap and clean the detergent drawer.
excessive vibrations or makes noise.
• Make sure the washing machine is installed on a level, solid floor that is not slippery.
If the floor is not level, use the levelling feet to adjust the height of the washing machine.
• Make sure the shipping bolts are removed.
• Make sure the washing machine is not contacting any other object.
• Make sure the laundry load is balanced.
• The motor can cause noise during normal operation.
• Overalls or metal-decorated clothes can cause noise while being washed.
This is normal.
• Metal objects such as coins can cause noise. After washing, remove these objects from the drum or filter case.
Does not drain and/ or spin.
• Make sure the drain hose is straight all the way to the drain system. If you encounter a drain restriction, call for service.
• Make sure the debris filter is not clogged.
• Close the door and press or tap Start/Pause. For your safety, the washing machine will not tumble or spin unless the door is closed.
• Make sure the drain hose is not frozen or clogged.
• Make sure the drain hose is connected to a drain system that is not clogged.
• If the washing machine is not supplied with sufficient power, the washing machine temporarily will not drain or spin.
As soon as the washing machine regains sufficient power, it will operate normally.
The door does not open.
• Press or tap Start/Pause to stop the washing machine.
• It may take a few moments for the door lock mechanism to disengage.
• The door will not open until 3 minutes after the washing machine has stopped or turned off.
• Make sure all the water in the drum is drained.
• The door may not open if water remains in the drum. Drain the drum and open the door manually.
• Make sure the door lock light is off. The door lock light turns off after the washing machine has drained.
Excessive suds.
• Make sure you use the recommended types of detergent .
• Use high efficiency (HE) detergent to prevent oversudsing.
• Reduce the detergent amount for soft water, small loads, or lightly soiled loads.
• Non-HE detergent is not recommended.
Cannot apply additional detergent.
• Make sure the remaining amount of detergent and fabric softener is not over the limit.
Stops.
• Plug the power cord into a live electrical outlet.
• Check the fuse or reset the circuit breaker.
• Close the door and press the Start/Pause button to start the washing machine. For your safety, the washing machine will not tumble or spin unless the door is closed.
• Before the washing machine starts to fill, it makes a series of clicking noises to check the door lock and then does a quick drain.
• There may be a pause or soak period in the cycle. Wait briefly and the washing machine may start.
• Make sure the mesh filter of the water supply hose at the water taps are not clogged. Periodically clean the mesh filter.
• If the washing machine is not supplied with sufficient power, the washing machine temporarily will not drain or spin. As soon as the washing machine regains sufficient power, it will operate normally.
Fills with the wrong water temperature.
• Fully open both taps.
• Make sure the temperature selection is correct.
• Make sure the hoses are connected to the correct taps. Flush water lines.
• Make sure your water heater is set to supply a minimum 120 °F (49 °C) hot water at the tap. Also, check the water heater capacity and recovery rate.
• Disconnect the hoses and clean the mesh filter. The mesh filter may be clogged.
• While the washing machine fills, the water temperature may change as the automatic temperature control feature checks incoming water temperature. This is normal.
• While the washing machine fills, you may notice just hot and/or just cold water going through the dispenser when cold or warm temperatures are selected. This is a normal function of the automatic temperature control feature as the washing machine determines the water temperature.
Load is wet at the end of a cycle.
• Use the High or Extra High spin speed.
• Use high efficiency (HE) detergent to reduce oversudsing.
• The load is too small. Small loads (one or two items) may become unbalanced and not spin completely.
• Make sure the drain hose is not kinked or clogged.
Leaks water.
• Make sure the door is properly closed.
• Make sure all hose connections are tight.
• Make sure the end of the drain hose is correctly inserted and secured to the drain system.
• Avoid overloading.
• Use high efficiency (HE) detergent to prevent oversudsing.
Has odors.
• Excessive suds collect in recesses and can cause foul odors.
• Run cleansing cycles to sanitize periodically.
• Clean the door seal (diaphragm).
• Dry the washing machine interior after a cycle has finished.
No bubbles are seen (Bubbleshot models only).
• Overloading may screen bubbles.
• Severely contaminated laundry may not generate bubbles.
Wi-Fi does not work (Wi-Fi models only).
• Make sure the Internet connection to your house is properly established.
• Make sure the router turns on and operates normally.
• Make sure you have installed the latest version of the Smart Control App.
INFORMATION CODES
Information codes may be displayed to help you better understand what is occurring with your washer.
CODE SYMBOL
MEANiNG
SOLUTiON
dc
Unbalanced load prevented your washer from spinning.
Redistribute the load, press the Start/Pause Button.
Door is open when washer is running.
Close the door tightly and restart the cycle. If the code reappears, call for service.
FL
Your washer failed to lock the door.
Close the door tightly and restart the cycle. If the code reappears, call for service.
Water temperature control problem.
(Heater Control problem)
Call for service.
Your washer has tried to fill but has not reached the proper water level.
Call for service.
L0
The door will not unlock.
Make sure the door is firmly closed.
Push the Power button to turn off your washer, then turn it on again. If the code reappears, call for service.
Motor not running properly.
Restart the cycle by pressing the Start/Pause Button. If the code reappears, call for service.
nd
Your washer is not draining.
It can also mean that the unit senses a small clog while draining.
First, clean the drain filter. Then do the following.
1) Turn off the unit and turn it on again.
2) Select only the Spin Cycle.
3) Press the Start/Pause to drain the water. Clean the debris filter.
If it still does not drain, call for service.
nF
Your washer has tried to fill but was unsuccessful.
Make sure the water faucets are open all the way. Check for kinked hoses.
Check the inlet screens on the fill hoses.
If you use a Flood Safety Device, remove the device and connect the water hoses directly to the unit.
Check if the hot water supply hose is connected.
You must connect the hot water supply hose because hot water is supplied by the Auto Temperature Control (A.T.C.) function if the temperature of the cold water is lower than 59 °F.
nFl
The hot/cold water hose connection is not correct.
Please connect the hot/cold water hose correctly.
PF
The electricity went off when the washer was running.
Restart the cycle by pressing the Start/Pause Button.
Water detected over the safe water level.
Call for service
Jammed Key.
Call for service
Motor speed sensor problem.
Restart the cycle.
If the code reappears, call for service.
Temperature sensor problem.
Restart the cycle.
If the code reappears, call for service.
High/Low voltage detected.
Restart the cycle.
If the code reappears, call for service.
SUd
Too much suds is detected during the washing cycle.
The unit is put on hold until the suds are reduced. Then, the unit will resume operation.
When it finishes washing, the End and Sd codes will blink in turn.
#1 Why is the door latch loose on my washing machine?
Don't worry if the door latch on your washing machine seems loose, this is normal. The door latch is designed to move so that the locking mechanism in the washer can grab onto the latch. If the latch were rigid, the lock mechanism would not be able to grab the latch properly, causing check code dC/DC. Don't book a repair or service for a loose latch unless you are experiencing another issue or check code.
#2 How to resolve a 5E or 5C error code on a washing machine?
A 5E or 5C error code indicates that the washing machine has detected a drainage issue. The most common reason for this error is a blocked filter or a kinked drain hose. You should also check that the drain hose has been installed properly and clean the hose thoroughly to remove any blockages that may be preventing your washing machine from draining properly.
#3 How do I use the detergent drawer compartments in my washing machine?
our washing machine has different compartments for different washing aids (for example detergents, washing powders, bleaches and fabric softeners). Make sure you add the correct type of detergent to the correct compartment when operating the washing machine. There are also several different types of detergent drawer, depending on your washing machine.


 ]” lamp illuminates.