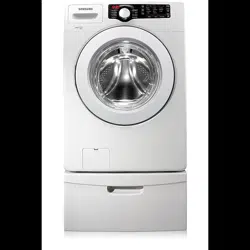
Samsung WF361BV Washer

User Manual

For WF361BV. Also, The document are for others Samsung models: WF361*, WF363*, WF365*, WF364*

PDF File Manual, 132 pages, Read Online | Download pdf file

WF361BV photo
background
Washing Machine
user manual
Imagine the possibilities
Thank you for purchasing this Samsung product.
WF361*
WF363*
WF365*
WF364*
This manual is made with 100% recycled paper.
WF361_363_365-02832J-07_EN.indd 1 2014-2-22 15:58:00
Loading page 2...
Loading page 3...
Loading page 4...
Loading page 5...
Loading page 6...
Loading page 7...
Loading page 8...
Loading page 9...
Loading page 10...
Loading page 11...
Loading page 12...
Loading page 13...
Loading page 14...
Loading page 15...
Loading page 16...
Loading page 17...
Loading page 18...
Loading page 19...
Loading page 20...
Loading page 21...
Loading page 22...
Loading page 23...
Loading page 24...
Loading page 25...
Loading page 26...
Loading page 27...
Loading page 28...
Loading page 29...
Loading page 30...
Loading page 31...
Loading page 32...
Loading page 33...
Loading page 34...
Loading page 35...
Loading page 36...
Loading page 37...
Loading page 38...
Loading page 39...
Loading page 40...
Loading page 41...
Loading page 42...
Loading page 43...
Loading page 44...
Loading page 45...
Loading page 46...
Loading page 47...
Loading page 48...
Loading page 49...
Loading page 50...
Loading page 51...
Loading page 52...
Loading page 53...
Loading page 54...
Loading page 55...
Loading page 56...
Loading page 57...
Loading page 58...
Loading page 59...
Loading page 60...
Loading page 61...
Loading page 62...
Loading page 63...
Loading page 64...
Loading page 65...
Loading page 66...
Loading page 67...
Loading page 68...
Loading page 69...
Loading page 70...
Loading page 71...
Loading page 72...
Loading page 73...
Loading page 74...
Loading page 75...
Loading page 76...
Loading page 77...
Loading page 78...
Loading page 79...
Loading page 80...
Loading page 81...
Loading page 82...
Loading page 83...
Loading page 84...
Loading page 85...
Loading page 86...
Loading page 87...
Loading page 88...
Loading page 89...
Loading page 90...
Loading page 91...
Loading page 92...
Loading page 93...
Loading page 94...
Loading page 95...
Loading page 96...
Loading page 97...
Loading page 98...
Loading page 99...
Loading page 100...
Loading page 101...
Loading page 102...
Loading page 103...
Loading page 104...
Loading page 105...
Loading page 106...
Loading page 107...
Loading page 108...
Loading page 109...
Loading page 110...
Loading page 111...
Loading page 112...
Loading page 113...
Loading page 114...
Loading page 115...
Loading page 116...
Loading page 117...
Loading page 118...
Loading page 119...
Loading page 120...
Loading page 121...
Loading page 122...
Loading page 123...
Loading page 124...
Loading page 125...
Loading page 126...
Loading page 127...
Loading page 128...
Loading page 129...
Loading page 130...
Loading page 131...
Loading page 132...

User Manual - Transcript

  • Page 1 - English - : Washing Machine user manual Imagine the possibilities Thank you for purchasing this Samsung product WF361 WF363 WF365 WF364 This manual is made with 100 recycled paper WF36136336502832J07ENindd 1 2014222 155800
  • Page 2 - English - : 2 features of your new washer features of your new washer 1 Extra Large Capacity Even bulky garments and blankets get super clean The large capacity leaves enough room for a more thorough cleaner wash 2 VRT Vibration Reduction Technology This Samsung washer performs smoothly at top spin speeds minimizing noise and vibration 3 Direct Drive Inverter Motor The power to handle anything Our directdrive inverter motor delivers power right to the washer tub from a variable speed reversible motor A beltless directdrive motor generates a higher spin speed of 1100 rpms for more effective quiet operation The washer also has fewer moving parts meaning fewer repairs 4 Sanitize When you select the NSF certified Sanitize cycle the water heats to an extra high temperature and removes 999 of certain bacteria typically found on clothing bedding or towels This certification is awarded by NSF International an independent thirdparty testing and certification organization Please check the garment care label to avoid garment damage Only sanitizing cycles have been designed to meet the requirements of this protocol for sanitization efficacy 5 Pure Cycle TM Using the Pure Cycle drum cleaning process helps to keep your washing machine clean even without any chemical detergent or bleach Keep your drum cleansed and odourless with this specialized cleaning program 6 Child Lock The Child Lock function ensures that curious little hands are kept out of your washing machine This safety feature stops your children from playing with the operation of the washing machine and alerts you when it is activated 7 Delay Start Delay a cycle for up to 19 hours in onehour increments and increase the convenience of using your washing machine especially when you have to go out NSF Protocol P172 Sanitization Performance of Residential and Commercial FamilySized Clothes washers WF36136336502832J07ENindd 2 2014222 155801
  • Page 3 - English - : features of your new washer 3 Pedestal with Storage Drawers Model No WE357 An optional 15 pedestal is available to raise the washer for easier loading and unloading The pedestal also offers a builtin storage drawer that can hold a 100 oz bottle of detergent 9 Stacking Model No SK3A1XAA SK4AXAA SK5AXAA Samsung washers and dryers can be stacked to maximize usable space An optional stacking kit is available for purchase from your Samsung retailer ltPedestal with Storage Drawersgt ltStackinggt WF36136336502832J07ENindd 3 2014222 155801
  • Page 4 - English - : 4 safety information safety information Congratulations on your new Samsung washer This manual contains important information on the installation use and care of your appliance Please take time to read this manual to take full advantage of your washers many benefits and features WHAT YOU NEED TO KNOW ABOUT SAFETY INSTRUCTIONS Warnings and Important Safety Instructions in this manual do not cover all possible conditions and situations that may occur It is your responsibility to use common sense caution and care when installing maintaining and operating your washer IMPORTANT SAFETY SYMBOLS AND PRECAUTIONS What the icons and signs in this user manual mean WARNING Hazards or unsafe practices that may result in severe personal injury or death To reduce the risk of fire explosion electric shock or personal injury when using your washer follow these basic safety precautions CAUTION Hazards or unsafe practices that may result in minor personal injury or property damage Do NOT attempt Do NOT disassemble Do NOT touch Follow directions explicitly Unplug the power plug from the wall socket Make sure the machine is grounded to prevent electric shock Call the service center for help Note These warning signs are here to prevent injury to you and others Please follow them explicitly After reading this section keep it in a safe place for future reference Read all instructions before using the appliance SAVE THESE INSTRUCTIONS WF36136336502832J07ENindd 4 2014222 155801
  • Page 5 - English - : safety information 5 WARNING To reduce the risk of fire electric shock or injury to persons when using your appliance follow basic precautions including the following 1 Read all instructions before using the appliance 2 Do not wash or dry articles that have been previously cleaned in washed in soaked in or spotted with gasoline drycleaning solvents other flammable or explosive substances as they give off vapors that could ignite or explode 3 Do not allow children to play on or in the appliance Close supervision of children is necessary when the appliance is used near children 4 Before the appliance is removed from service or discarded remove the door to the washing or drying compartment 5 Do not reach into the appliance if the drum is moving 6 Do not install or store this appliance where it will be exposed to the weather 7 Do not tamper with controls 8 Do not repair or replace any part of the appliance or attempt any servicing unless specifically recommended in the usermaintenance instructions or in published user repair instructions that you understand and have the skills to carry out 9 Do not add gasoline drycleaning solvents or other flammable or explosive substances to the wash water These substances give off vapors that could ignite or explode 10 Under certain conditions hydrogen gas may be produced in a hot water system that has not been used for 2 weeks or more HYDROGEN GAS IS EXPLOSIVE If the hot water system has not been used for such a period before using a washer or combination washerdryer turn on all hot water faucets and let the water flow from each for several minutes This will release any accumulated hydrogen gas As the gas is flammable do not smoke or use an open flame during this time State of California Proposition 65 Warnings WARNING This product contains chemicals known to the State of California to cause cancer and reproductive toxicity WARNING WARNING SAVE THESE INSTRUCTIONS WF36136336502832J07ENindd 5 2014222 155801
  • Page 6 - English - : 6 safety information safety information CRITICAL INSTALLATION WARNINGS Plug the power cord into an AC 120 V 60 Hz 15 A wall socket or higher and use the socket for this appliance only In addition do not use an extension cord Sharing a wall socket with other appliances using a power strip or using an extension chord may result in electric shock or fire Do not use an electric transformer It may result in electric shock or fire Ensure that the voltage frequency and amperage provided at the wall socket match the power specifications of the product The installation of this appliance must be performed by a qualified technician or service company Failing to do so may result in electric shock fire an explosion problems with the product or injury Remove all foreign substances such as dust or water from the power plug terminals and contact points using a dry cloth on a regular basis Unplug the power plug and clean it with a dry cloth Failing to do so may result in electric shock or fire Plug the power plug into the wall socket in the right direction so that the cord runs towards the floor If you plug the power plug into the socket in the opposite direction the electric wires within the cable may be damaged and this may result in electric shock or fire This appliance must be properly grounded Do not ground the appliance to a gas pipe plastic water pipe or telephone line This may result in electric shock fire an explosion or problems with the product Never plug the power cord into a socket that is not grounded correctly and make sure that it is in accordance with local and national codes Do not install this appliance near a heater or inflammable material Do not install this appliance in a humid oily or dusty location in a location exposed to direct sunlight and water rain drops Do not install this appliance in a location where gas may leak This may result in electric shock or fire Plug the power plug into the wall socket firmly Do not use a damaged power plug damaged power cord or loose wall socket This may result in electric shock or fire Do not pull or excessively bend the power cord Do not twist or tie the power cord Do not hook the power cord over a metal object place a heavy object on the power cord insert the power cord between objects or push the power cord into the space behind the appliance This may result in electric shock or fire Do not pull the power cord when unplugging the power plug Unplug the power plug by holding the plug Failing to do so may result in electric shock or fire If the power plug or power cord is damaged contact your nearest service center SAVE THESE INSTRUCTIONS WARNING WF36136336502832J07ENindd 6 2014222 155801
  • Page 7 - English - : safety information 7 INSTALLATION CAUTIONS Position the appliance so that the power plug is easily accessible Failing to do so may result in electric shock or fire due to electric leakage Install your appliance on a level and hard floor that can support its weight Failing to do so may result in abnormal vibrations noise or problems with the product Unplug the power plug when the appliance is not being used for long periods of time or during a thunderlightning storm Failing to do so may result in electric shock or fire CRITICAL USAGE WARNINGS If the appliance is flooded cut the power immediately and contact your nearest service center If the appliance emits a strange noise a burning smell or smoke unplug the power plug immediately and contact your nearest service center Failing to do so may result in electric shock or fire In the event of a gas leak such as propane gas LP gas etc ventilate immediately without touching the power plug Do not touch the appliance or power cord Do not use a ventilating fan A spark may result in an explosion or fire Do not wash items contaminated with gasoline kerosene benzene paint thinner alcohol or other flammable or explosive substances This may result in electric shock fire or an explosion Do not open the washer door by force while the washer is operating hightemperature washing dryingspinning Water flowing out of the washer may result in burns or cause the floor to be slippery This may result in injury Opening the door by force may result in damage to the product or personal injury Make sure to remove the packaging sponge styrofoam attached to the bottom of the washer before using it Do not insert your hand under the washer This may result in injury Do not touch the power plug with wet hands This may result in electric shock Do not turn the appliance off by unplugging the power plug while an operation is in progress Plugging the power plug into the wall socket again may cause a spark and result in electric shock or fire Keep all packaging materials well out of the reach of children as packaging materials can be dangerous to children If a child places a plastic bag over his or her head the child may sufficate Do not let children or infirm persons use this washer unsupervised Failing to do so may result in electric shock burns or injury Do not insert your hand or a metal object under the washer while it is operating This may result in injury Make sure the detergent drawer is closed before you put laundry into the washer or remove laundry from the washer If the detergent drawer is open you could strike the drawer with your head and injure yourself SAVE THESE INSTRUCTIONS CAUTION WARNING WF36136336502832J07ENindd 7 2014222 155801
  • Page 8 - English - : 8 safety information safety information Do not attempt to repair disassemble or modify the appliance yourself Do not use any fusesuch as cooper steel wire etc other than the standard fuse If you need to repair or reinstall the appliance contact your nearest service center Failing to do so may result in electric shock fire problems with the product or injury If water has enters the appliance anywhere but the drum unplug the power plug and contact your nearest service center Failing to do so may result in electric shock or fire When the water supply hose comes loose from the faucet and floods the appliance unplug the power plug Failing to do so may result in electric shock or fire If any foreign substance enters the appliance unplug the power plug and contact you nearest service center Failing to do so my result in electric shock or fire USAGE CAUTIONS If the washer is contaminated by a foreign substance such as detergent dirt food waste etc unplug the power plug and clean the washer using a damp soft cloth Failing to do so may result in discoloration deformation damage or rust If struck hard the front glass can break Take care when using the washer If the glass is broken it may result in injury After a water supply failure or when reconnecting the water supply hose open the faucet slowly Open the faucet slowly after a long period of nonuse The air pressure in the water supply hose or the water pipe may result in damage to a part or in water leakage If a drain error occurs during an operation check if there is a drainage problem If the washer is used when it is flooded because of a drainage problem it may result in electric shock or fire due to electric leakage Insert the laundry into the washer completely so that laundry does not get caught in the door If laundry gets caught in the door it may result in damage to the laundry or the washer or result in water leakage Ensure that the faucet is turned off when the washer is not being used Ensure that the fittings on the water supply hoses are firmly connected to the faucets and properly tightened Failing to do so may result in property damage or injury Take care that the Rubber Seal and the Front Door Glass are not contaminated by a foreign substance eg waste thread hair etc If a foreign substance is caught in the door or the door is not completely closed it may cause water leakage Open the faucets and check if the water supply hose connectors are firmly tightened and that there is no water leaking before using the product If the water supply hose connectors are loose it may result in water leakage The product you have purchased is designed for domestic use only The use for business purposes qualifies as product misuse If used for business the product will not be covered by the standard warranty provided by Samsung and no responsibility can be attributed to Samsung for malfunctions or damage resulting from such misuse SAVE THESE INSTRUCTIONS CAUTION WF36136336502832J07ENindd 8 2014222 155801
  • Page 9 - English - : safety information 9 If the wash is not started and the laundry is left for a period of time after you have added detergent or applied stain remover or pretreatment the laundry may be discolored Select the recommended cycle and temperature on the basis of the laundry items sort the laundry by color on the basis of its colorfastness and select the appropriate cycle Make sure that foreign objects such as pins buttons and coins are removed from clothing items when adding laundry to the washer Wash dirty laundry separately from relatively clean items and wash fragile items separately from tougher textiles If an item is stained wash it as soon as possible Use stain remover or detergent only after testing the colorfastness of the item by applying a small quantity to an inside seam Do not stand on top of the appliance or place objects such as laundry lighted candles lighted cigarettes dishes chemicals metal objects etc on the appliance This may result in electric shock fire problems with the product or injury Do not operate the appliance with wet hands This may result in electric shock Do not spray volatile material such as insecticide onto the surface of the appliance As well as being harmful to humans it may also result in electric shock fire or problems with the product Do not place an object that generates a electromagnetic field near the washer This may result in injury due to a malfunction Since the water drained during a hightemperature wash or drying cycle is hot do not touch the water This may result in burns or injury Do not wash spin or dry waterproof seats mats or clothing Do not wash thick hard mats even if the washer mark is on the care label This may result in injury or damage to the washer walls floor or clothing due to abnormal vibrations Items not to wash Woolen Bedding PLUS rain covers fishing vests ski pants sleeping bags diaper covers sweat suits and bicycle motor cycle car covers etc Do not operate the washer when the detergent dispenser is open or removed This may result in electric shock or injury due to water leakage Do not touch the inside of the tub during or just after drying as it is hot This may result in burns Do not insert your hand into the detergent dispenser after opening it This may result in injury as your hand may be caught Do not place any nonlaundry objects such as shoes food waste or animals into the washer This can cause abnormal vibrations that can damage the washer and in the case of pets cause severe injury or death Do not press the buttons using sharp objects such as pins knifes fingernails etc This may result in electric shock or injury Do not wash laundry contaminated by oils creams or lotions usually found in skincare shops or massage clinics This may result in the rubber seal becoming deformed and water leakage SAVE THESE INSTRUCTIONS WF36136336502832J07ENindd 9 2014222 155801
  • Page 10 - English - : 10 safety information safety information Do not leave metal objects safety pins hair pins etc or bleach in the tub for long periods of time This may cause the tub to rust If rust appears on the surface of the tub apply a neutral cleansing agent to the surface and use a sponge to clean it Never use a metal brush Do not use dry cleaning detergent directly and do not wash rinse or spin laundry contaminated by dry cleaning detergent This may result in spontaneous combustion or ignition due to the heat from the oxidation of the oil Do not use hot water from water coolingheating devices This may result in problems with the washer Do not use natural handwashing soap in the washer If it hardens and accumulates inside the washer it may result in problems with the product discoloration rust or bad odors Do not wash large laundry items such as Bedding PLUS in the washing net Failing to do so may result in injury due to abnormal vibrations Place smaller items such as lace socks and lingerie in the washing net Do not use hardened detergent If it accumulates inside the washer it may result in water leakage Do not wash throw rugs or doormats If you wash throw rugs or doormats sand will accumulate inside the washer The sand can prevent the washer from draining properly Take care that childrens fingers are not caught in the door when closing it This may result in injury CRITICAL CLEANING INSTRUCTIONS Do not clean the appliance by spraying water directly onto it Do not use the strong acid cleaning agent Do not use benzene thinner or alcohol to clean the appliance This may result in discoloration deformation damage electric shock or fire Before cleaning or performing maintenance unplug the appliance from the wall socket Failing to do so may result in electric shock or fire SAVE THESE INSTRUCTIONS WARNING WF36136336502832J07ENindd 10 2014222 155802
  • Page 11 - English - : contents 11 contents SETTING UP YOUR WASHER 12 Checking the parts 13 Meeting installation requirements 13 Electrical supply 13 Grounding 13 Water 13 Drain facility 14 Flooring 14 Location considerations 14 Alcove or closet installation washer only 14 Undercounter installation washer only 15 With optional pedestal base or stacking kit 16 Installing your washer 16 Installation flow chart WASHING A LOAD OF LAUNDRY 19 Loading your washer 19 Getting started 20 Overview of the control panel 22 Child Lock 23 Spin Only 23 Garment 23 Using steam wash WF363 WF365 23 ATC Auto Temperature Control 24 Detergent use 24 Features CLEANING AND MAINTAINING YOUR WASHER 26 Cleaning the exterior 26 Cleaning the interior 26 Cleaning the dispensers 26 Storing your washer 27 Cleaning the debris filter 28 Cleaning the door sealbellow 28 Preserving the top cover and the front frame 29 Pure cycle tm TROUBLESHOOTING AND INFORMATION CODES 30 Check these solutions if your washer 32 Information codes APPENDIX 34 Fabric care chart 35 Helping the environment 35 Declaration of conformity 35 Specifications 36 Cycle chart WF36136336502832J07ENindd 11 2014222 155802
  • Page 12 - English - : 12 setting up your washer setting up your washer CHECKING THE PARTS Unpack your washer and inspect it for shipping damage Make sure you have received all of the items shown below If your washer was damaged during shipping or you do not have all of the items contact 1800SAMSUNG 18007267864 To prevent personal injury or strain wear protective gloves whenever lifting or carrying the unit Packing materials can be dangerous to children Keep all packing material plastic bags polystyrene etc well out of childrens reach If a child places a plastic bag over his or her head the child may sufficate Parts supplied Wrench Bolt hole covers Water supply hoses Hose guide Manual book Tools needed Pliers Flat screwdriver Bolt hole covers The number of bolt hole covers depends on the model 36 covers WARNING Cold water supply hose Hot water supply hose Drain hose Adjustable legs Detergent drawer Control panel Door Emergency drain tube Tub Debris filter Filter cover Plug Work top WF36136336502832J07ENindd 12 2014222 155804
  • Page 13 - English - : setting up your washer 13 MEETING INSTALLATION REQUIREMENTS Electrical supply 120 Volt 60 Hz 15 AMP fuse or circuit breaker Individual branch circuit serving only your washer is recommended Your washer is equipped with a power cord Never use an extension cord Grounding ELECTRICAL GROUNDING IS REQUIRED FOR THIS APPLIANCE This appliance must be grounded In the event of malfunction or breakdown grounding will reduce the risk of electric shock by providing a path of least resistance for electric current This appliance is equipped with a power cord having a threeprong grounding plug for use in a properly installed and grounded outlet The plug must be plugged into an appropriate outlet that is properly installed and grounded in accordance with all local codes and ordinances Improper connection of the equipmentgrounding conductor can result in a risk of electrical shock Check with a qualified electrician or serviceman if you are not sure whether the appliance is properly grounded Do not modify the plug provided with the appliance If it does not fit the outlet have a proper outlet installed by a qualified electrician IMPORTANT SAFETY PRECAUTIONS To prevent unnecessary risk of fire electrical shock or personal injury all wiring and grounding must be done in accordance with the National Electrical Code ANSIFNPA No 70 Latest Revision and local codes and ordinances It is the personal responsibility of the appliance owner to provide adequate electrical service for this appliance Never connect the ground wire to plastic plumbing lines gas lines or hot water pipes Water To correctly fill your washer in the proper amount of time water pressure of 20116 psi 137 800 kPa is required Water pressure less than 20 psi 137 kPa may cause water valve failure may not allow the water valve to shut off completely or may extend the fill time beyond what your washer controls allow resulting in your washer turning off A time limit is built into the controls to prevent flooding if a hose becomes loose The water faucets must be within 4 ft 122 cm of the back of your washer to match the inlet hose provided with your washer Accessory inlet hoses are available in various lengths up to 10 ft 305 cm for faucets that are further away from the back of your washer To avoid the possibility of water damage Have water faucets easily accessible Turn off faucets when the washer is not in use Periodically check that there is no leakage from the water inlet hose fittings Check all connections at the water valve and faucet for leaks Drain facility If you use a standpipe the recommended height of the standpipe is 18 in 46 cm The drain hose must be routed through the drain hose clip to the standpipe The standpipe must be large enough to accept the outside diameter of the drain hose The drain hose is attached the factory 01 setting up your washer CAUTION CAUTION WARNING WARNING WF36136336502832J07ENindd 13 2014222 155804
  • Page 14 - English - : 14 setting up your washer setting up your washer Flooring For best performance your washer must be installed on a solidly constructed floor Wood floors may need to be reinforced to minimize vibration andor unbalanced load situations Carpeting and soft tile surfaces are contributing factors to vibration which can cause your washer to move slightly during the spin cycle Never install your washer on a platform or weakly supported structure Location considerations Do not install your washer in areas where water may freeze since your washer will always retain some water water in its water valve pump and hose areas This can cause damage to the pump hoses and other components Alcove or closet installation washer only MINIMUM CLEARANCES FOR CLOSET AND ALCOVE INSTALLATIONS Sides 1 In 25 cm Rear 59 In 15 cm Top 17 In 432 cm Closet Front 2 In 51 cm If the washer and a dryer are installed together the closet front must have at least a 72 in² 465 cm² unobstructed air opening Your washer alone does not require a specific air opening A Recessed area B Side view closet or confined area Undercounter installation washer only CAUTION 1 in 25 cm 1 in 25 cm 27 in 686 cm 39 in 99 cm 1 in 25 cm 1 in 25 cm 1 in 25 cm 27 in 686 cm 27 in 686 cm A 2 in 5 cm 59 in 15 cm 311 in 80 cm 17 in 432 cm B WF36136336502832J07ENindd 14 2014222 155807
  • Page 15 - English - : setting up your washer 15 With optional pedestal base or stacking kit Required Dimensions for Installation With Pedestal Required Dimensions for Installation With Stacking Kit Required spacing External exhaust elbow requires additional space 01 setting up your washer 1 in 25 cm 27 in 686 cm 76 in 193 cm 6 in 152 cm Closet or Door 48 in² 310 cm² 24 in² 155 cm² 3 in 76 cm 3 in 76 cm 1 in 25 cm 311 in 80 cm 59 in 15 cm 5 in 127 cm 27 in 686 cm 38 in 965 cm 53 in 1346 cm 59 in 15 cm 311 in 80 cm 508 in 129 cm to clear open door WF36136336502832J07ENindd 15 2014222 155808
  • Page 16 - English - : 16 setting up your washer INSTALLING YOUR WASHER Before STEP 5 is complete do not plug the power cord into a wall socket Packaging materials can be dangerous to children keep all packaging material plastic bags polystyrene etc well out of the reach of children Installation flow chart Selecting a location Finish the installation Removing the shipping bolts Drum only Connecting the water and the drain Adjusting the levelling feet Powering your washing machine Running a test cycle Run a test cycle RinseSpin with small amount of laundary about 45 Towels Yes Please check again before steps No Does your washer have excess vibration or noise STEP 1 Selecting a location Before you install the washer make sure the location Hasahardlevelsurfacewithoutcarpetingorflooringthatmayobstructventilation Hasnodustoildetergentetc Isawayfromdirectsunlight Hasadequateventilation Willnothavetemperaturesatorbelow32For0C Isawayfromheatsourcessuchasoilorgas Hasenoughspacesothatthewasherdoesntstandonitspowercord STEP 2 Removing the Shipping Bolts Before using your washer you must remove all shipping bolts from the back of the unit 1 Loosen all the bolts with the supplied wrench 2 Slide the bolt and spacer up and remove the bolt with the spacer through the hole in the rear wall of your washer Repeat for each bolt 3 Fill the holes with the supplied plastic covers 4 Keep the shipping bolts and spacers for future use setting up your washer WARNING CAUTION WF36136336502832J07ENindd 16 2014222 155809
  • Page 17 - English - : setting up your washer 17 STEP 3 Installing your washer 1 Place the drain hose in the drain facility tub sink or standpipe If you connect the drain hose to a standpipe be sure an airtight connection is NOT made between the drain hose and the standpipe The standpipe must be at least 18 inches or 46 cm high and no higher than 96 inches You must always exercise caution to avoid collapsing or damaging the drain hose For best results the drain hose should not be restricted in any way by elbows couplings or excessive length For situations where the drain hose cannot be conveniently elevated to at least 18 in or 46 cm the drain hose must be supported If drain hose is installed below 1846cm water can be drained in cycle working cause of siphon phenomenon It causes the washer to nF error Drain Hose can be installed until 96245cm maximum But drain capability can be reduced at this height It causes the washer to have odor because of remained water in the drain system Connection the hose guide within 615cm from the end of the drain hose If the drain hose is extended more than 615cm beyond the end of the hose guide mold or microorganisms could spread to the inside of the washer 2 Before connecting the inlet hoses to the water faucets make sure a washer is inside each coupling on both ends 3 Thread the inlet hoses onto the HOT and COLD faucet connections on the washer Attach the other end of each fill hose to a water valve Make sure the hose with Hot printed on it is attached to the HOT faucet Tighten by hand until snug then tighten twothirds of a turn with pliers For correct water use connect both HOT and COLD water valves If either or both are not connected an nF no fill error can occur 1RPRUHWKDQ ರFP RVHXLGH 01 setting up your washer 96 Max 18 Min 96 Max 18 Min Hose retainer Tie strap Laundry tub Stand pipe Rubber washer Coupling Cold Hot WF36136336502832J07ENindd 17 2014222 155810
  • Page 18 - English - : 18 setting up your washer 4 Turn on the HOT and COLD water supply and check all connections at the water valve and the faucet for leaks 5 Slide your washer into position 6 Level your washer by turning the leveling legs in or out as necessary by hand or by using the wrench included with your washer When your washer is level tighten the locking nuts using the wrench or flathead screwdriver 7 Plug the power cord into a 3prong well grounded 120 volt 60 Hz approved electrical outlet protected by a 15amp fuse or comparable circuit breaker Your washer is grounded through the third prong of the power cord when plugged into a threeprong grounded receptacle Your washer must be leveled on all four sides Use a carpenters level on all four corners of your washer to ensure its level Its also a good idea to recheck the leveling after the first dozen washes Avoid damage to the legs Do not move the washer unless the locking nuts are fastened to the bottom of the washer Test run Make sure that you install your washing machine correctly by running the RinseSpin cycle after the installation is complete setting up your washer Cold printed Hot printed WF36136336502832J07ENindd 18 2014222 155812
  • Page 19 - English - : washing a load of laundry 19 washing a load of laundry To reduce the risk of fire electric shock or injury to persons read the IMPORTANT SAFETY INSTRUCTIONS before operating this appliance LOADING YOUR WASHER You can fill the tub with dry unfolded clothes but DO NOT OVERLOAD the tub Overloading may reduce washing efficiency cause excess wear and possibly cause creasing or wrinkling of the load Wash delicate items such as bras hosiery and other lingerie in the Delicates cycle with similar lightweight items When washing big bulky items or a few smaller items that dont fill the tub completely a rug a pillow stuffed toys or one or two sweaters for example add a few towels to improve tumbling and spin performance During the spin cycle the washer may add water to redistribute any imbalance inside the drum To ensure good cleaning results when washing heavily soiled loads do not overload your washer To add a forgotten item 1 Press the Power button 2 Press the StartPause Button 3 Wait for the Door Lock light to go out 5 seconds 4 Add the item close the door and press the StartPause Button After a 10second pause the cycle resumes To ensure thorough cleaning add items within five minutes of starting the wash cycle GETTING STARTED 1 Load your washer 2 Close the door 3 Press the Power button 4 Add detergent and additives to the dispenser see pages 2425 5 Select the appropriate cycle and options for the load see pages 2021 6 Press the StartPause Button 7 The Wash Indicator light illuminates 8 The estimated cycle time appears in the display The time may fluctuate to indicate the time remaining in the cycle better The actual time required for a cycle may differ from the estimated time in the display depending on the water pressure water temperature detergent and laundry 9 Before your washer starts to fill it will make a series of clicking noises to check the door lock and do a quick drain When the cycle is complete the Door Lock light goes out and End appears in the display DO NOT attempt to open the door until the Door Lock light is off To add a forgotten item see the Loading your washer section page 19 When you restart your washer after a pause expect a delay of up to 15 seconds before the cycle continues Pressing Power cancels the cycle and stops your washer The Wash Rinse and Spin indicator lights illuminate during those portions of the cycle Do not place anything on top of your washer while it is running 02 washing a load of laundry WARNING WARNING WF36136336502832J07ENindd 19 2014222 155812
  • Page 20 - English - : 20 washing a load of laundry OVERVIEW OF THE CONTROL PANEL Cycle Selector Select the appropriate cycle for the type of load This will determine the tumble pattern and spin speed for the cycle Normal For most fabrics including cottons linens and normally soiled garments Heavy Duty For sturdy colorfast fabrics and heavily soiled garments Perm Press For washandwear synthetic fabrics and lightly to normally soiled garments To minimize wrinkling of laundry select the Perm Press cycle Sanitize For heavily soiled colorfast garments This cycle heats the water to 150 F to eliminate bacteria washing a load of laundry 2 7 6 8 WF36136336502832J07ENindd 20 2014222 155815
  • Page 21 - English - : washing a load of laundry 21 If you select Pause during the heating portion of the Sanitize Cycle your washer door will remain locked for your safety Pure Cycle TM Use for drum cleaning It cleanses the drum of dirt and bacteria Regular use after every 40 washes is recommended No detergent or bleach needed WF365WF364 DelicatesHand Wash For sheer fabrics bras lingerie silk and other hand washonly fabrics For best results use liquid detergent Wool For machinewashable wool Loads should be under 8 pounds For best resultes we recommend a load of 44 pounds or less The Wool cycle washes laundry by moving the wash drum horizontally to maintain the characteristics of the wool fibers and to prevent damage to the cloth It then stops for a while to allow the laundry to soak in the water This pause in the operation of the Wool cycle is normal We recommend you use a neutral detergent to prevent damage to the cloth and to improve the washing results Quick Wash For lightly soiled garments needed quickly Rinse Spin Use for loads that need rinsing only or to add rinseadded fabric softener to a load Digital graphic display Displays the remaining cycle time all cycle information and error messages Extra Rinse button WF361WF364 Add an additional rinse at the end of the cycle to more thoroughly remove laundry additives and perfumes Temperature selection button Press the Temp button repeatedly to cycle through the different water temperature options Hot Whites and heavily soiled colorfast items Warm Colorfast items When you select warm rinse only the final rinse will be warm The other rinses will be cold to conserve energy Eco Warm Moderately soiled colorfast items most wrinklefree items Cold Brightly colored very lightly soiled items Spin selection button Press the Spin button repeatedly to cycle through the different spin speed options High Use for underwear tshirts jeans and sturdy cottons Medium Use for jeans wrinklefree or washandwear items and synthetics Low Use for delicate items needing a slow spin speed No Spin Drains your washer without spinning Use for extremely delicate items that cannot tolerate any spin Spin Only Only the spin cycle is performed Soil Level selection button Press the Soil Level button to select the Soil Levelwashing time Heavy For heavily soiled loads Normal For moderately soiled loads This setting is best for most loads WF365 WF364 Light For lightly soiled loads Delay Start button You can delay any cycle for up to 19 hours in onehour increments Displayed hour indicates the time at which the wash will be started StartPause selection button Press to pause and restart programs Power button Press once to turn your washer on Press again to turn your washer off If the washer is left on for more than 10 minutes without any buttons being touched the power automatically turns off Steam button WF363 WF365 Press this button to use the steam wash function Steam wash is available with Normal Heavy Duty Perm Press Sanitize cycles For heavily soiled colorfast garments Steam wash improves stain treatment and use less water of each cycle See page 23 Signal selection button WF361 WF363 Press the signal button to turn the signal on or off Pure Cycle Use for drum cleaning It cleanses drum of dirt and bacteria Regular use after every 40 washes is recommended No detergent or bleach needed see page 29 02 washing a load of laundry WF36136336502832J07ENindd 21 2014222 155816
  • Page 22 - English - : 22 washing a load of laundry washing a load of laundry Child Lock Child Lock prevents children from playing with your washer Activating the Child Lock function Press and hold both the Spin and Soil Level buttons simultaneously for approximately 3 seconds When you activate the Child Lock function the door locks and the Child Lock lamp illuminates If you press the StartPause button after you have activated the Child Lock function none of the buttons will work except for the Power button If you press a button when the buttons are locked the Child Lock lamp blinks Pausing the Child Lock function When the door is locked or the buttons are locked by the Child Lock function you can pause the Child Lock operation for 1 minute by pressing and holding both the Spin and Soil Level buttons simultaneously for approximately 3 seconds If you pause the Child Lock mode temporarily the door lock is released for 1 minute for user convenience During this period the Child Lock lamp blinks If you open the door after the minute is over an alarm sounds for up to 2 minutes If you close the door within the 2 minutes the door is locked and the Child Lock function is reactivated If you close the door after the 2 minutes the door is not locked automatically and no alarm sounds Deactivating the Child Lock function Press and hold both the Spin and Soil Level buttons simultaneously for approximately 6 seconds When you deactivate the Child Lock function the door is unlocked and the Child Lock is turned off TheChildLockfunctionpreventschildrenortheinfirmfromaccidentlyoperatingthe washer and injuring themselves Ifachildentersthewashingmachinethechildmaybecometrappedandsuffocate OnceyouhaveactivatedtheChildLockfunctionitcontinuesworkingevenifthepower is turned off Openingthedoorbyforcecanresultininjuryordamagetotheproduct To add laundry after you have activated the Child Lock function you must first pause or deactivate the Child Lock function If you want to open the door of the washing machine when the Child Lock function is activated Pause or deactivate the Child Lock function CAUTION WARNING WF36136336502832J07ENindd 22 2014222 155817
  • Page 23 - English - : washing a load of laundry 23 Spin Only If you press the Power button and then press and hold the Spin button for 2 seconds the spin time will be displayed on the display panel Then press the Spin button repeatedly until the required spin level is selected and then press the StartPause button Before pressing the Spin Only button to use the Spin Only function you can select a cycle with the Cycle Selector If you have selected a cycle you can only select the spin level corresponding to the selected cycle Garment You can add or take out laundry items even after the wash has started as long as the Garment light is turned on Pressing the StartPause button unlocks the door unless the water is too hot or if there is too much water in your washer If you are able to unlock the door and wish to continue the wash cycle close the door and then press the StartPause button USING STEAM WASH WF363 WF365 If you select steam the steam acts at the most effective times for the detected amount of laundry maximizing the effect of the steam increasing the wash temperature enhancing the Soak effect and improving wash performance 1 Load the washer 2 Press the Power button 3 Turn the Cycle Selector and select a steam cycle 4 Press the Steam button 5 Add detergent into the dispenser tray for a wash and add fabric softener up to the marked line 6 Press the StartPause button The washer automatically selects the optimal wash conditions by sensing the weight of the laundry Steam may not necessarily be visible during the steam cycles and may not be present during an entire steam wash cycle ATC AUTO TEMPERATURE CONTROL ATC is the control function that the washer controls water temperature with temperature sensor thermistor Because there are numerous water temperatures depending on the customers environmentscold areas warm areas various water temperature settings of heater temperature etcs ATC function in our washer maintains the certain level of wash temperature to output the best washing performance at each cycle If you select normal amp heavy duty course those courses are the regulation and UL course Since new washer must reduce the amount of energy usage at first priority customer will notice more cold water entering the washer But This is Normal not a problem In those regulation course Hot temperature is similar to acceptable adult bathwater temperature and warm temperature is similar to comfortable swimmingpool water temperature If customer want to wash clothes in specific water temperature customer should choose a different course at each temperatureHotWarmEco Warm 02 washing a load of laundry WF36136336502832J07ENindd 23 2014222 155817
  • Page 24 - English - : 24 washing a load of laundry DETERGENT USE Your washer is designed to use high efficiency HE detergents For best cleaning results use high efficiency detergents such as Tide HE Wisk HE Cheer HE or Gain HE High efficiency detergents contain suds suppressors that reduce or eliminate suds When fewer suds are produced the load tumbles more efficiently and cleaning is maximized Regular detergent is NOT recommended Please use only HE detergents Reducing the amount of detergent may reduce the quality of cleaning It is important to pretreat stains sort carefully by color and soil level and avoid overloading Brand names are trademarks of their respective manufacturers FEATURES Automatic dispenser Your washer has separate compartments for dispensing detergent and colorsafe bleach chlorine bleach and fabric softener Add all laundry additives to their respective compartments before starting your washer The automatic dispenser MUST ALWAYS be in place before starting your washer DONOTopentheautomaticdispenserwhenyourwasheris running Never exceed the manufacturers recommendations when adding detergent This compartment holds liquid detergent for the main wash cycle which is added to the load at the beginning of the cycle When using powdered detergent remove the liquid detergent compartment from the detergent drawer The washer will not dispense powdered detergent from the liquid detergent compartment Detergent compartment 1 Pour the recommended amount of laundry detergent directly into the detergent compartment before starting your washer 2 If you are using colorsafe bleach add it with the detergent to the detergent compartment When adding colorsafe bleach with detergent it is best if both laundry products are in the same form powdered or liquid washing a load of laundry WARNING Liquid detergent compartment CAUTION WF36136336502832J07ENindd 24 2014222 155818
  • Page 25 - English - : washing a load of laundry 25 Bleach compartment Liquid chlorine bleach only 1 Add chlorine bleach to the bleach compartment DO NOT exceed the MAX FILL line 2 Avoid splashing or overfilling the compartment 3 Your washer automatically dispenses bleach into the tub at the appropriate time 4 The dispenser automatically dilutes liquid chlorine bleach before it reaches the wash load Never pour undiluted liquid chlorine bleach directly onto the load or into the tub It is a powerful chemical and can cause fabric damage such as weakening of the fibers or color loss if not used properly Oxitype boosters or colorsafe bleach can be added to the drum prior to adding laundry Put the laundry into the drum only after confirming that the oxitype boosters or colorsafe bleach has completely entered the hole of the drum Tousepowdereddetergentandpowderoxitype boosters or powdered colorsafe bleach at the same time it is more effective to put them in the drum together before adding the laundry When you use powdered detergent remember to remove the Liquid Detergent holder from the detergent compartment Fabric softener compartment 1 Pour the recommended amount of liquid fabric softener into the softener compartment For smaller loads use less than one capful 2 The dispenser automatically releases liquid fabric softener at the proper time during the rinse cycle Use the softener compartment ONLY for liquid fabric softeners If the Fabric Softener is highly concentrated thick it could remain in the Fabric Softener compartment after the wash cycle is completed If the Fabric Softener being used is highly concentrated dilute it with water Then add the diluted mixture up to the MAX FILL line in the Fabric Softener compartment DO NOT use the Downy Ball in the fabric softener compartment with this washer It will not add fabric softener at the appropriate time Use the detergent compartment Do not use liquid fabric softener that is too sticky as it may not mix with the water sufficiently Brand names are trademarks of their respective manufacturers Fabric Softener compartment Bleach compartment 02 washing a load of laundry WF36136336502832J07ENindd 25 2014222 155819
  • Page 26 - English - : 26 cleaning and maintaining your washer cleaning and maintaining your washer Keeping your washer clean improves its performance wards off unnecessary repairs and lengthens its life CLEANING THE EXTERIOR Turn off the water faucets after finishing the days washing This will shut off the water supply to your washer and prevent the unlikely possibility of damage from escaping water Leave the door open to allow the inside of your washer to dry out Use a soft cloth to wipe up all detergent bleach or other spills as they occur Clean the following as recommended Control Panel Clean with a soft damp cloth Do not use abrasive powders or cleaning pads Do not spray cleaners directly on the panel Cabinet Clean with soap and water CLEANING THE INTERIOR Clean the interior of your washer periodically to remove any dirt soil odor mold mildew or bacterial residue that may remain in your washer as a result of washing clothes Failure to follow these instructions may result in unpleasant conditions including odors andor permanent stains on your washer or laundry Hard water deposits may be removed if needed Use a cleanser labeled Washer safe CLEANING THE DISPENSERS You may need to clean the Automatic Dispenser periodically to remove laundry additive buildup 1 Pull the detergent liquid holder out of the detergent compartment 2 Remove the Siphon Cap from the fabric softener and bleach compartments 3 Wash all of the parts under running water 4 Clean the dispenser recess with a soft brush 5 Reinsert the Siphon Cap and push it firmly into place 6 Push the dispenser back into place 7 Run a Rinse Spin cycle without any load in your washer STORING YOUR WASHER Washers can be damaged if water is not removed from hoses and internal components before storage To prepare your washer for storage follow these steps 1 Select the Quick Wash cycle and add bleach to the automatic dispenser Run your washer through the cycle without a load 2 Turn the water faucets off and disconnect the inlet hoses 3 Unplug your washer from the electrical outlet and leave your washer door open to let air circulate inside the tumbler If you store your washer in belowfreezing temperatures allow time for any leftover water in your washer to thaw out before use Siphon cap WF36136336502832J07ENindd 26 2014222 155819
  • Page 27 - English - : cleaning and maintaining your washer 27 CLEANING THE DEBRIS FILTER We recommend cleaning the debris filter when water does not drain well or the nd error message is displayed 1 Open the filter cover by pressing and then pulling the handle of the filter cover with your finger 2 Holding the drain cap pull the drain tube that is hooked on the guide hook to the front Do not pull the drain tube with excessive force 3 Place a bowl under the washing machine to catch any remaining water Then hold the drain tube with one hand and turn the drain cap counter clockwise with the other hand to separate it from the drain tube 4 Drain the remaining water completely 5 Turn the debris cap counterclockwise and then pull the debris cap and debris filter assembly out of the washer 6 Wash any dirt or other material from the debris filter Make sure the drain pump propeller behind the debris filter is not blocked 7 When you have finished cleaning the filter insert the debris cap and filter assembly back into the washer Turn the debris filter cap clockwise until the indicator on the debris filter cap is in the 12 oclock position pointing to the indicator on the washer 8 Reattach the emergency drain cap to the drain tube and then hook the tube to the hook guide 9 Reinstall the filter cover Debris filter cap Filter cover Step 2Step 1 Drain cap Debris filter cap Debris filter 03 cleaning and maintaining WF36136336502832J07ENindd 27 2014222 155821
  • Page 28 - English - : 28 cleaning and maintaining your washer cleaning and maintaining your washer CLEANING THE DOOR SEALBELLOW 1 Open the washer door and remove any clothing or items from the washer 2 Inspect the gray colored sealbellow between the door opening and the basket for stained areas Pull back the sealbellow to inspect all areas under the sealbellow and to check for foreign objects 3 If you find stained areas wipe down these areas of the sealbellow using the procedure below a Mix a dilute solution containing ¾ cup 177 mL of liquid chlorine bleach and 1 gal 38 L of warm tap water b Wipe the sealbellow area with the dilute solution using a damp cloth c Let stand 5 minutes d Wipe down the area thoroughly with a dry cloth and let the washer interior air dry with the door open IMPORTANT Wear rubber gloves when cleaning for prolonged periods Refer to the bleach manufacturers instructions for proper use PRESERVING THE TOP COVER AND THE FRONT FRAME Do not place any heavy or sharp objects or a detergent box on the washer Keep them on the purchased pedestal or in a separate storage box Objects may scratch or damage the top cover or fall off the washer Since the entire washer has a highgloss finish the surface can be scratched or damaged Avoid scratching or damaging the surface when using the washer sealbellow CAUTION WF36136336502832J07ENindd 28 2014222 155822
  • Page 29 - English - : cleaning and maintaining your washer 29 PURE CYCLE TM Pure Cycle is a selfcleaning cycle that removes any mold from inside the washing machine 1 Press the Power button 2 Press the Pure Cycle button Once you have pressed the Pure Cycle button the only function you can set is the Delay Start function For WF365WF364 models Select the Pure Cycle cycle by turning the Cycle Selector 3 Press the StartPause button The Pure Cycle cycle will start The Pure Cycle Auto Alarm Function IfthePure Cycle button is lit after a wash it indicates that tub drum cleaning is required In this case remove the laundry from the washing machine turn the power on and clean the drum by running Pure Cycle IfyoudonotrunPureCyclethePure Cycle indicator turns off However the Pure Cycle indicator will light again after two washes Not running Pure Cycle at this point will not cause a problem with the washing machine AlthoughgenerallythePureCycleAutoAlarm appears once a month or so the frequency may differ depending on the number of times the washing machine is used 03 cleaning and maintaining WF36136336502832J07ENindd 29 2014222 155824
  • Page 30 - English - : 30 troubleshooting and information codes troubleshooting and information codes CHECK THESE SOLUTIONS IF YOUR WASHER PROBLEM SOLUTION Will not start Make sure the door is firmly closed Make sure your washer is plugged in Make sure the water source faucets are open Make sure to press the StartPause Button to start your washer Make sure the Child Lock is not activated See page 22 Before your washer starts to fill it will make a series of clicking noises as it checks the door lock and does a quick drain Check the fuse or reset the circuit breaker Has no water or not enough water Turn both faucets on fully Make sure the door is tightly closed Straighten the water inlet hoses The hose filter screens may be plugged Disconnect the hoses and clean the screens Open and close the door then press the StartPause Button Has detergent remains in the automatic dispenser after the wash cycle is complete Make sure your washer is running with sufficient water pressure Make sure the Detergent Selector dial is in the upper position when using granular detergent Vibrates or is too noisy Make sure your washer is set on a level surface If the surface is not level adjust your washers feet to level the appliance Make sure that the shipping bolts are removed Make sure your washer is not touching any other object Make sure the laundry load is balanced Stops Plug the power cord into a live electrical outlet Check the fuse or reset the circuit breaker Close the door and press the StartPause Button to start your washer For your safety your washer will not tumble or spin unless the door is closed Before your washer starts to fill it will make a series of clicking noises as it checks the door lock and does a quick drain There may be a pause or soak period in the cycle Wait and it may start Check the screens on the inlet hoses at the faucets for obstructions Clean the screens periodically WF36136336502832J07ENindd 30 2014222 155824
  • Page 31 - English - : troubleshooting and information codes 31 CHECK THESE SOLUTIONS IF YOUR WASHER PROBLEM SOLUTION Fills with the wrong temperature water Turn both faucets on fully Make sure the temperature selection is correct Make sure the hoses are connected to the correct faucets Flush the water lines Check your water heater It should be set to deliver a minimum 120 F 49 C hot water at the tap Also check the water heater capacity and recovery rate Disconnect the hoses and clean the screens The hose filter screens may be plugged As your washer is filling the water temperature may change as the automatic temperature control feature checks incoming water temperature This is normal While your washer is filling you may notice just hot andor just cold water going through the dispenser when cold or warm wash temperatures are selected This is a normal function of the automatic temperature control feature as your washer determines the temperature of the water Door locked or will not open Press the StartPause Button to stop your washer Your washer door will remain locked during the heating portion of the Sanitize Cycle It may take a few moments for the door lock mechanism to disengage Does not drain andor spin Check the fuse or reset the circuit breaker Straighten the drain hoses Eliminate kinked hoses If there is a drain restriction call for service Close the door and press the StartPause Button For your safety your washer will not tumble or spin unless the door is closed Make sure the debris filter is not clogged Load is too wet at the end of the cycle Use the High or Extra High spin speed Use high efficiency detergent to reduce oversudsing The load is too small Very small loads one or two items may become unbalanced and not spin out completely Leaks water Make sure the door is firmly closed Make sure all hose connections are tight Make sure the end of the drain hose is correctly inserted and secured to the drainage system Avoid overloading Use high efficiency detergent to prevent oversudsing Has excessive suds Use high efficiency detergent to prevent oversudsing Reduce the detergent amount for soft water small or lightly soiled loads Make sure you are using HE detergent There appears to be an insufficient amount of water The Front Loading washer provides maximum performance using a small amount of water Since the water fill is not completed at the beginning of the wash the amount of water may appear to be small Because the amount of time that water is supplied differs depending on the type of laundry the amount of water may seem small Since water is supplied from the bottom of the tub and the supplied water is absorbed by the laundry the amount of water may seem small Has an odor Excessive suds collect in nooks and crannies and can cause foul odors Run cleansing cycles to sanitize the machine periodically Silver Care or Sanitize Cycle or Pure Cycle Clean the door seal Diaphragm Dry the interior of your washer after the total cycle has finished 04 troubleshooting WF36136336502832J07ENindd 31 2014222 155824
  • Page 32 - English - : 32 troubleshooting and information codes INFORMATION CODES Information codes may be displayed to help you better understand what is occurring with your washer CODE SYMBOL MEANING SOLUTION Unbalanced load prevented your washer from spinning Redistribute the load press the StartPause Button Door is open when washer is running Close the door tightly and restart the cycle If the code reappears call for service Your washer failed to lock the door Close the door tightly and restart the cycle If the code reappears call for service Water temperature control problem Heater Control problem Call for service Your washer has tried to fill but has not reached the proper water level Call for service The door will not unlock Make sure the door is firmly closed Push the Power button to turn off your washer then turn it on again If the code reappears call for service Motor not running properly Restart the cycle by pressing the StartPause Button If the code reappears call for service Your washer is not draining It can also mean that the unit senses a small clog while draining First clean the drain filter Then do the following 1 Turn off the unit and turn it on again 2 Select only the Spin Cycle 3 Press the StartPause to drain the water Clean the debris filter If it still does not drain call for service Your washer has tried to fill but was unsuccessful Make sure the water faucets are open all the way Check for kinked hoses Check the inlet screens on the fill hoses If you use a Flood Safety Device then please remove the device and connect the water hoses directly to the unit Check if the hot water supply hose is connected You must connect the hot water supply hose because hot water is supplied by the Auto Temperature Control ATC function if the temperature of the cold water is lower than 59 F The hotcold water hose connection is not correct Please connect the hotcold water hose correctly Electric service was lost when the washer was running Restart the cycle by pressing the StartPause Button troubleshooting and information codes WF36136336502832J07ENindd 32 2014222 155827
  • Page 33 - English - : troubleshooting and information codes 33 Water detected over the safe water level Call for service Jammed Key Call for service Motor speed sensor problem Restart the cycle If the code reappears call for service Temperature sensor problem Restart the cycle If the code reappears call for service HighLow voltage detected Restart the cycle If the code reappears call for service Too much suds is detected during the washing session The unit is put on hold until the suds are reduced Then the unit will resume operation When it finishes washing the End and Sd codes will blink in turn To prevent reduce the amount of detergent For any codes not listed above call 18007267864 1800SAMSUNG 04 troubleshooting WF36136336502832J07ENindd 33 2014222 155828
  • Page 34 - English - : 34 appendix appendix FABRIC CARE CHART The following symbols provide garment care direction The clothing care labels include symbols for washing bleaching drying and ironing or dry cleaning when necessary The use of symbols ensures consistency among garment manufacturers of domestic and imported items Follow care label directions to maximize garment life and reduce laundering problems Wash Cycle Special Instructions Warning Symbols for Laundering Normal Line Dry Hang to Dry Do Not Wash Permanent Press Wrinkle Resistant Wrinkle Control Drip Dry Do Not Wring GentleDelicates Dry Flat Do Not Bleach Hand Wash Heat Setting Do Not Tumble Dry Water Temperature High No Steam added to iron Hot Medium Do Not Iron Warm Low Dryclean Cold Any Heat Dry Clean Bleach No HeatAir Do Not Dry Clean Any Bleach when needed IronDry or Steam Temperatures Line Dry Hang to Dry Only NonChlorine colorsafe Bleach when needed High Drip Dry Tumble Dry Cycle Medium Dry Flat Normal Low Permanent Press Wrinkle Resistant Wrinkle Control Gentle Delicates The dot symbols represent appropriate wash water temperatures for various items The temperature range for Hot is 105 125 F 41 52C for Warm 85 105 F29 41 C and for Cold 60 85 F16 29 C Wash water temperature must be a minimum of 60 F16C for detergent activation and effective cleaning The clothes washer cannot ensure these temperatures because the actual water temperatures entering your washer are dependent on water heater settings and regional water supply temperatures For example cold water entering the home in the northern states during winter may be 40 F4 C which is too cold for effective cleaning The water temperature in this situation will need to be adjusted by selecting a warm setting adding some hot water to the MAX FILL line or using your washers heating option if available WF36136336502832J07ENindd 34 2014222 155828
  • Page 35 - English - : appendix 35 HELPING THE ENVIRONMENT Your washer is manufactured from recyclable materials If you decide to dispose of it please observe local waste disposal regulations Cut off the power cord so that the appliance cannot be connected to a power source Remove the door so that animals and small children cannot get trapped inside the appliance Do not exceed the detergent quantities recommended in the detergent manufacturers instructions Use stain removal products and bleaches before the wash cycle only when necessary Save water and electricity by only washing full loads the exact amount depends upon the program used DECLARATION OF CONFORMITY This appliance complies with UL2157 SPECIFICATIONS TYPE FRONT LOADING WASHER DIMENSIONS Div Inches cm A HeightOverall 383 974 B Width 27 686 C Depth with door open 90 508 129 D Depth 315 80 WATER PRESSURE 20116 psi 137 kPa 800 kPa WEIGHT 174 lbs 79 kg HEATER RATING 900 W POWER CONSUMPTION WASHING 120 V 140 W WASHING AND HEATING 120 V 960 W SPIN 120 V 430 W DRAIN 120 V 80 W SPIN REVOLUTION WF361 WF363 WF365 WF364 1100 rpm 05 appendix A B D C WF36136336502832J07ENindd 35 2014222 155829
  • Page 36 - English - : 36 appendix CYCLE CHART Use this chart to set the best cycle and option for your laundry Model WF361 factory setting selectable FUNCTIONS OPTIONS Temp Spin Soil Level Delay Start Extra Rinse H W EW C H M L NS H N L Normal Heavy Duty Perm Press Sanitize DelicatesHand Wash Wool Quick Wash Rinse Spin Pure Cycle Model WF363 factory setting selectable FUNCTIONS OPTIONS Temp Spin Soil Level Delay Start Steam H W EW C H M L NS H N L Normal Heavy Duty Perm Press Sanitize DelicatesHand Wash Wool Quick Wash Rinse Spin Pure Cycle Temp Spin Soil Level H Hot W Warm EW Eco Warm C Cold H High M Medium L Low NS No Spin H Heavy N Normal L Light appendix WF36136336502832J07ENindd 36 2014222 155830
  • Page 37 - English - : appendix 37 Model WF365 factory setting selectable FUNCTIONS OPTIONS Temp Spin Soil Level Delay Start Steam H W EW C H M L NS H N L Normal Heavy Duty Perm Press Sanitize DelicatesHand Wash Wool Quick Wash Rinse Spin Pure Cycle Model WF364 factory setting selectable FUNCTIONS OPTIONS Temp Spin Soil Level Delay Start Extra Rinse H W EW C H M L NS H N L Normal Heavy Duty Perm Press Sanitize DelicatesHand Wash Wool Quick Wash Rinse Spin Pure Cycle Temp Spin Soil Level H Hot W Warm EW Eco Warm C Cold H High M Medium L Low NS No Spin H Heavy N Normal L Light 05 appendix WF36136336502832J07ENindd 37 2014222 155831
  • Page 38 - English - : 38 warranty warranty USA SAMSUNG WASHER LIMITED WARRANTY TO ORIGINAL PURCHASER This SAMSUNG brand product as supplied and distributed by SAMSUNG ELECTRONICS AMERICA INC SAMSUNG and delivered new in the original carton to the original consumer purchaser is warranted by SAMSUNG against manufacturing defects in materials and workmanship for a limited warranty period of One 1 year part and labor Two 2 years Control Board Parts Part Only Three 3 years stainless tub part Part Only Five 5 years washing motor part Part Only Ten 10 years washing DD motor part Part Only This limited warranty begins on the original date of purchase and is valid only on products purchased and used in the United States To receive warranty service the purchaser must contact SAMSUNG for problem determination and service procedures Warranty service can only be performed by a SAMSUNG authorized service center The original dated bill of sale must be presented upon request as proof of purchase to SAMSUNG or SAMSUNGs authorized service center SAMSUNG will provide inhome service during the warranty period at no charge subject to availability within the contiguous United States Inhome service is not available in all areas To receive inhome service product must be unobstructed and accessible to the service agent If service is not available SAMSUNG may elect to provide transportation of the product to and from an authorized service center SAMSUNG will repair replace or refund this product at our option and at no charge as stipulated herein with new or reconditioned parts or products if found to be defective during the limited warranty period specified above All replaced parts and products become the property of SAMSUNG and must be returned to SAMSUNG Replacement parts and products assume the remaining original warranty or ninety 90 days whichever is longerThis limited warranty covers manufacturing defects in materials and workmanship encountered in normal noncommercial use of this product and shall not apply to the following damage that occurs in shipment delivery and installation applications and uses for which this product was not intended altered product or serial numbers cosmetic damage or exterior finish accidents abuse neglect fire water lightning or other acts of nature or God use of products equipment systems utilities services parts supplies accessories applications installations repairs external wiring or connectors not supplied or authorized by SAMSUNG that damage this product or result in service problems incorrect electrical line voltage fluctuations and surges customer adjustments and failure to follow operating instructions maintenance and environmental instructions that are covered and prescribed in the instruction book product removal and reinstallation problems caused by pest infestations This limited warranty does not cover problems resulting from incorrect electric current voltage or supply light bulbs house fuses house wiring cost of a service call for instructions or fixing installation errors SAMSUNG does not warrant uninterrupted or errorfree operation of the product WF36136336502832J07ENindd 38 2014222 155831
  • Page 39 - English - : warranty 39 EXCEPT AS SET FORTH HEREIN THERE ARE NO WARRANTIES ON THIS PRODUCT EITHER EXPRESS OR IMPLIED AND SAMSUNG DISCLAIMS ALL WARRANTIES INCLUDING BUT NOT LIMITED TO ANY IMPLIED WARRANTIES OF MERCHANTABILITY INFRINGEMENT OR FITNESS FOR A PARTICULAR PURPOSE NO WARRANTY OR GUARANTEE GIVEN BY ANY PERSON FIRM OR CORPORATION WITH RESPECT TO THIS PRODUCT SHALL BE BINDING ON SAMSUNG SAMSUNG SHALL NOT BE LIABLE FOR LOSS OF REVENUE OR PROFITS FAILURE TO REALIZE SAVINGS OR OTHER BENEFITS OR ANY OTHER SPECIAL INCIDENTAL OR CONSEQUENTIAL DAMAGES CAUSED BY THE USE MISUSE OR INABILITY TO USE THIS PRODUCT REGARDLESS OF THE LEGAL THEORY ON WHICH THE CLAIM IS BASED AND EVEN IF SAMSUNG HAS BEEN ADVISED OF THE POSSIBILITY OF SUCH DAMAGES NOR SHALL RECOVERY OF ANY KIND AGAINST SAMSUNG BE GREATER IN AMOUNT THAN THE PURCHASE PRICE OF THE PRODUCT SOLD BY SAMSUNG AND CAUSING THE ALLEGED DAMAGE WITHOUT LIMITING THE FOREGOING PURCHASER ASSUMES ALL RISK AND LIABILITY FOR LOSS DAMAGE OR INJURY TO PURCHASER AND PURCHASERS PROPERTY AND TO OTHERS AND THEIR PROPERTY ARISING OUT OF THE USE MISUSE OR INABILITY TO USE THIS PRODUCT THIS LIMITED WARRANTY SHALL NOT EXTEND TO ANYONE OTHER THAN THE ORIGINAL PURCHASER OF THIS PRODUCT IS NONTRANSFERABLE AND STATES YOUR EXCLUSIVE REMEDY Some states do not allow limitations on how long an implied warranty lasts or the exclusion or limitation of incidental or consequential damages so the above limitations or exclusions may not apply to you This warranty gives you specific rights and you may also have other rights which vary from state to state To obtain warranty service please contact SAMSUNG at Samsung Electronics America Inc 85 Challenger Road Ridgefield Park NJ 07660 1800SAMSUNG 7267864 wwwsamsungcomussupport Visits by a Service Engineer to explain functions maintenance or installation is not covered by warranty Please contact your Samsung call agent for help with any of these issues WF36136336502832J07ENindd 39 2014222 155831
  • Page 40 - English - : 40 warranty warranty CANADA SAMSUNG WASHER LIMITED WARRANTY TO ORIGINAL PURCHASER This SAMSUNG brand product as supplied and distributed by SAMSUNG ELECTRONICS CANADA INC SAMSUNG and delivered new in the original carton to the original consumer purchaser is warranted by SAMSUNG against manufacturing defects in materials and workmanship for a limited warranty period of One 1 year part and labor Ten 10 years washing DD motor Part only This limited warranty begins on the original date of purchase and is valid only on products purchased and used in the Canada To receive warranty service the purchaser must contact SAMSUNG for problem determination and service procedures Warranty service can only be performed by a SAMSUNG authorized service center The original dated bill of sale must be presented upon request as proof of purchase to SAMSUNG or SAMSUNGs authorized service center SAMSUNG will provide inhome service during the warranty period at no charge subject to availability within the Canada Inhome service is not available in all areas To receive inhome service product must be unobstructed and accessible to the service agent If service is not available SAMSUNG may elect to provide transportation of the product to and from an authorized service center SAMSUNG will repair replace or refund this product at our option and at no charge as stipulated herein with new or reconditioned parts or products if found to be defective during the limited warranty period specified above All replaced parts and products become the property of SAMSUNG and must be returned to SAMSUNG Replacement parts and products assume the remaining original warranty or ninety 90 days whichever is longerThis limited warranty covers manufacturing defects in materials and workmanship encountered in normal noncommercial use of this product and shall not apply to the following damage that occurs in shipment delivery and installation applications and uses for which this product was not intended altered product or serial numbers cosmetic damage or exterior finish accidents abuse neglect fire water lightning or other acts of nature or God use of products equipment systems utilities services parts supplies accessories applications installations repairs external wiring or connectors not supplied or authorized by SAMSUNG that damage this product or result in service problems incorrect electrical line voltage fluctuations and surges customer adjustments and failure to follow operating instructions maintenance and environmental instructions that are covered and prescribed in the instruction book product removal and reinstallation problems caused by pest infestations This limited warranty does not cover problems resulting from incorrect electric current voltage or supply light bulbs house fuses house wiring cost of a service call for instructions or fixing installation errors SAMSUNG does not warrant uninterrupted or errorfree operation of the product WF36136336502832J07ENindd 40 2014222 155831
  • Page 41 - English - : warranty 41 EXCEPT AS SET FORTH HEREIN THERE ARE NO WARRANTIES ON THIS PRODUCT EITHER EXPRESS OR IMPLIED AND SAMSUNG DISCLAIMS ALL WARRANTIES INCLUDING BUT NOT LIMITED TO ANY IMPLIED WARRANTIES OF MERCHANTABILITY INFRINGEMENT OR FITNESS FOR A PARTICULAR PURPOSE NO WARRANTY OR GUARANTEE GIVEN BY ANY PERSON FIRM OR CORPORATION WITH RESPECT TO THIS PRODUCT SHALL BE BINDING ON SAMSUNG SAMSUNG SHALL NOT BE LIABLE FOR LOSS OF REVENUE OR PROFITS FAILURE TO REALIZE SAVINGS OR OTHER BENEFITS OR ANY OTHER SPECIAL INCIDENTAL OR CONSEQUENTIAL DAMAGES CAUSED BY THE USE MISUSE OR INABILITY TO USE THIS PRODUCT REGARDLESS OF THE LEGAL THEORY ON WHICH THE CLAIM IS BASED AND EVEN IF SAMSUNG HAS BEEN ADVISED OF THE POSSIBILITY OF SUCH DAMAGES NOR SHALL RECOVERY OF ANY KIND AGAINST SAMSUNG BE GREATER IN AMOUNT THAN THE PURCHASE PRICE OF THE PRODUCT SOLD BY SAMSUNG AND CAUSING THE ALLEGED DAMAGE WITHOUT LIMITING THE FOREGOING PURCHASER ASSUMES ALL RISK AND LIABILITY FOR LOSS DAMAGE OR INJURY TO PURCHASER AND PURCHASERS PROPERTY AND TO OTHERS AND THEIR PROPERTY ARISING OUT OF THE USE MISUSE OR INABILITY TO USE THIS PRODUCT THIS LIMITED WARRANTY SHALL NOT EXTEND TO ANYONE OTHER THAN THE ORIGINAL PURCHASER OF THIS PRODUCT IS NONTRANSFERABLE AND STATES YOUR EXCLUSIVE REMEDY Some provinces do not allow limitations on how long an implied warranty lasts or the exclusion or limitation of incidental or consequential damages so the above limitations or exclusions may not apply to you This warranty gives you specific rights and you may also have other rights which vary from province to province To obtain warranty service please contact SAMSUNG at Samsung Electronics Canada Inc 2050 Derry Road West Mississauga Ontario L5N 0B9 Canada 1800SAMSUNG 7267864 wwwsamsungcomcasupport English wwwsamsungcomcafrsupport French FAX18664364617 Visits by a Service Engineer to explain functions maintenance or installation is not covered by warranty Please contact your Samsung call agent for help with any of these issues WF36136336502832J07ENindd 41 2014222 155831
  • Page 42: note WF36136336502832J07ENindd 42 2014222 155831
  • Page 43: note WF36136336502832J07ENindd 43 2014222 155831
  • Page 44 - English - : QUESTIONS OR COMMENTS Country CALL OR VISIT US ONLINE AT USA 1800SAMSUNG 7267864 wwwsamsungcomussupport MEXICO 01800SAMSUNG 7267864 wwwsamsungcommxsupport CANADA 1800SAMSUNG 7267864 wwwsamsungcomcasupport English wwwsamsungcomcafrsupport French Visits by a Service Engineer to explain functions maintenance or installation is not covered by warranty Please contact your Samsung call agent for help with any of these issues Code No DC6802832J07EN bitlysamsungwashers WF36136336502832J07ENindd 44 2014222 155831
  • Page 45 - Spanish - : Lavadora manual del usuario Imagine las posibilidades Gracias por adquirir este producto Samsung WF361 WF363 WF365 WF364 Este manual está impreso en papel 100 reciclado WF36136336502832J07MESindd 1 2014222 155728
  • Page 46 - Spanish - : 2 características de su nueva lavadora características de su nueva lavadora 1 Capacidad extra grande Aun las prendas y mantas voluminosas quedan superlimpias La gran capacidad deja suficiente espacio para un lavado más profundo y limpio 2 VRT Tecnología de Reducción de la Vibración Esta lavadora Samsung funciona con suavidad durante el centrifugado a velocidad máxima minimizando el ruido y las vibraciones 3 Motor inversor de accionamiento directo El poder de manejarlo todo El motor inversor de accionamiento directo suministra energía al tambor de la lavadora desde un motor reversible de velocidad variable Un motor de accionamiento directo sin correa genera una velocidad más alta de centrifugado de 1100 rpm para un funcionamiento más eficiente y silencioso La lavadora también posee menos piezas movibles lo cual se traduce en menos reparaciones 4 Esterilizar Al seleccionar el ciclo Sanitize Desinfección certificado por NSF el agua se calienta a una temperatura extremadamente alta para eliminar el 999 de las bacterias que suelen alojarse en prendas ropa de cama o toallas La presente certificación ha sido otorgada por NSF International una organización privada de evaluación y certificación Lea la etiqueta de la prenda para evitar daños Únicamente los ciclos de desinfección fueron diseñados para cumplir con los requisitos de este protocolo para una desinfección eficaz 5 Pure Cycle Usar el proceso de limpieza del tambor Pure Cycle ayuda a mantener su lavadora limpia incluso sin ningún detergente químico ni blanqueador Mantenga su tambor limpio y sin olor con este programa de limpieza especializado 6 Seguro para niños La función Seguro para niños asegura que las manitos curiosas se mantengan alejadas de la lavadora Esta función de seguridad evita que sus hijos jueguen con el funcionamiento de la lavadora y le advierte cuando ésta se activa 7 Delay Start Inicio retardado Demore un ciclo por hasta 19 horas en incrementos de a una hora y aumente su comodidad al utilizar su lavadora especialmente cuando tenga que salir NSF Protocol P172 Desinfección en lavadoras comerciales residenciales y familiares WF36136336502832J07MESindd 2 2014222 155728
  • Page 47 - Spanish - : características de su nueva lavadora 3 8 Pedestal con cajones de almacenamiento Modelo N WE357 Tiene una base de 15quot opcional a disposición para elevar la lavadora y lograr así una carga y descarga más sencilla El pedestal también ofrece un cajón de almacenamiento incorporado que puede sostener una botella de detergente de 100 oz 9 Apilamiento Modelo N SK3A1XAA SK4AXAA SK5AXAA Las lavadoras y las secadoras Samsung pueden apilarse para maximizar el espacio aprovechable Puede adquirir un kit de apilamiento opcional en su comercio minorista de productos Samsung ltPedestal con cajones de almacenamientogt ltApilamientogt WF36136336502832J07MESindd 3 2014222 155729
  • Page 48 - Spanish - : 4 información sobre seguridad CONSERVE ESTAS INSTRUCCIONES información sobre seguridad Felicitaciones por la compra de la nueva lavadora Samsung Este manual contiene información importante acerca de la instalación el uso y el cuidado del electrodoméstico Lea detenidamente estas instrucciones a fin de aprovechar al máximo los múltiples beneficios y funciones de la lavadora LO QUE NECESITA SABER SOBRE LAS INSTRUCCIONES DE SEGURIDAD Las advertencias y las instrucciones de seguridad importantes de este manual no cubren todas las posibles condiciones y situaciones que pueden ocurrir Es su responsabilidad actuar con sentido común precaución y cuidado cuando instale realice el mantenimiento y ponga en funcionamiento la lavadora SÍMBOLOS Y PRECAUCIONES DE SEGURIDAD IMPORTANTES Los íconos y las señales incluidas en este manual del usuario significan lo siguiente ADVERTENCIA Peligros o prácticas inseguras que pueden causar lesiones físicas graves o la muerte Para reducir el riesgo de incendio explosión descargas eléctricas o lesiones físicas cuando usa esta lavadora siga estas instrucciones de seguridad básicas PRECAUCIÓN Peligros o prácticas inseguras que pueden causar lesiones físicas leves o daños materiales NO intente hacer nada NO desarme NO toque Siga las instrucciones completamente Desenchufe el cable de alimentación eléctrica del tomacorriente de pared Asegúrese de que la máquina tenga buena conexión a tierra para evitar descargas eléctricas Llame al centro de servicio técnico para obtener asistencia Nota Estas señales de advertencia están aquí para evitar que usted u otras personas sufran daños Siga las instrucciones completamente Después de leer esta sección guárdela en un lugar seguro para consultas futuras Lea todas las instrucciones antes de usar el electrodoméstico WF36136336502832J07MESindd 4 2014222 155729
  • Page 49 - Spanish - : información sobre seguridad 5 CONSERVE ESTAS INSTRUCCIONES ADVERTENCIA Para reducir el riesgo de incendio descargas eléctricas o lesiones físicas cuando usa este electrodoméstico siga las instrucciones de seguridad básicas que figuran a continuación 1 Lea todas las instrucciones antes de usar el electrodoméstico 2 No lave o seque prendas que han sido previamente limpiadas lavadas remojadas o salpicadas con gasolina solventes de limpieza en seco u otras sustancias inflamables o explosivas ya que emiten vapores que pueden prenderse fuego o explotar 3 No permita que los niños jueguen sobre la lavadora o dentro de ella Se requiere de supervisión cuando el electrodoméstico es utilizado cerca de los niños 4 Antes de descartar el electrodoméstico o de trasladarlo para que se le efectúe el servicio técnico retire la puerta del compartimiento de la lavadora o la secadora 5 No introduzca la mano en el electrodoméstico si el tambor está en movimiento 6 No instale o guarde este electrodoméstico donde quede expuesto a factores climáticos 7 No modifique los controles 8 No repare reemplace ni intente realizar el mantenimiento de cualquier pieza del electrodoméstico salvo que esté recomendado específicamente en las instrucciones de mantenimiento del usuario o en las instrucciones de reparación para el usuario publicadas y que a su juicio usted tenga la habilidad para llevarlas a cabo 9 No agregue gasolina solventes de limpieza en seco u otras sustancias inflamables o explosivas al agua del lavado Estas sustancias emiten vapores que pueden prenderse fuego o explotar 10 En ciertas circunstancias se puede producir gas hidrógeno en un sistema de agua caliente que no se ha usado durante 2 semanas o más EL GAS HIDRÓGENO ES EXPLOSIVO Si el sistema de agua caliente no fue utilizado durante dicho período antes de usar la lavadora o la lavadora y la secadora combinadas abra las llaves de agua caliente y deje correr el agua por varios minutos De esta manera se eliminará el gas hidrógeno acumulado Dado que el gas es inflamable no fume ni use una llama abierta en ese momento Advertencias de la disposición 65 del Estado de California ADVERTENCIAEste producto contiene químicos que se sabe en el estado de California que causan cáncer y toxicidad reproductiva ADVERTENCIA ADVERTENCIA WF36136336502832J07MESindd 5 2014222 155729
  • Page 50 - Spanish - : 6 información sobre seguridad CONSERVE ESTAS INSTRUCCIONES información sobre seguridad ADVERTENCIAS FUNDAMENTALES PARA LA INSTALACIÓN Enchufe el cable de alimentación en un tomacorriente de pared de 120 V60 Hz15 A CA o superior y utilice el tomacorriente sólo con este electrodoméstico No use un cable prolongador Compartir el tomacorriente de pared con otros electrodomésticos utilizando un multicontacto o un cable prolongandor puede provocar un incendio o una descarga eléctrica No utilice un transformador eléctrico Puede provocar un incendio o una descarga eléctrica Asegúrese de que el voltaje la frecuencia y el amperaje del tomacorriente de pared coincidan con las especificaciones eléctricas del producto La instalación de este electrodoméstico la debe efectuar un técnico cualificado o una empresa de servicios Si no lo hace puede provocar una descarga eléctrica un incendio una explosión problemas con el producto o lesiones Retire regularmente todas las sustancias extrañas como polvo o agua de los terminales y los puntos de contacto de la alimentación con un paño seco Desenchufe el cable de alimentación y límpielo con un paño seco Si no lo hace puede provocar un incendio o una descarga eléctrica Enchufe el cable de alimentación en un tomacorriente de pared en la dirección adecuada de manera que el cable baje hacia el suelo Si enchufa el cable de alimentación en el tomacorriente en la dirección opuesta los cables eléctricos del interior del cable pueden dañarse y provocar un incendio o una descarga eléctrica Este electrodoméstico debe conectarse a tierra correctamente La toma de tierra no se ha de conectar a una conducción de gas o de agua ni a la línea telefónica Puede provocar un incendio una descarga eléctrica un incendio o problemas con el producto Nunca enchufe el cable de alimentación a un tomacorriente que no esté conectado a tierra correctamente y asegúrese de que guarde conformidad con los códigos locales y nacionales No instale este electrodoméstico cerca de un calefactor o materiales inflamables No instale este electrodoméstico en un lugar húmedo con aceites o polvo ni expuesto a la luz directa del sol o al agua gotas de lluvia No instale este electrodoméstico en un lugar donde pueda haber fugas de gas Puede provocar un incendio o una descarga eléctrica Enchufe el cable de alimentación firmemente en el tomacorriente de pared No utilice un cable de alimentación dañado ni un tomacorriente que esté flojo Puede provocar un incendio o una descarga eléctrica No tire del cable de alimentación ni lo doble excesivamente No tuerza ni ate el cable de alimentación No cuelgue el cable de alimentación de un objeto metálico no coloque objetos pesados sobre él no inserte el cable de alimentación entre objetos ni lo empuje en un espacio detrás del electrodoméstico Puede provocar un incendio o una descarga eléctrica No tire del cable de alimentación para desenchufarlo Desenchufe el cable de alimentación sujetándolo por el enchufe Si no lo hace puede provocar un incendio o una descarga eléctrica Si el enchufe o el cable de alimentación están dañados comuníquese con el centro de servicio más cercano ADVERTENCIA WF36136336502832J07MESindd 6 2014222 155729