Loading ...
Loading ...
Loading ...
Winding/Installing the Bobbin
Basic operations B-17
GETTING READY
B
o
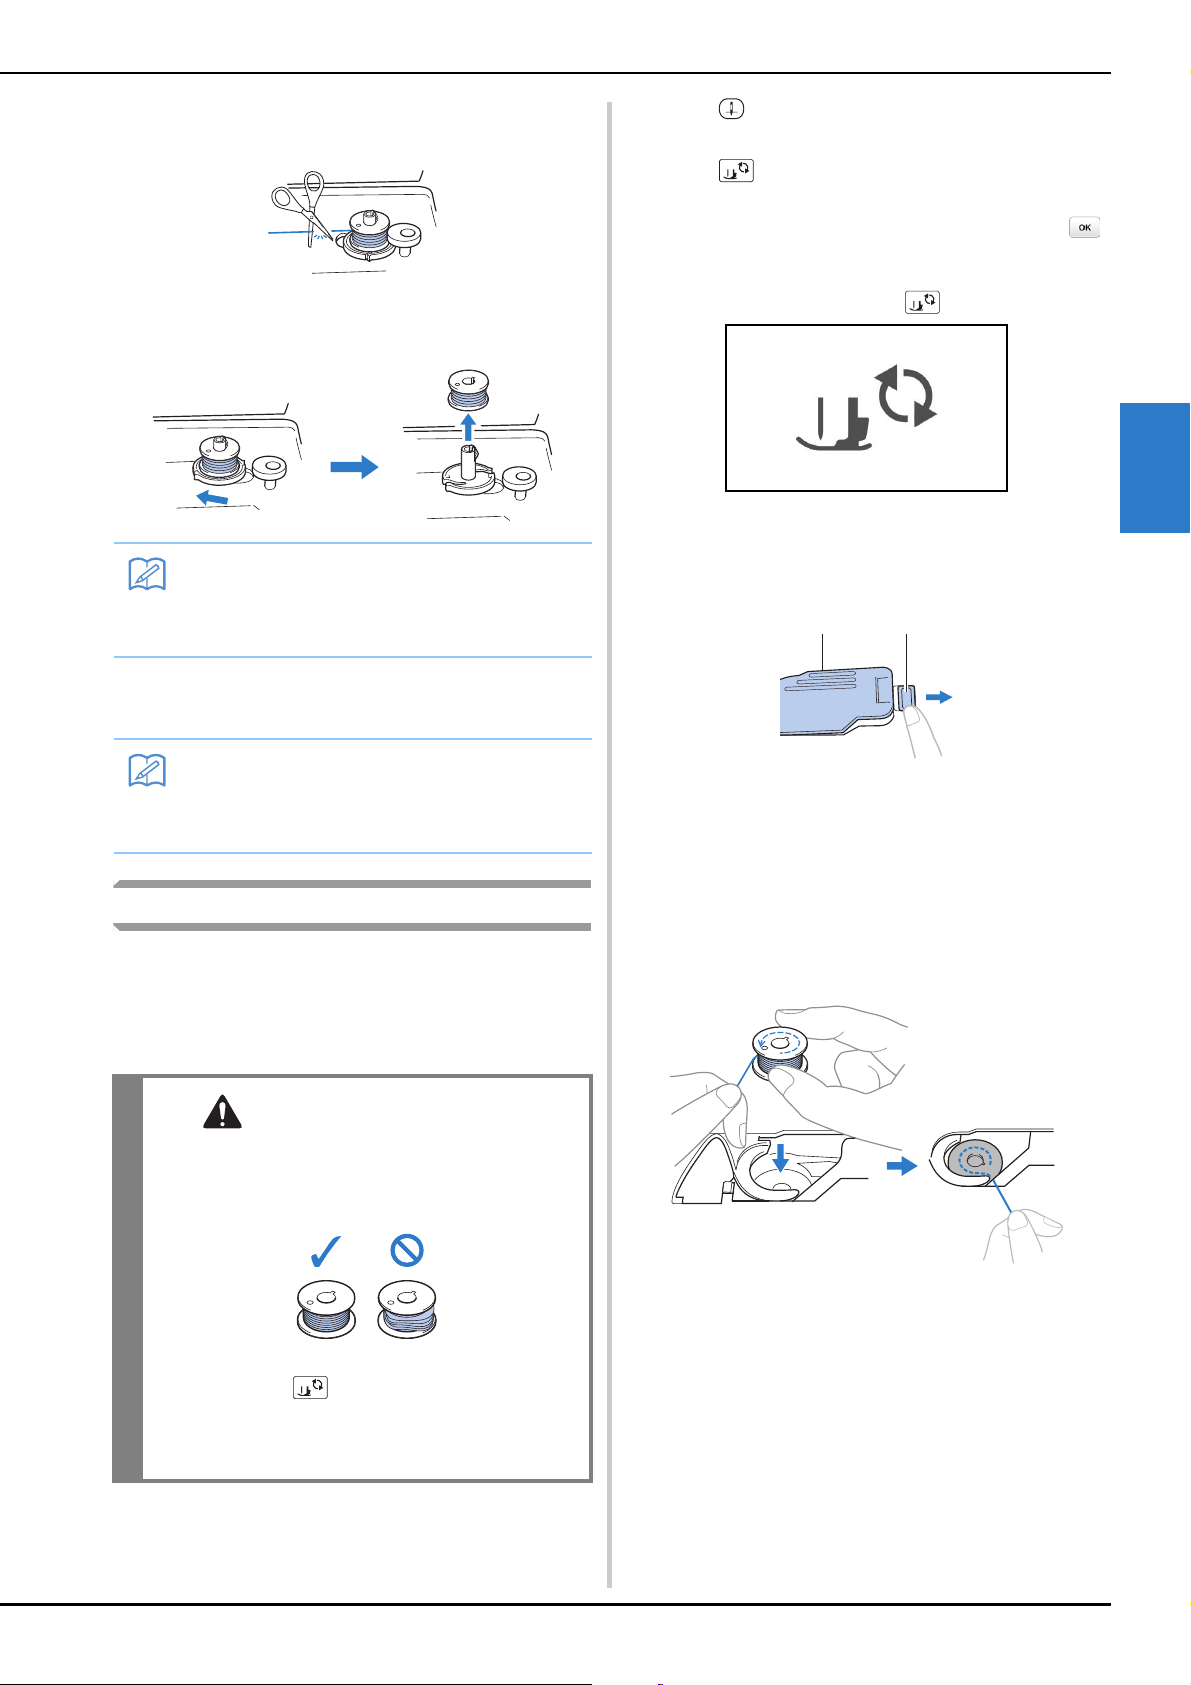
Use scissors to cut the end of the thread wound around
the bobbin.
p
Slide the bobbin winder shaft to the left, and then
remove the bobbin from the shaft.
q
Remove the spool for the bobbin thread from the spool
pin.
Installing the bobbin
Install the bobbin wound with thread.
You can begin embroidering immediately without pulling up
the bobbin thread by simply inserting the bobbin in the
bobbin case and guiding the thread through the slit in the
needle plate cover.
a
Press (Needle position button) once or twice to
raise the needle.
b
Press .
• When the message “OK to automatically lower the
presser foot? ” appears on the LCD screen, press
to continue.
→ The screen changes, and all keys and operation
buttons are locked (except ).
c
Raise the presser foot lever.
d
Slide the bobbin cover latch to the right.
1 Bobbin cover
2 Latch
e
Remove the bobbin cover.
f
Hold the bobbin with your right hand with the thread
unwinding to the left, and hold the end of the thread
with your left hand. Then, with your right hand, place
the bobbin in the bobbin case.
Memo
• If the bobbin winder shaft is set to the right side,
the needle will not move. (Embroidering is
impossible.)
Memo
• When the machine is started or the handwheel is
turned after winding the bobbin, the machine will
make a clicking sound; this is not a malfunction.
CAUTION
• Use a bobbin that has been correctly wound
with thread, otherwise the needle may break
or the thread tension will be incorrect.
• Before inserting or changing the bobbin, be
sure to press on the operation panel to
lock all keys and buttons, otherwise injuries
may occur if the “Start/Stop” button or any
other button is pressed and the machine starts.
2
1
Loading ...
Loading ...
Loading ...