Loading ...
Loading ...
Loading ...
Setting the Image Quality
90
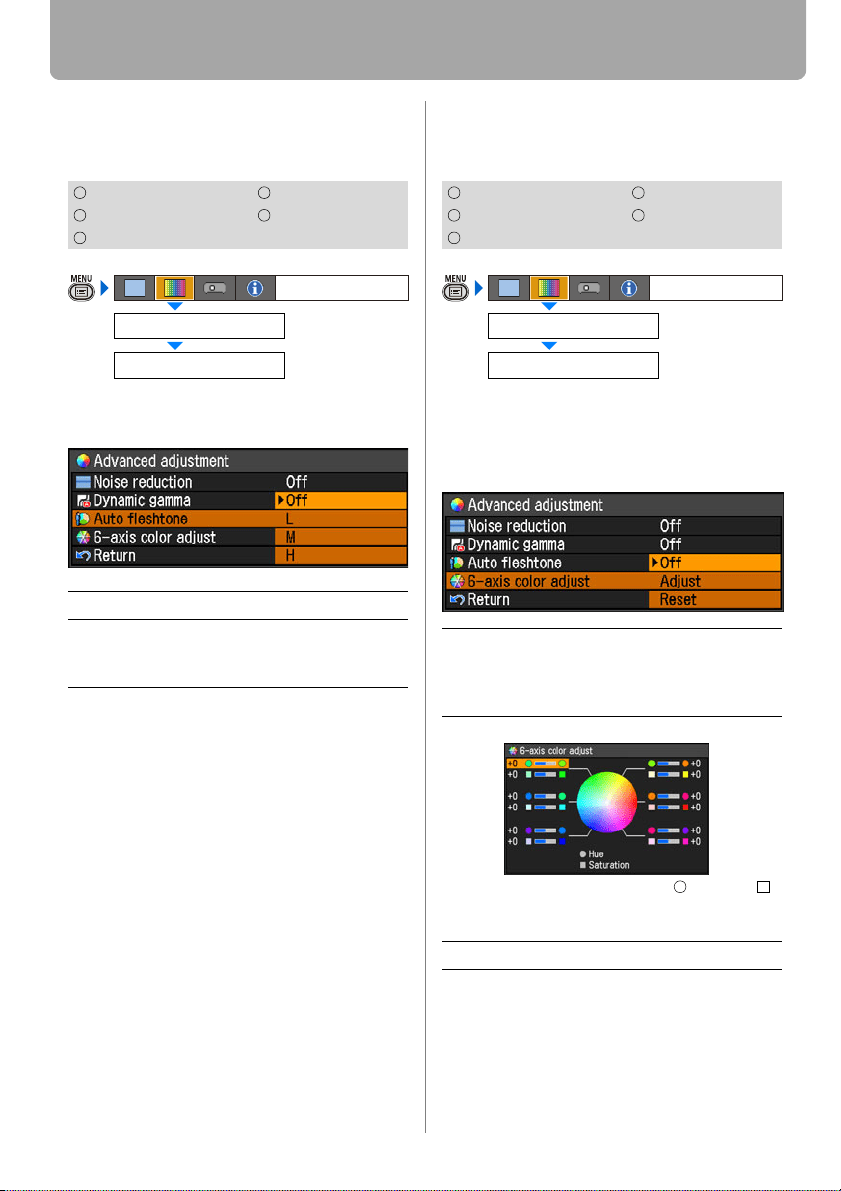
Making Advanced Adjustment (Auto flesh-
tone)
[Advanced adjustment] - [Auto fleshtone]
You can represent the skin color impres-
sively.
Press the OK button to accept your setting
and then press the MENU button.
• The adjustment you have made is
stored as an adjusted value of input sig-
nals being projected in an image mode.
Adjusting Fine Color Adjustment (6-axis
color adjust)
[Advanced adjustment] - [6-axis color adjust]
You can make fine color adjustment with
RGB (red, green, blue) and CMY (cyan,
magenta, yellow). For the details of 6-axis
color adjust, refer to the page 133.
When you have completed the adjust-
ment, press the MENU button.
• [Off] is the factory default.
• The adjustment you have made is
stored as an adjusted value of input sig-
nals being projected in an image mode.
HDMI COMPONENT
DIGITAL PC
VIDEO
ANALOG PC
Off Disables the [Auto fleshtone] function.
L
M
H
Specifies the intensity of the [Auto flesh-
tone] in three steps.
Advanced adjustment
Image adjustment
Auto fleshtone
HDMI COMPONENT
DIGITAL PC
VIDEO
ANALOG PC
Off Disables the 6-axis color adjustment.
If you select [Adjust], the previous set-
ting of 6-axis color adjustment
becomes active again.
Adjust Enables the 6-axis color adjustment.
Use [ ] / [ ] to select [ Hue] or [
Saturation], then adjust them with [<] /
[>].
Reset Returns any adjustment values to zero.
Advanced adjustment
Image adjustment
6-axis color adjust
<
<
Loading ...
Loading ...
Loading ...