Loading ...
Loading ...
Loading ...
7
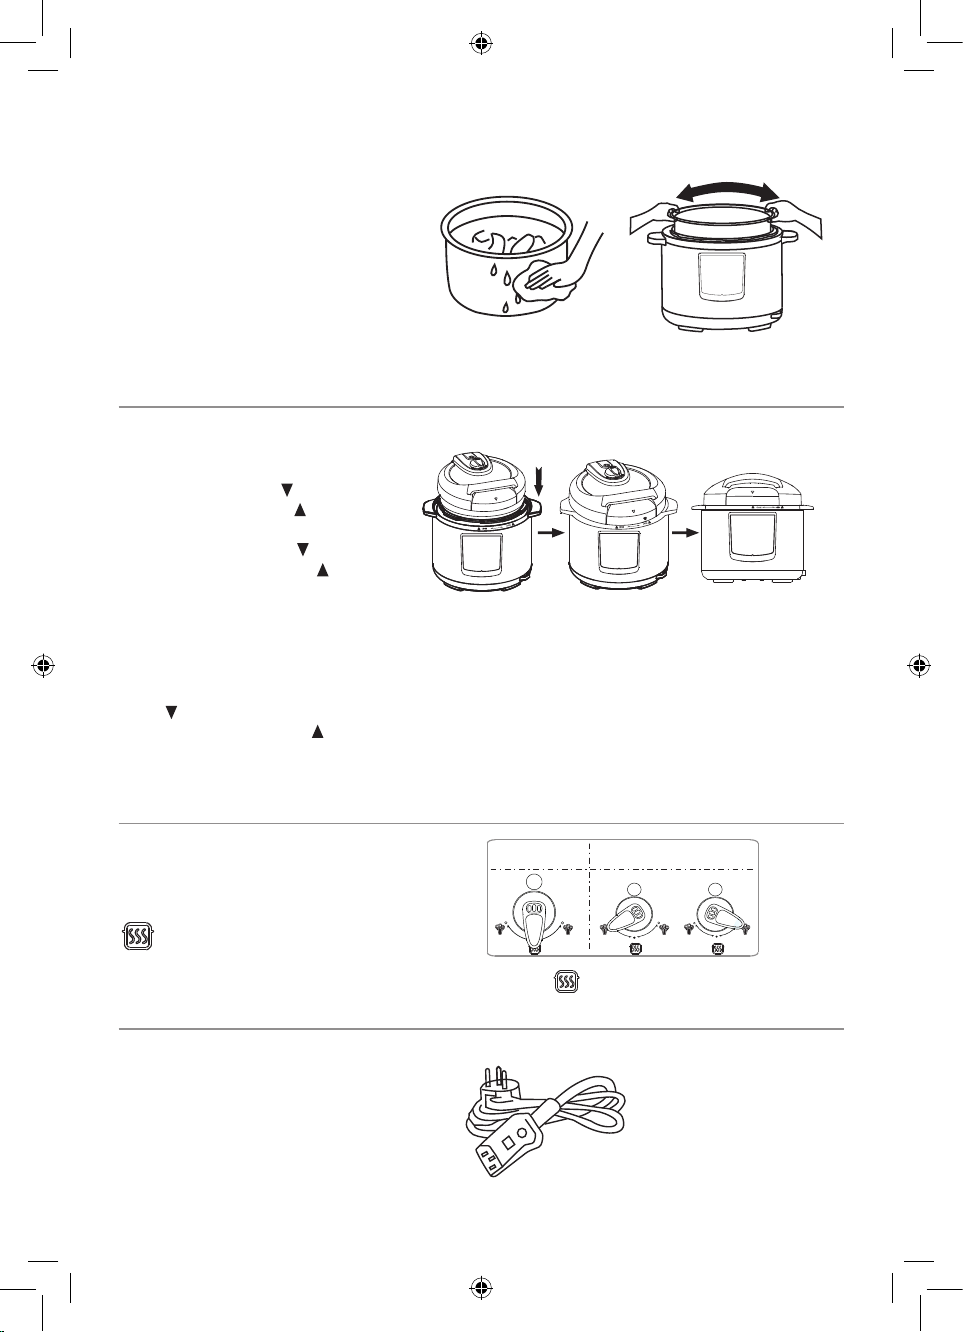
4. Inserting the cooking pot in the
pressure cooker
Be sure to remove any food residue
and water droplets from the exterior
of the cooking pot and interior of the
pressure cooker.
After placing the cooking pot into the
pressure cooker, rotate the cooking
pot slightly left to right to ensure the
pot is in place and there is contact
between the cooking pot and heating
plate.
5. Close the lid
Place the lid onto the pressure
cooker, aligning the “ ” marking on
the lid with the “OPEN ” marking
on the pressure cooker. Rotate the
lid clockwise until the “ ” marking
on the lid aligns with the “ CLOSE”
marking on the pressure cooker.
IMPORTANT: Be sure the lid is
fully locked into place. If the lid is
not in place correctly the pressure
cooker will beep.
The “ ” marking on the lid must
align directly with the “ CLOSE”
marking on the pressure cooker,
otherwise the pressure cooker will
not pressurise.
6. Position the exhaust valve
When cooking, align the handle of
exhaust valve with the sealing icon,
indicating that the pressure
cooker is airtight.
7. Insert the Power Cord
Insert the power cord into the socket
provided on the side of the pressure
cooker.
NOTE: When the plug is switched
on at the power outlet, the power
will come on.
Note: if the exhaust valve has not been aligned to the seal icon, pressure will not build
up and you may not achieve desired cooking results.
Seal Position Release Position
Loading ...
Loading ...
Loading ...