Loading ...
Loading ...
Loading ...
17
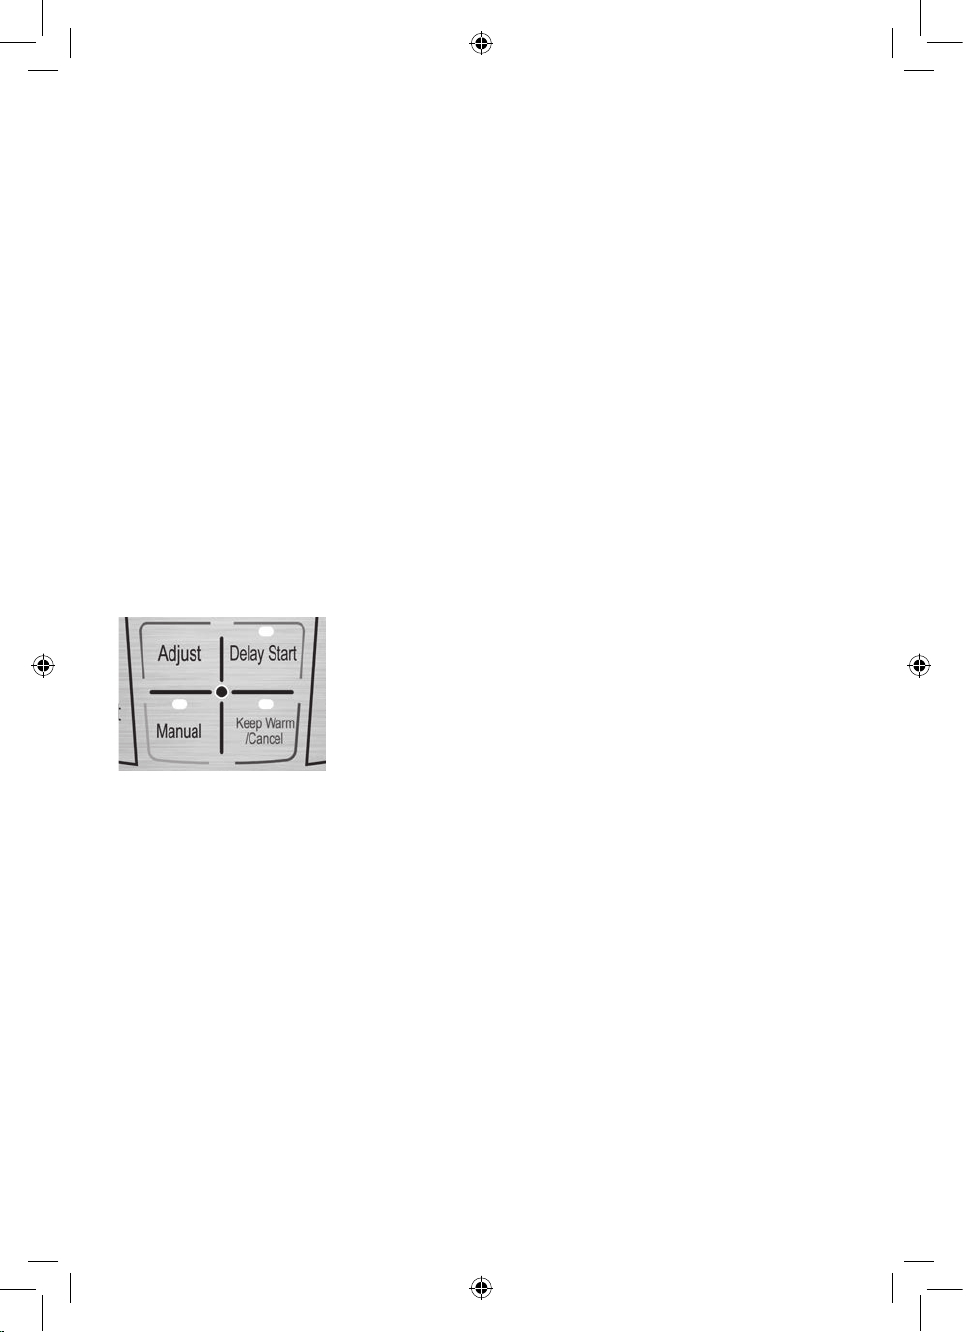
1. Within 10 seconds of pressing your menu selection button, press the “Delay Start” button
once and the hour ashes. Then use the “-“ & “+” buttons to select the amount of hours
before you would like your meal to be ready.
2. Press the “Delay Start” button again and the minutes will ash. Then use the “-“ & “+”
buttons to adjust the number of minutes.
NOTE: The minute selection is in 10 minute increments.
3. 10 seconds after the desired time is selected, the pressure cooker will beep 3 times, the
DELAY START button light will become solid and the display screen timer will then begin to
count down.
NOTE: Once the desired time is selected, wait for the program to automatically start.
NOTE: Press the Keep Warm/Cancel button at any time to cancel the function
selected.
4. After the preset time elapses and when cooking is complete the pressure cooker will
automatically switch to Keep Warm mode.
NOTE: Delay start is not available for the Slow Cook and Pudding menu functions. All
other menu functions have the option a 2 hour up to 24 hour delay start function.
KEEP WARM FUNCTION:
• After cooking, the pressure cooker automatically switches into “KEEP WARM” mode.
• When in “KEEP WARM” mode, the indicator light will illuminate and “EAT” will be displayed
on the display screen.
• The keep warm temperature is 60-80°C.
• If the “Keep Warm/Cancel” button is pressed while in standby mode, the pressure cooker
will heat up.
IMPORTANT: For health and safety reasons do not use the keep warm function to heat or
re-heat foods.
NOTE: Some food will deteriorate if kept in “keep warm” mode for extended periods of
time.
NOTE: When the cooking cycle has finished, the unit will automatically switch to KEEP
WARM and slowly release pressure for up to 30 minutes. Please note, food will continue
to cook until all the pressure is released.
Loading ...
Loading ...
Loading ...