Loading ...
Loading ...
Loading ...
82
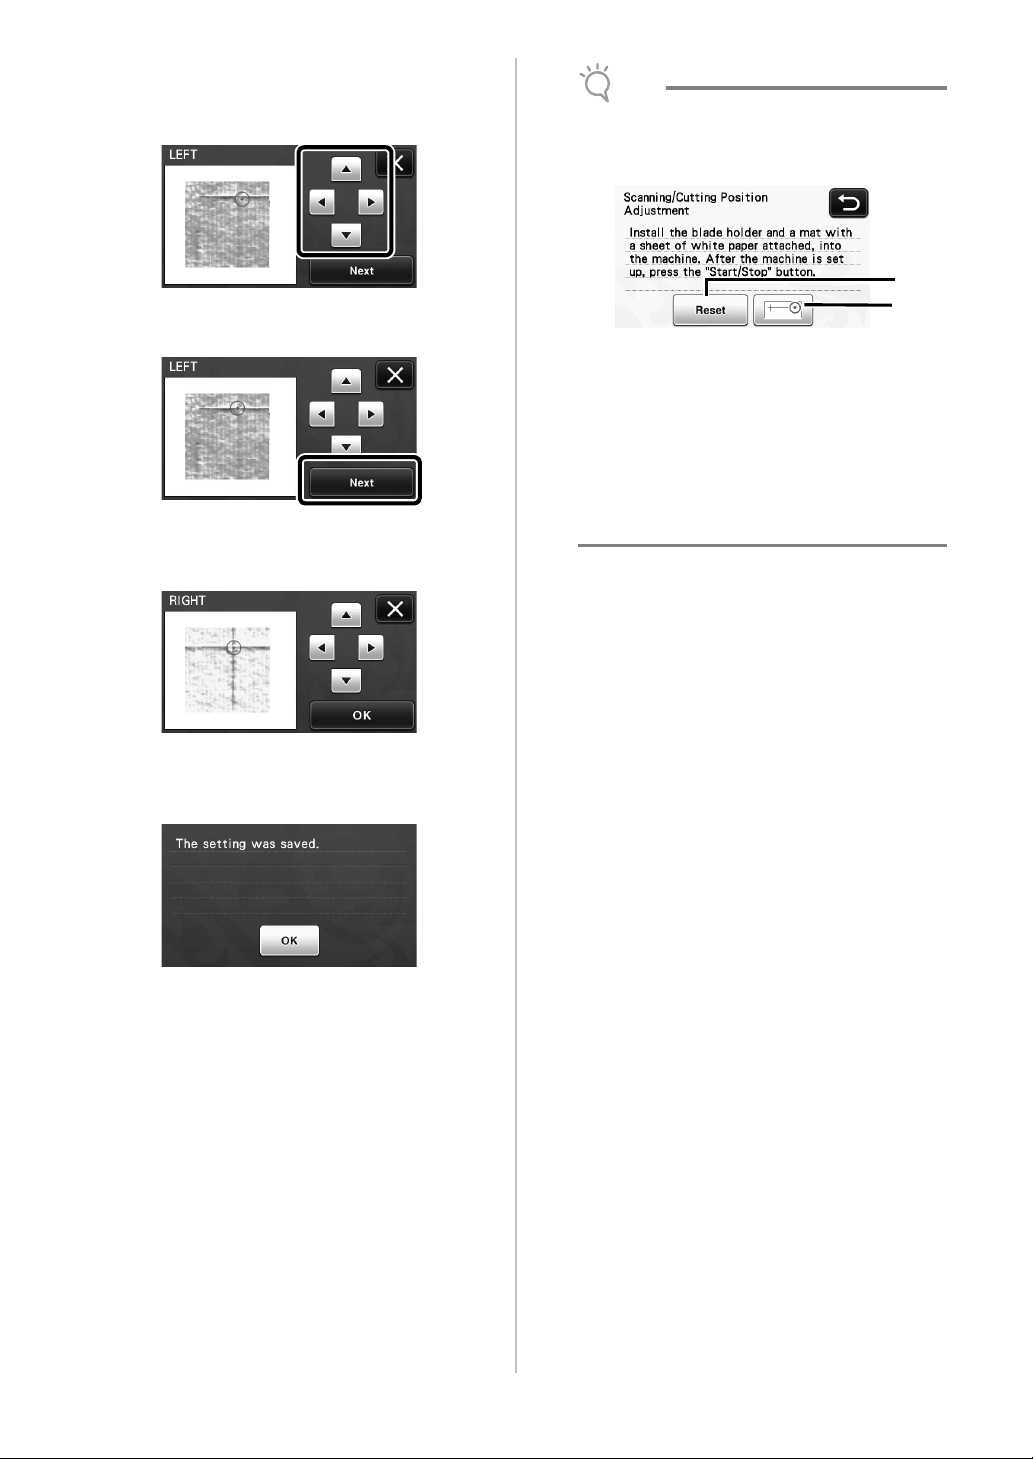
f When the scan of the cut (left) appears, touch
the arrow keys to align the red center of the
circle with the center of the cut.
g Touch the “Next” key.
hAdjust the right cut in the same way, and then
touch the “OK” key.
i When the following message appears, touch the
“OK” key.
X The adjustment is finished.
Note
• To perform the adjustment again or to return
the settings to their defaults, touch the
appropriate key below.
a Reset
Touch to return the settings to their defaults.
b Show manual adjustment
Manual adjustment is enabled. If the pattern
has never been scanned since the machine was
turned on, this key will appear in gray. When
this key is available, a previous scan of the
image is stored in the memory. Press this key to
adjust the scanned image. When the machine is
turned off, the scanned images are erased.
j Use “Direct Cut” mode to check the
adjustment results.
• For details on the “Direct Cut” mode, see
“SCANNING FOR CUTTING (Direct Cut)” on
page 61.
b
a
Loading ...
Loading ...
Loading ...