Loading ...
Loading ...
Loading ...
63
4
e While holding the mat level and lightly
inserting it under the feed rollers on the left and
right sides of the feed slot, press in the
operation panel.
• For details, see “Loading the Mat” on page 27.
X The “Start/Stop” button in the operation panel
lights up.
f Press the “Start/Stop” button to start scanning.
■ Creating Cutting Data
The procedure for creating cutting data differs
depending on the mode.
Grayscale recognition mode
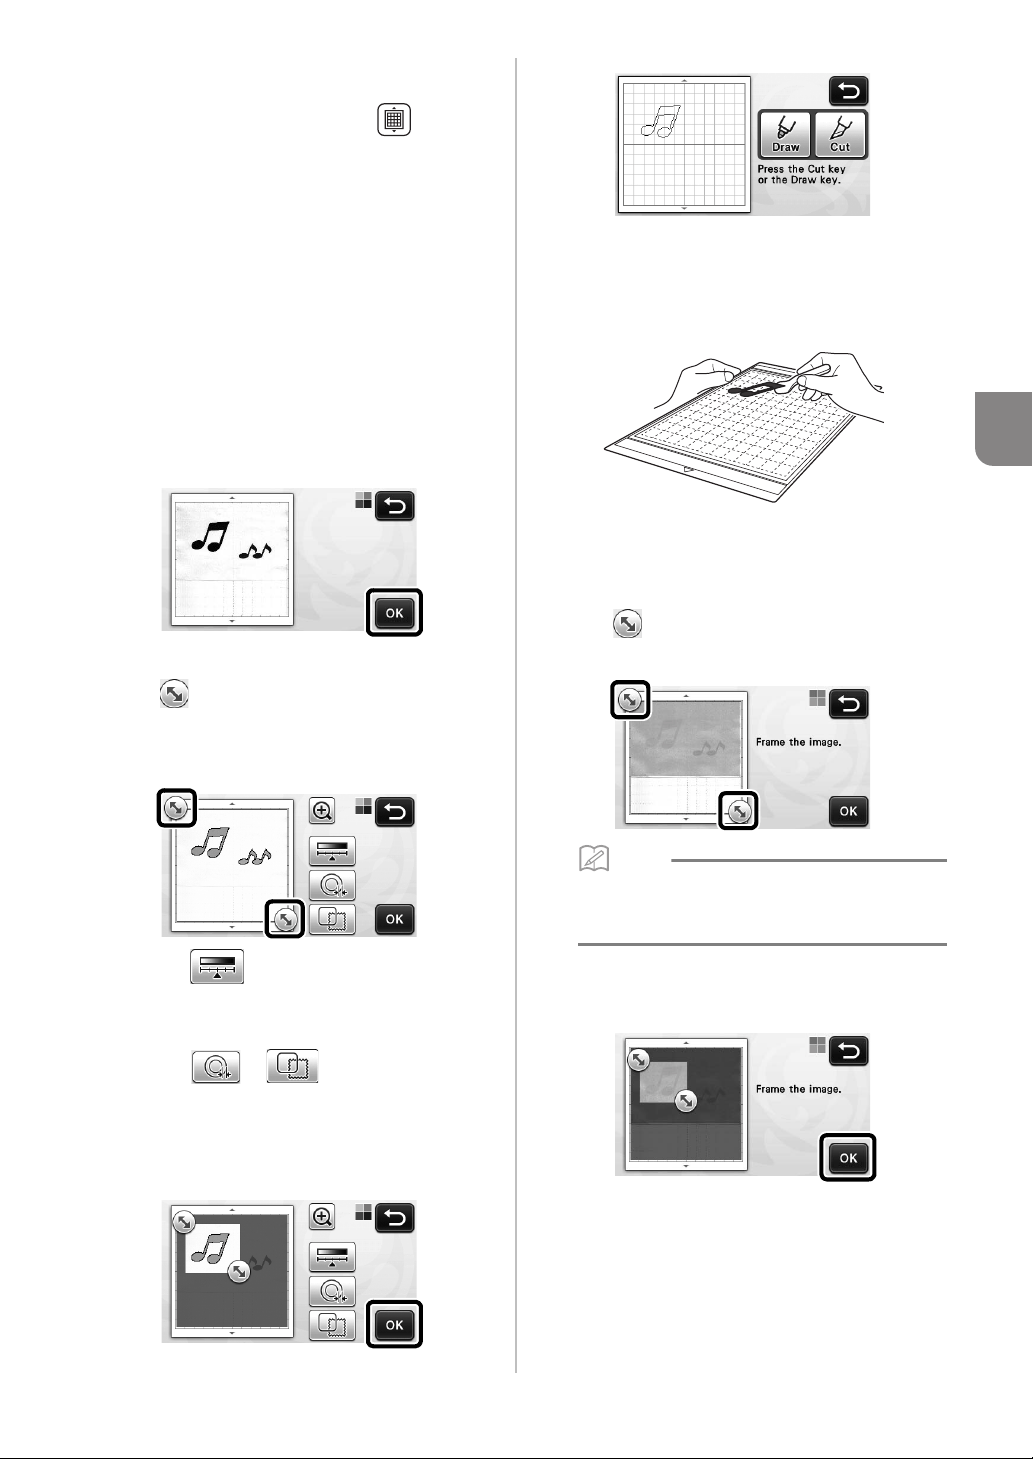
a Check the scanned image, and then touch the
“OK” key.
b In the image trim screen, use the touch pen to
drag to trim the image to the size to be
imported.
X If cutting lines are created, the outline of the
scanned illustration will be black.
• Touch to change the minimum object size
that will be detected and the conversion threshold.
For details, see “Adjusting Image Detection Levels”
on page 72.
• Touch or to edit the imported
cutting data. For details, see “Advanced Cutting
Functions for “Direct Cut”” on page 64.
c Touch the “OK” key to confirm the trimmed
area.
X Only the cutting lines appear.
d Press the “Start/Stop” button to start cutting.
• For details on unloading the mat after cutting,
follow the procedure under “Unloading the Mat”
on page 28.
Color recognition mode
a In the image trim screen, use the touch pen to
drag to trim the image to the size to be
imported.
Memo
• Trimming the image to the desired size can
reduce the amount of time required to convert it
to cutting data.
b Touch the “OK” key to confirm the trimmed
area.
X The image is converted to cutting data.
Loading ...
Loading ...
Loading ...