Loading ...
Loading ...
Loading ...
81
5
Adjusting the Scanning/Cutting
Position
In “Direct Cut” mode, the cutting position can be
manually adjusted if it has shifted.
For details on the “Direct Cut” mode, see
“SCANNING FOR CUTTING (Direct Cut)” on
page 61.
■ Materials
Memo
• If the paper described above is unavailable, the
paper can be replaced with copy paper. Be
sure to first test attaching it to a mat suitable for
the paper.
a Adjust the blade extension, and then insert the
holder into the carriage.
• For details, follow the procedures under “Adjusting
the Blade Extension” on page 24 and “Installing
and Uninstalling the Holder” on page 26.
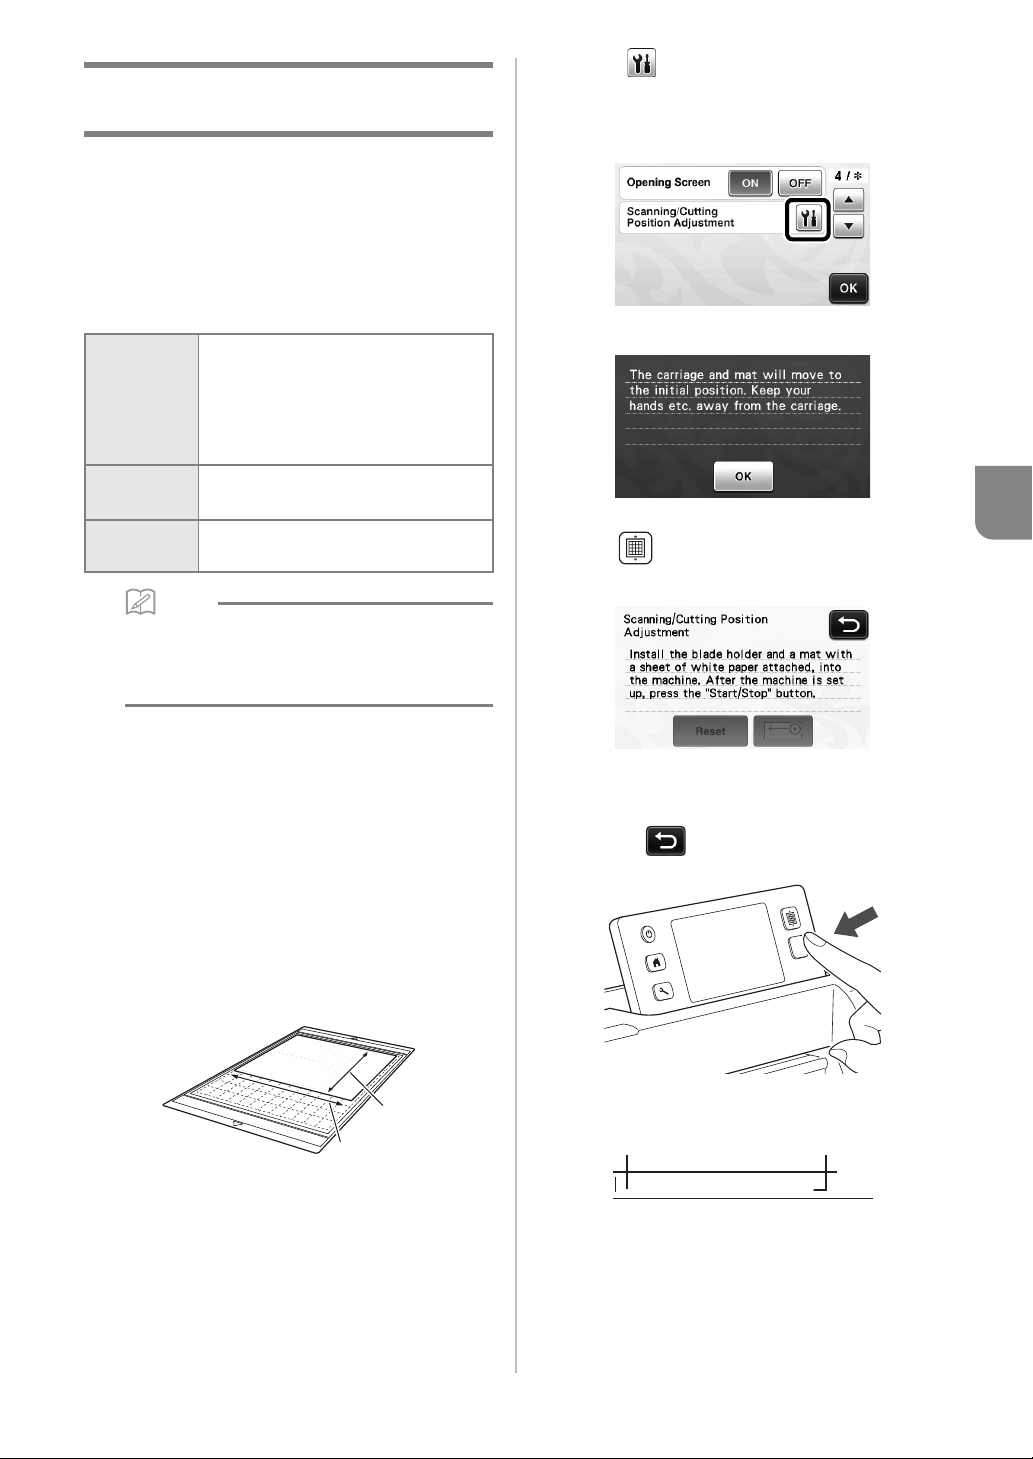
b Attach the paper to the mat.
• Align the upper-left corner of the paper with the
upper-left corner of the mat.
• For details on attaching the paper, follow the
procedure under “Attaching the Material (Paper)”
on page 18.
a Long side
b Short side
c Touch beside “Scanning/Cutting Position
Adjustment” in the settings screen.
• This function is not available if a scanning function
is being used. First quit the scanning function.
X The following message appears.
• Touch the “OK” key.
d Press to feed in the mat.
• For details, see “Loading the Mat” on page 27.
e Press the “Start/Stop” button to start cutting.
See “Cutting” on page 28.
• Touch key to return to the previous screen.
X Position adjustment cuts are cut, and then the
cuts are scanned.
• Use the cut crosses on the left and right sides to
adjust the scanning position.
Paper
Thick paper
Color: White
Size: A4 size (210 mm × 297 mm) or
Letter size (216 mm × 279 mm)
Thickness: 0.1 to 0.3 mm
(recommended)
Mat
Mat suitable for the material (See
page 16.)
Cutting
blade
Standard cut blade (turquoise)
a
b
Loading ...
Loading ...
Loading ...