Loading ...
Loading ...
Loading ...
64
c Check the imported image in the image editing
screen.
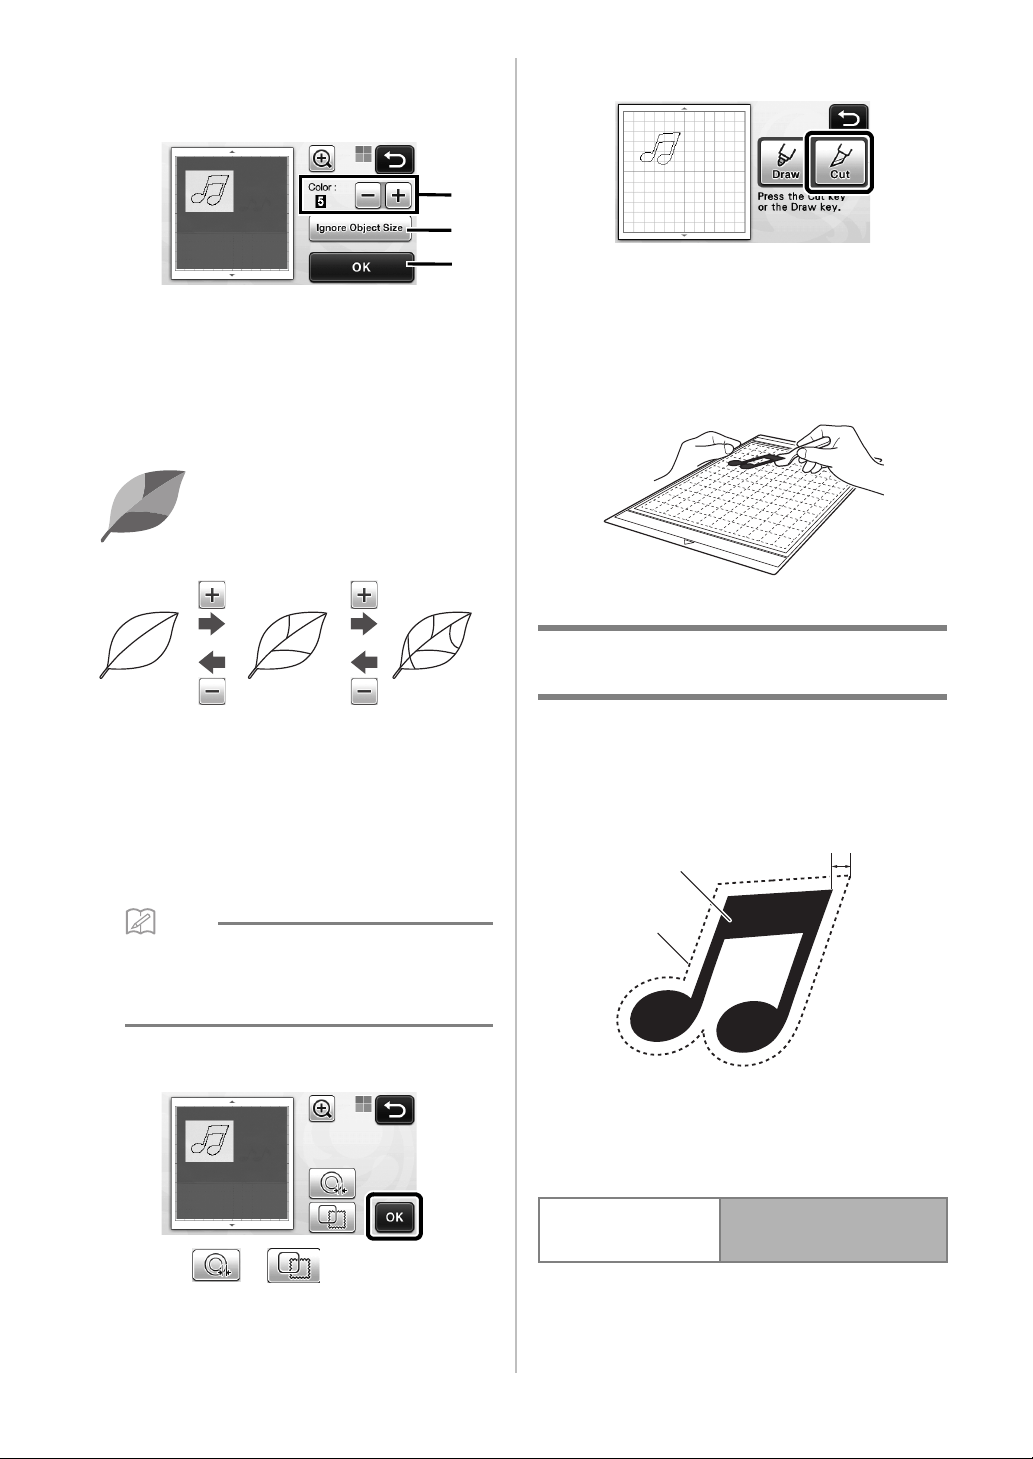
X The created cutting data appears as black lines.
a If the cutting lines were not correctly detected,
change the number of colors to be detected. If
a color that appears as a single color is
detected as separate colors, reduce the
number of colors. If adjacent colors with a
similar brightness are detected as a single
color, increase the number of colors.
b Small unnecessary patterns (dotted lines, etc.)
can be excluded from cutting data. For details,
see “Specifying “Ignore Object Size”” on
page 72.
c Touch the “OK” key to apply the settings. When
the number of colors is changed, the “OK” key
changes to the “Preview” key. After changing
the number of colors, touch the “Preview” key
to check the results.
Memo
• When making a stamp, for example, the image
may not be converted to cutting data if it
contains a gradation or areas that are only
partially filled with a color.
d Touch the “OK” key.
• Touch or to edit the imported
cutting data. For details, see “Advanced Cutting
Functions for “Direct Cut”” on page 64.
X Only the cutting lines appear.
e Touch the “Cut” key.
X The “Cut” key is highlighted, and the “Start/Stop”
button in the operation panel lights up.
f Press the “Start/Stop” button to start cutting.
• For details on unloading the mat after cutting,
follow the procedure under “Unloading the Mat”
on page 28.
Advanced Cutting Functions for
“Direct Cut”
■ Outline Distance
Use this function to cut while adding a margin around
patterns. Specify the distance from the cutting line to the
outline of the scanned image.
a Pattern outline
b Cutting line
c Outline distance
Available in the following screen
original
a
c
b
Image trim screen
→
Tutorial 3; Step
c
(page 63)
or Step
d
(page 64) in
“Creating Cutting Data”
a
b
c
Loading ...
Loading ...
Loading ...