Loading ...
Loading ...
Loading ...
50
Patterns and characters arranged in the cutting/
drawing area can be saved and recalled later.
Note
• USB flash drive is widely used, however some
USB flash drive may not be usable with this
machine. Please visit our website
“ http://support.brother.com ” for more details.
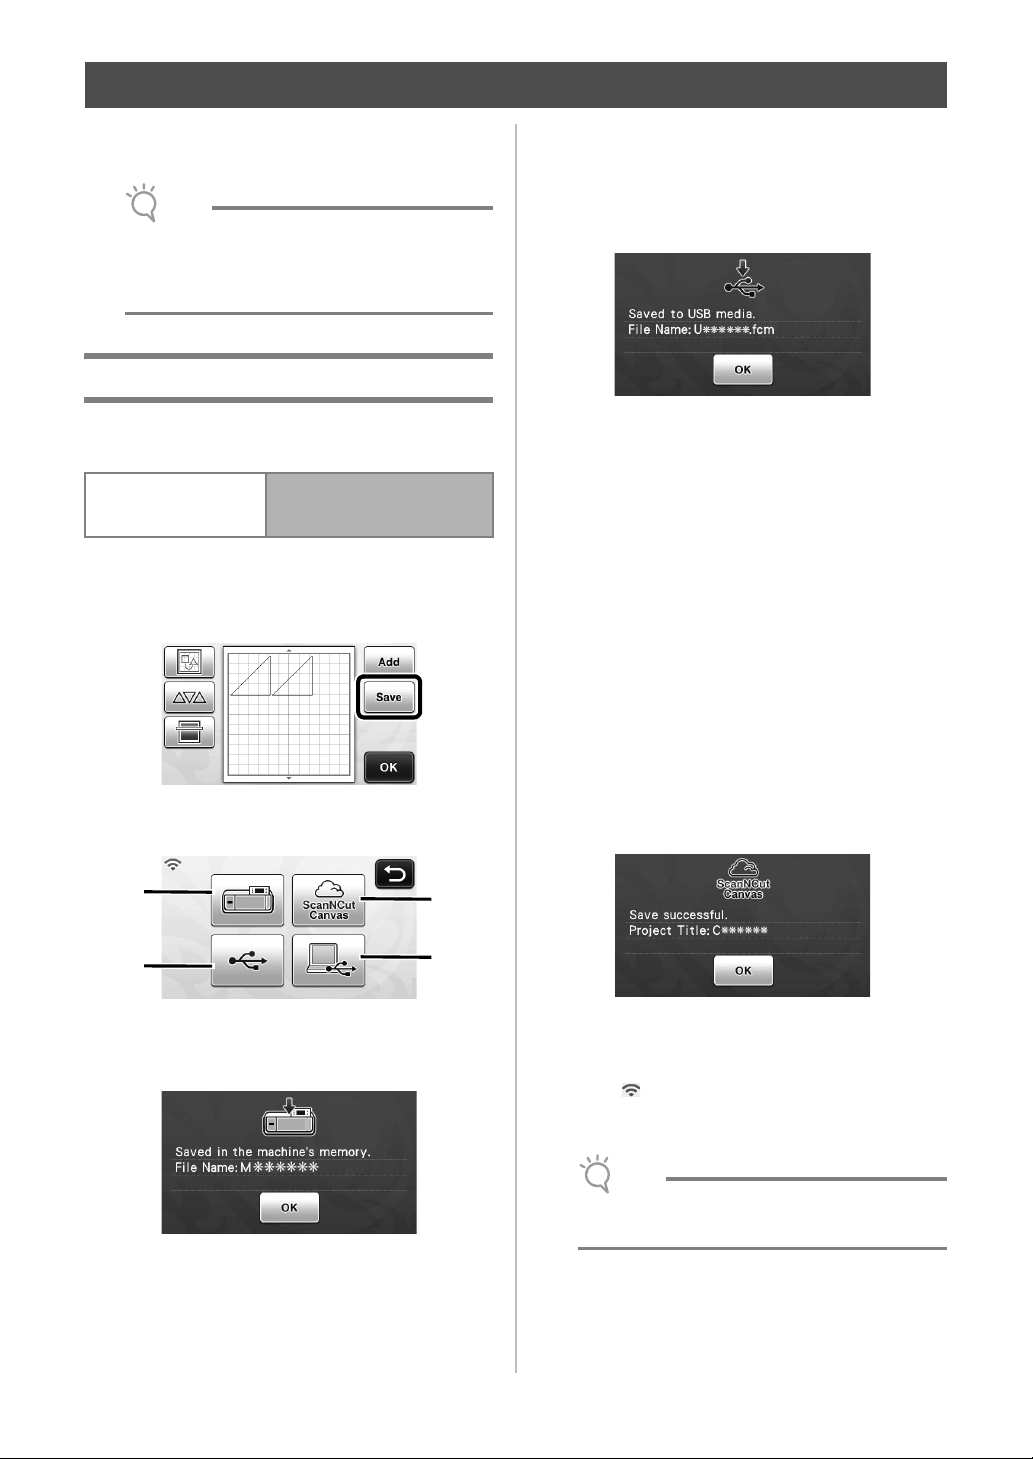
Saving
Available in the following screen
a Touch the “Save” key to display the destination
memory selection screen.
b Touch the desired destination to start saving.
a Save to the machine’s memory.
X When saving is finished, the following message
and the name of the saved file appear.
b Save to the USB flash drive.
• In order to save data on a USB flash drive, plug
the USB flash drive into the USB port (for a USB
flash drive) on this machine.
X When saving is finished, the following message
and the name of the saved file appear.
• The name of the saved file with the extension
“.fcm” is automatically assigned.
c Save to the computer.
• In order to save data to connect the computer
by plugging a USB cable into this machine's
USB port (for computer). For details, see
“Saving Patterns in the Computer” on page 51.
d Save to ScanNCutCanvas. (Wireless network
models only)
• In order to save to ScanNCutCanvas, the
machine must be connected to a wireless
network. This is available only after a
connection has been established with
ScanNCutCanvas (http://
ScanNCutCanvas.Brother.com/). For details on
making the connection, refer to “Wireless
Network Setup Guide”.
X When saving is finished, the following message
and the name of the project appear. For details on
checking data saved in ScanNCutCanvas, refer to
“Wireless Network Quick Setup Guide”.
• This is a function of ScanNCut Online. For
details, refer to “Overview of “ScanNCut
Online” for Data Transfer via a Wireless
Network” on page 11.
• If in the pattern category selection screen is
blue, the machine is connected to a wireless
network.
Note
• While data is being saved, do not remove the
USB flash drive or disconnect the USB cable.
c Touch the “OK” key to finish saving the data.
MEMORY FUNCTIONS
Pattern layout screen
→
Tutorial 1; Step
e
(page 34)
in “Selecting and Editing the
Second Pattern”
a
d
b
c
Loading ...
Loading ...
Loading ...