Loading ...
Loading ...
Loading ...
26
Self-Cleaning Oven
Wall Oven
Before a
clean cycle
The oven door must be closed and all controls
must be set correctly for the self-clean cycle to
work properly.
We recommend venting your kitchen with
an open window or using a ventilation fan
or hood during the first self-clean cycle.
• Clean soil from the frame around the oven door
and outside the door gasket. These areas must
be cleaned by hand.
• Do not clean the door gasket by hand as this
could damage it.
• Wipe up excess grease and other food spills
with a damp cloth. This will minimize the
amount of smoke created during self-cleaning.
• Remove all cookware, broiler pan, grid, probe
and any aluminum foil from the oven.
• The oven racks may be left in the oven during
the self-clean cycle.
• Make sure the oven light lens and lens frame
are in place.
• Do not use commercial oven cleaners,
abrasives or oven protectors in or near the
self-cleaning oven.
IMPORTANT: The health of some birds is
extremely sensitive to the fumes given off during
the self-cleaning cycle of any oven. Move birds to
another well-ventilated room.
NOTE: Self-Clean will not work if the temperature
probe is plugged in or if the Sabbath feature is
set.
CAUTION: Never place cooking
utensils or any other items on the oven
floor. There is a heating element beneath the
oven floor. Placing items on the oven floor may
cause the oven to overheat, resulting in damage
to the oven and risk of damage or fire to
cabinets.
On double oven models, you can set a clean cycle
in both ovens at the same time. The last oven set
will automatically delay its start until the end of
the first oven’s clean cycle.
On double oven models, you can use timed baking
in one oven and self-clean in the other at the
same time.
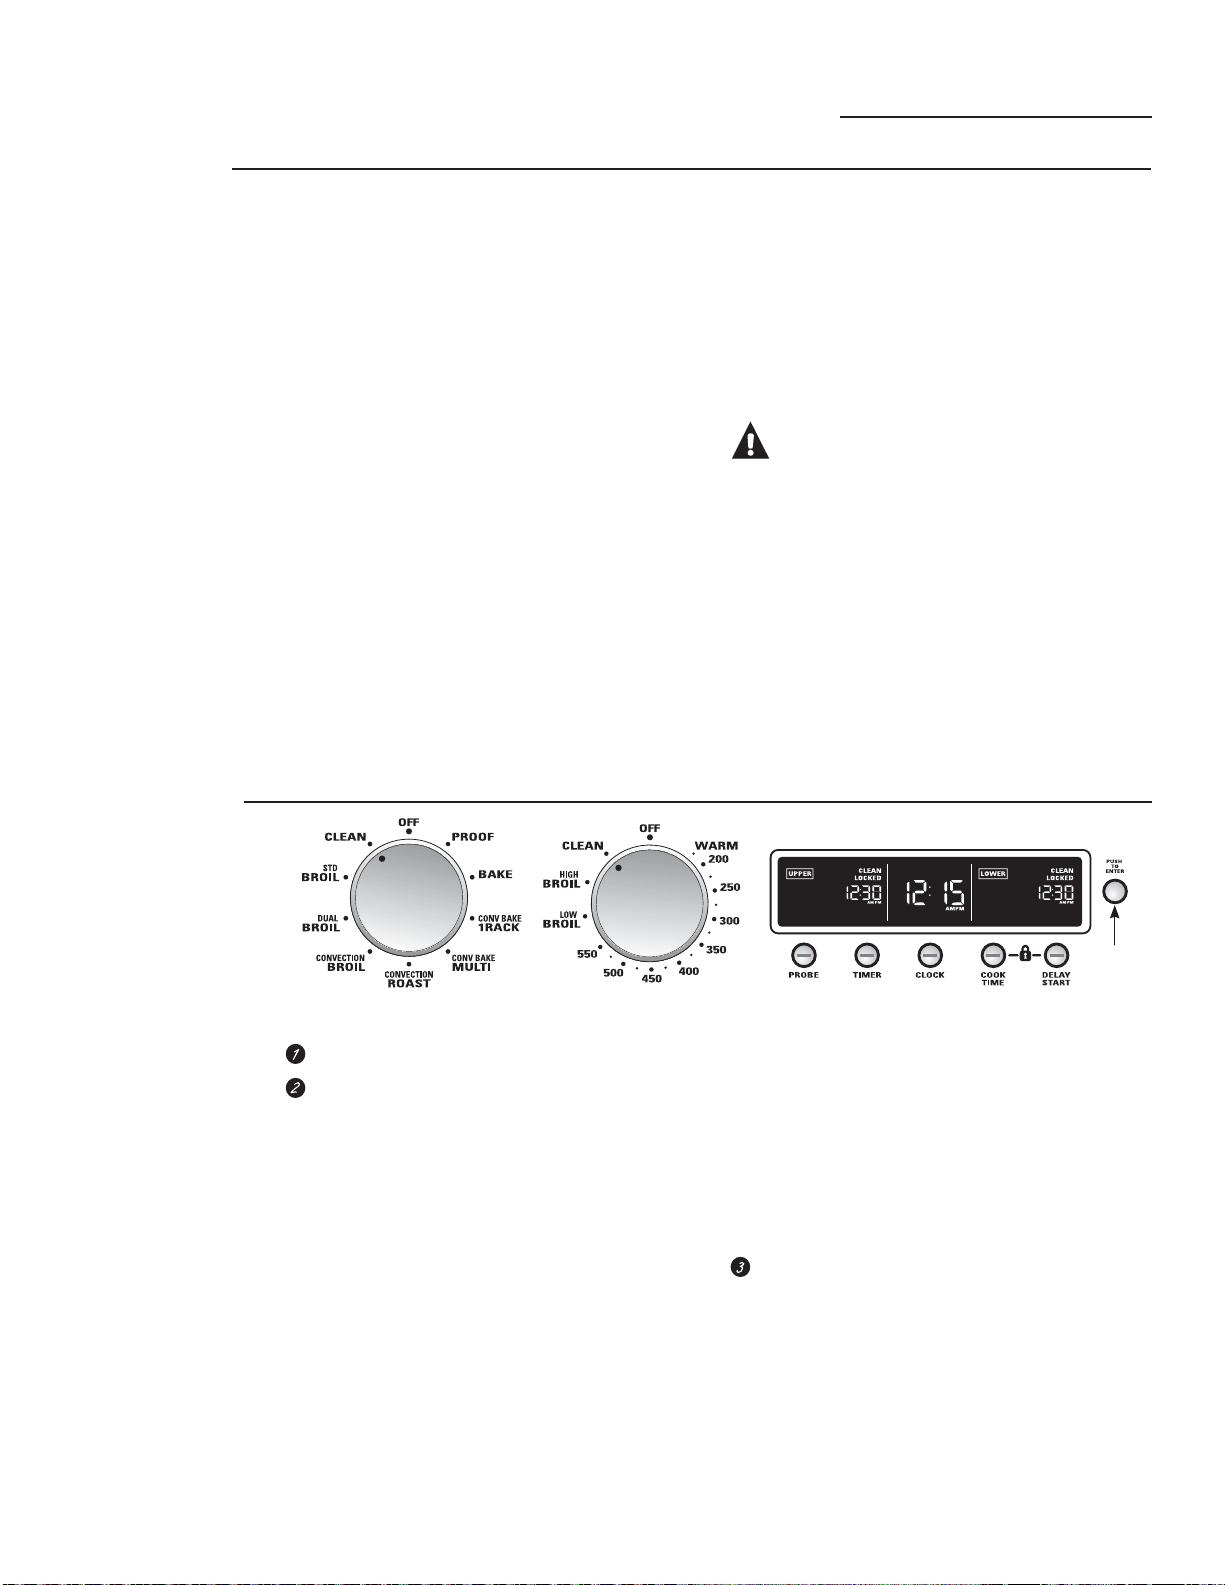
Turn the Oven Mode knob to CLEAN.
Turn the Temperature knob to CLEAN.
The oven is set to clean for its normal clean time
of 5 hours. (If a clean time less than
5 hours is needed, turn the Mini-Knob to the
clean time desired.) Push to enter it.
You can change the clean time to any time
between 3 and 5 hours, in 15 minute increments,
depending on the amount of soil in your oven.
NOTE: The Mini-Knob must be pushed for the
self-clean cycle to start.
If your oven is connected to a 208V electrical
supply, we recommend that you set your clean
time for 5 hours.
If LOCKED flashes in the display, the self-clean
cycle has been selected but the door is not
closed. Close the oven door.
The display will show CLEAN and the clean time
remaining.
As the oven heats to the clean temperature, the
door will lock automatically. The LOCKED light
will turn on. The display will show the clean time
remaining. It will not be possible
to open the oven door until the temperature
drops below the lock temperature and the
LOCKED light goes off.
After the clean cycle is complete and the oven
has cooled, END will show in the display and
the LOCKED light will turn off. Turn the Oven
Mode knob and the Temperature knob to OFF.
To stop a clean cycle, turn the Oven Mode
knob and the Temperature knob to OFF. When
the LOCKED light goes off, indicating the oven
has cooled below the locking temperature,
you will be able to open the door.
How to
set the
oven for
cleaning
Oven Mode knob Temperature knob
Mini-Knob
Turn to
select Push
to enter
Double oven display shown.
Loading ...
Loading ...
Loading ...