Loading ...
Loading ...
Loading ...
12
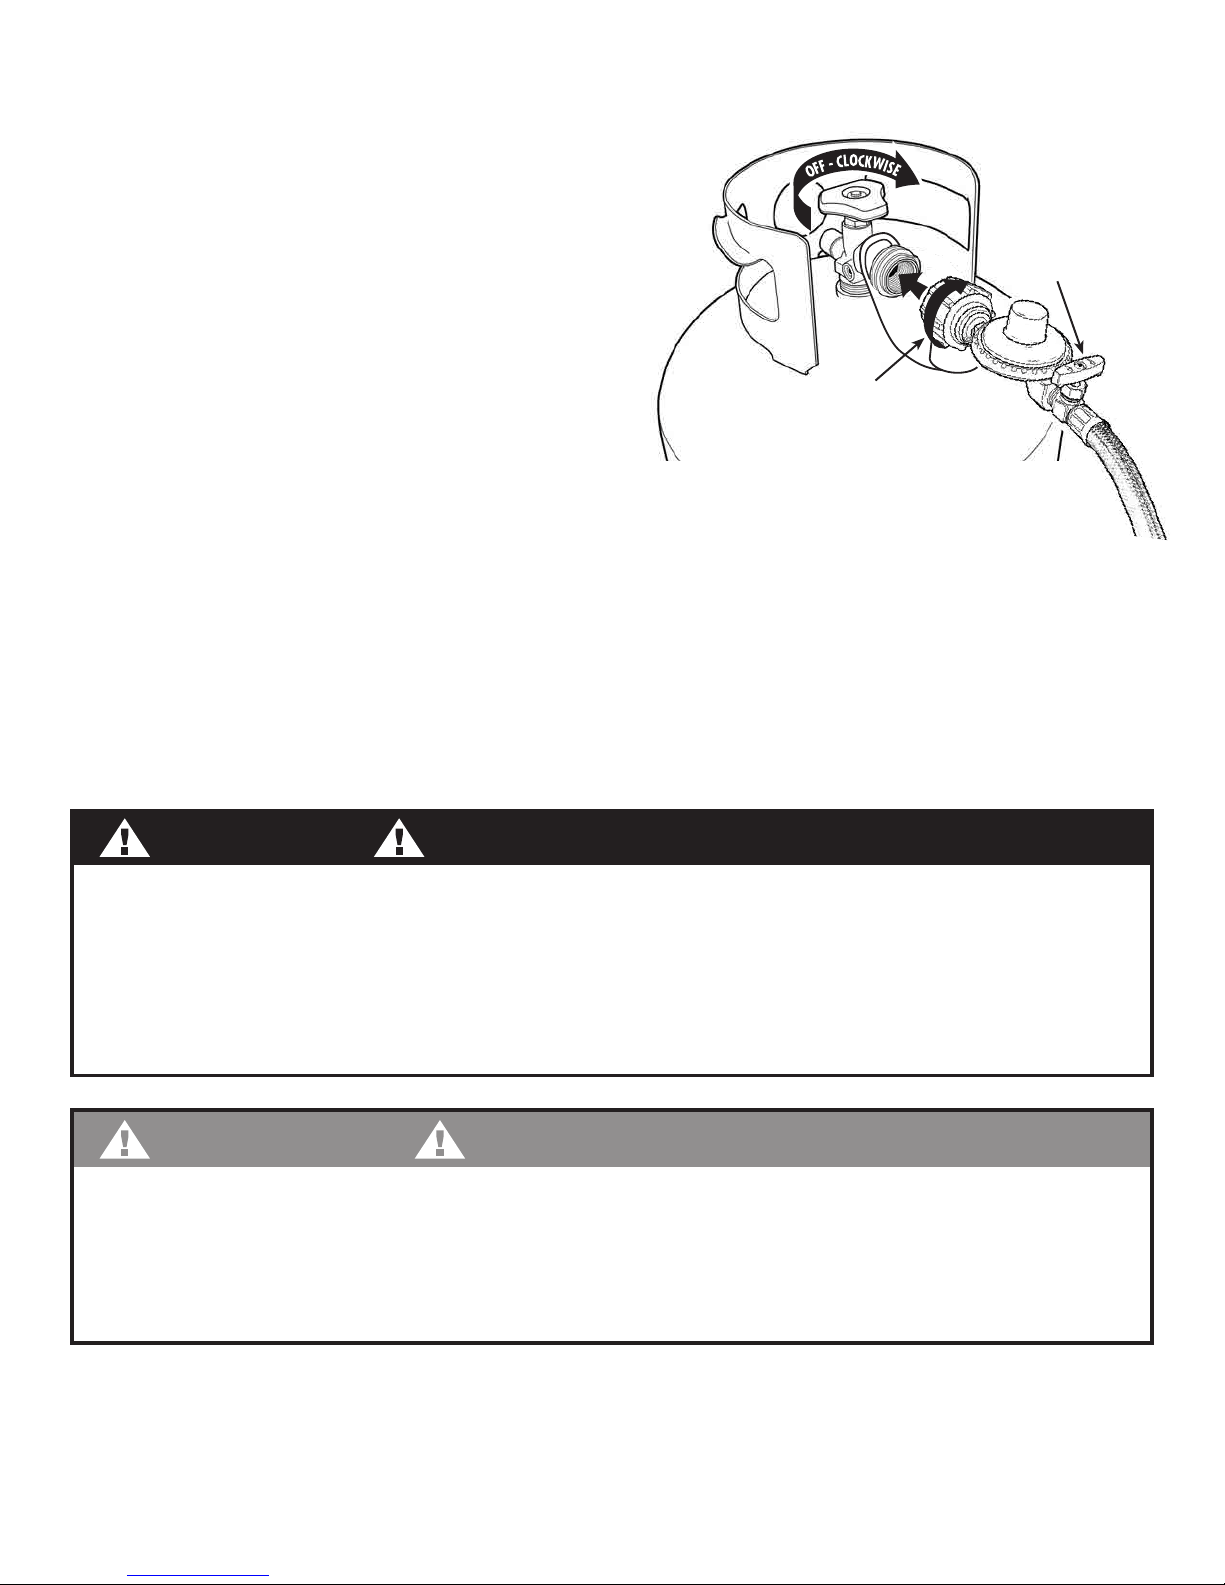
1. Check that cylinder is upright and the valve is closed
by turning the knob clockwise.
2.
Check that the Regulator Control Valve is also closed
by turning the knob clockwise.
3. Remove the protective safety caps from the cylinder valve
and the Type-1 Coupling Nut on the regulator.
4. Insert the nipple of large coupling nut into the
cylinder valve outlet. Insure that the coupling nut
is centered properly.
5. Turn the large coupling nut clockwise by hand and
tighten to a full stop. Take care not to cross thread
the coupling nut onto the cylinder valve.
Do not use tools to tighten connection.
NOTE: If you are unable to make the connection, repeat steps 4 and 5.
6. Check that the hose does not contain kinks, does not come into contact with sharp edges, and does
not contact surfaces that may become hot during use.
7.
Leak check all fittings before lighting fryer. Refer to pages 12 - 13 for Gas Leak Test Instructions.
CONNECTING REGULATOR HOSE ASSEMBLY TO LP GAS CYLINDER
Turn Coupling Nut
CLOCKWISE
to Attach
Hand Tighten!
Turn Regulator Valve
CLOCKWISE
to OFF position
Upright
position
DANGER
To prevent fire or explosion hazard:
• DO NOT smoke or per
mit ignition sources in the area while conducting a leak test.
•
Perform test OUTDOORS only in a well ventilated area at least 10-ft away from any structure or trees.
• Never perform a leak test with a match or open flame.
• Never perform a leak test while the appliance is in use or while fryer is still hot.
WARNING
WHEN TO PERFORM A LEAK TEST
•
After assembling your fryer and before lighting for the first time, even if purchased fully assembled.
• Every time the LP gas cylinder is refilled or if any of the gas components are replaced.
• Every time you use your fryer.
GAS LEAK TESTING
Downloaded from www.ManualsFile.com manuals search engine
Loading ...
Loading ...
Loading ...