
Loading ...
Loading ...
Loading ...
Emergencies
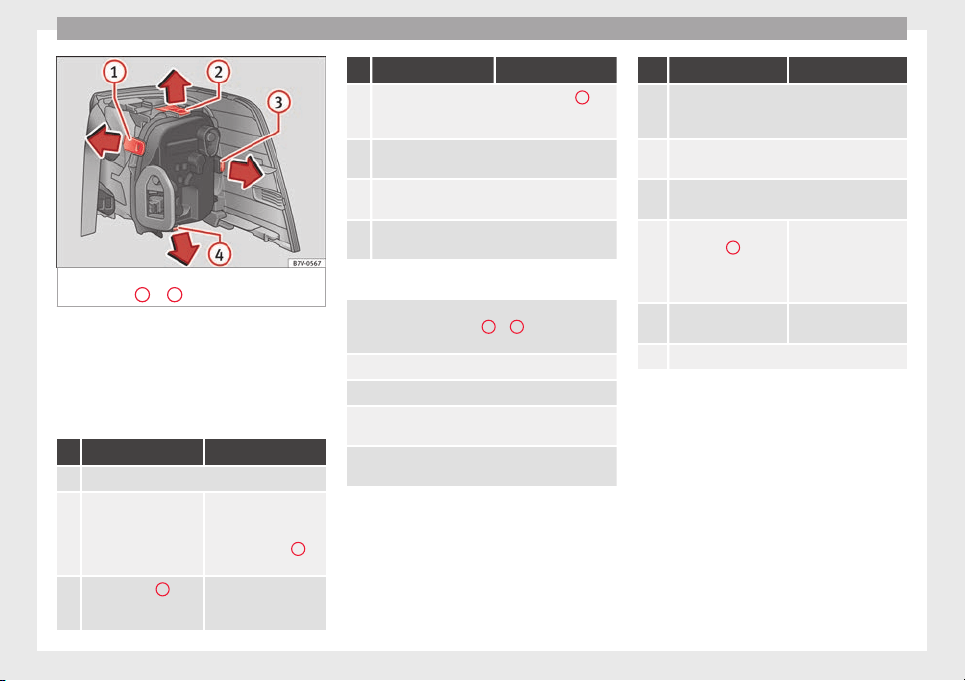
Fig. 114 Rear lights in the body: Remove the
b
u
l
b holder.
1
to
4
: Attachment tab
Complete operations only in the sequence
giv
en.
R
emo
ving the rear light units
Complete operations only in the sequence
given:
Rear light, left Rear light, right
1. Open the rear lid ››› page 122.
2.
Open the storage com-
partments on the left-
hand side of the lug-
gage compartment
››› page 163.
Move the 12 V power
socket support by
pressing gently down-
wards ››› Fig. 113
B
(arrow).
3.
Rotate the cap
1
90°
in the direction of the
arrow and remove it.
Rear light, left Rear light, right
4.
Unscrew the attachment screw ››› Fig. 113
2
us-
ing the screwdriver from the vehicle tool kit
››› page 82. The bolt is secured in its position.
5.
Extract the rear light from the bodywork by careful-
ly pulling backwards.
6.
Pull the red strip on the connector and extract the
connector.
7.
Disassemble the tail light unit and place it on a
flat, clean surface.
To change the bulb
8.
To release the bulb holder, press on the attach-
ment tabs ››› Fig. 114
1
to
4
in the direction of
the arrow.
9. Remove the bulb holder from the rear light unit.
10. Replace the faulty bulb with a new identical bulb.
11.
Place the bulb holder in the tail light unit. The at-
tachment tabs should audibly click into place.
12.
Insert the connector and press the red attachment
strip in so that the connector is locked into place.
Assembling the rear light units
C
omp
l
ete operations only in the sequence
given:
Rear light, left Rear light, right
13.
Carefully insert the tail light unit into the opening
in the bodywork. To do this, insert the upper rear
light unit guide into the attachment ring.
14.
Tighten the white attachment screw using the
screwdriver from the vehicle tool kit.
15.
Ensure that the tail light unit has been correctly
fitted and is firmly secured.
16.
Replace the cap
››› Fig. 113
1
and ro-
tate it 90° in the oppo-
site direction of the ar-
row.
Move the 12 V power
socket support up-
wards gently until it is
correctly closed.
17.
Close the storage com-
partment.
18. Close the rear lid ››› page 122.
96
Loading ...
Loading ...
Loading ...