
Loading ...
Loading ...
Loading ...
Fuses and bulbs
Dipped beam
A
and daytime lights
B
2. Remove the rubber cover on the rear of the head-
light.
3. Rotate the bulb holder to the left all the way and
pull it out backwards together with the bulb.
4. Depending on the model, the bulb is removed di-
rectly from the bulb holder or it may need to be ro-
tated and then removed.
5. Replace the faulty bulb with a new identical bulb.
6. Place the bulb holder in the headlight and rotate
to the right all the way.
7. Insert the rubber cover.
Main beam head-
lights
C
Side lights
C
1. Open the bonnet
››› page 268.
2. Remove the rubber cover on the rear of the head-
light.
3. Press the wire clip
downwards and pull the
bulb holder
2
out to-
gether with the bulb.
Pull the bulb holder
3
out backwards together
with the bulb.
4. Depending on the model, the bulb is removed di-
rectly from the bulb holder or it may need to be ro-
tated and then removed.
5. Replace the faulty bulb with a new identical bulb.
Main beam head-
lights
C
Side lights
C
6. Place the bulb holder in
the headlight and pull
the wire clip upwards
until it clicks into place.
Place the bulb holder in
the headlight and insert
completely.
7. Insert the rubber cover.
Note
The images show the left hand headlight
from behind. The s
tructure of the right hand
side headlight is symmetric.
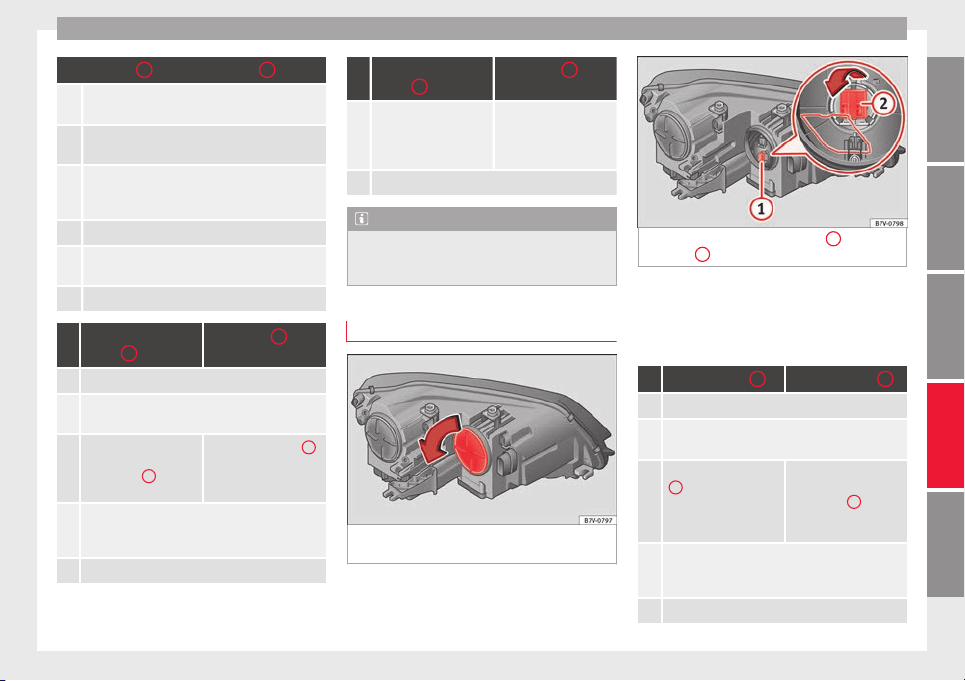
To replace the xenon headlight bulb
Fig. 107 In the engine compartment: turn sig-
n
al
indic
ator cover.
Fig. 108 Turn signal bulb holder
1
and turn-
ing light
2
.
There is no need to remove the headlight to
r
ep
l
ace bulbs.
Complete operations only in the sequence
given:
Turn signals
1
Turning lights
2
1. Open the bonnet
››› page 268.
2.
Rotate the cover ››› Fig. 107 in the direction of the
arrow and remove it.
3.
Rotate the bulb holder
1
››› Fig. 108 to the
left all the way and pull
it out backwards to-
gether with the bulb.
Press the wire clip
downwards and pull the
bulb holder
2
››› Fig. 108 out together
with the bulb.
4.
Depending on the model, the bulb is removed di-
rectly from the bulb holder or it may need to be ro-
tated and then removed.
5. Replace the faulty bulb with a new identical bulb.
»
93
Technical dataAdviceOperationEmergenciesSafety
Loading ...
Loading ...
Loading ...