Loading ...
Loading ...
Loading ...
English
Français
Español
EN
–
27
–
–
Troubleshooting
g
If this Unit does not perform properly when operated as instructed in this manual. Refer to the following:
INFORMATIO
N
N
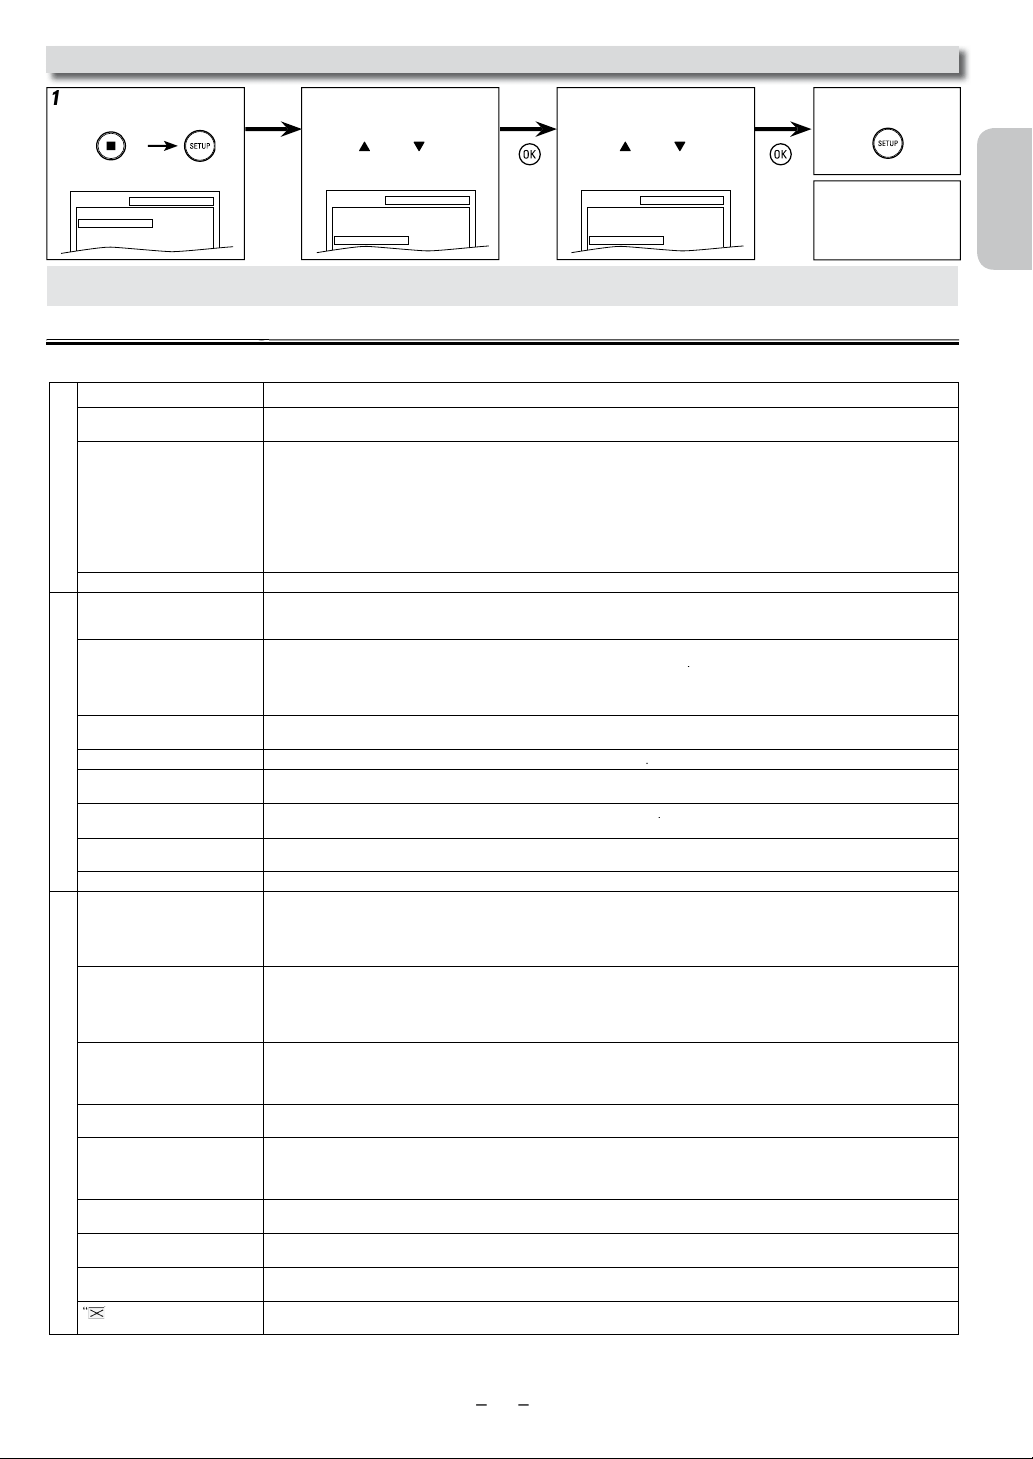
ote(s):
•
Wh
en you
d
o not
wis
h
to initia
l
ize
,
se
l
ect
“NO” at step 3.
2
Select “INITIALIZE”
.
4
T
o exit t
h
e menu
3
Select “YES”.
1
P
ress
[
SETUP
]
in t
h
e
Stop mode.
R
eset to the Default Setting (Except for PARENTAL Setting)
SETUP
QUICK
CUSTOM
INITIALIZE
SETUP INITIALIZE
Initialize?
NO
YES
SETUP menu
P
ress
tw
i
ce.
SETUP
QUICK
CUSTOM
INITIALIZE
or
or
DVD / VCR
P
ro
bl
e
m
C
orrective action
N
o power. • Make sure the power plug is connected to an AC outlet.
•
M
a
k
e sure t
h
e power is turne
d
on.
Th
is
U
nit
d
oes not respon
d
to t
h
e
Remote Control.
• Check if the power plug is connected to an AC outlet.
• Check the batteries in the Remote Control
.
•
A
im the Remote Control directly at the infrared sensor window. If necessary, remove all the obstacles between the sensor and the Remote Control.
• You have to be within 23 feet (7m) of this Unit
.
• Check if a cassette tape is in this Unit.
• Tune your radio to an empty AM station so that you hear a lot of static. Turn up the volume, then if you hear some signal sound from
t
he radio in response to your pressing buttons on the Remote Control, the Remote Control is working.
• Press and hold any button on the Remote Control toward a Digital or Cell Phone Camera. The Remote Control is working when a
blinking infrared light is on the Display. Note some Cell Phone Cameras have an IR filter.
P
oor picture or noise. • Interference signal may be received. Change the position and direction of the Unit
.
VCR
C
annot record a TV program. •
Th
is
U
nit
d
oes not
h
ave a
T
uner to receive
TV
b
roa
d
casting.
• You must connect this Unit to a TV through a Cable/Satellite Set-top Box or similar DTV to analog TV converter devices to record TV
programs. Refer to “Recording & One-touch Timer Recording (OTR)” on page 16 and “Satellite Link” on page 18.
T
imer recor
d
ing is not wor
k
ing. • Make sure the timer program is set correctly. Refer to page 16
.
•
M
a
k
e sure
T
IMER REC indicator on this Unit lights up. If not, press
[
TIMER SET
]
.
• Make sure the VCR clock is set correctly. Refer to page 12
.
• Make sure the Cable/Satellite Set-top Box or DTV to Analog TV Converter is turned On and is sending a signal to “L1” or “L2” input
jacks at the time the Timer recording is active. Refer to page 16.
C
annot go into record mode. • Make sure the cassette tape has a Record tab. If needed, cover the hole with adhesive tape
.
• Activate this Unit in VCR mode. Pres
s
[
VCR
]
on the Remote Control so that the VCR S
O
URCE light will illuminate.
Pl
ay
b
ac
k
picture is partia
ll
y noisy.
•
A
djust tracking control for a better picture by pressing
[
TRACKING
L
/
K
]
.
C
annot view a picture but the
a
udio is OK.
• Head cleaning may be necessary. Refer to page 5
.
• Make sure the VCR is not in the VCR Menu mode
.
N
one or poor p
l
ay
b
ac
k
picture.
• Adjust tracking control for a better picture by pressing
[
TRACKING
L
/
K
]
.
• Connect the video cable firmly
.
Video or color fades in and out when
making a copy of a cassette tape.
•
Y
ou cannot copy a copyrig
h
te
d
cassette tape.
C
annot remove the cassette tape.
• Check if this Unit is in the VCR mode. If not, press
[
VCR
]
on the Remote Control to switch the mode.
DVD
N
o picture. • Connect the video cable firmly
.
•
I
nsert a correct vi
d
eo
d
isc t
h
at can
b
e p
l
aye
d
b
ac
k
on t
h
is
U
nit
.
•
P
ress
[DVD]
on the Remote Control. Check if the DVD SOURCE light will illuminate. Then try other DVD features.
• Set “PROG. SCAN” correctly in “DISPLAY” menu. Turn it on only if your TV has progressive scan and you are using the component
v
ideo connections between the Unit and the TV. Disable progressive scan for all other connections. Refer to page 10.
D
isc cannot
b
e p
l
aye
d
b
ac
k
.•
I
nsert t
h
e
d
isc.
• Clean the disc
.
•
Pl
ace t
h
e
d
isc correct
l
y wit
h
t
h
e
l
a
b
e
l
si
d
e up
.
• Cancel the parental lock or change the control levels
.
• Handle a disc with special care so that it does not have fingerprints, scratches or dusts on its surface.
N
o soun
d
. • Connect the audio cables firmly
.
• Turn on the power of the audio component
.
• Correct the audio output settings
.
• Correct the input settings on the audio component
.
No DTS audio is output. • This Unit does not support DTS audio
.
-This is not a malfunction
.
D
istorte
d
picture. • Connect this Unit directly to the TV
.
• There are some cases where pictures may be slightly distorted and those are not a sign of a malfunction
.
• Although pictures may stop for a moment, this is not a malfunction. Refer to page 19
.
• Check if the progressive mode is set correctly according to your TV. Refer to pages 24-25
.
A
udio or subtitle language does
not matc
h
t
h
e setting.
• The selected language is not available for audio or subtitles on the DVD.
-This is not a malfunction
.
Th
e camera ang
l
e cannot
b
e
c
h
ange
d
.
• The DVD does not contain sequences recorded from different camera angles.
-This is not a malfunction
.
A
udio or subtitle Language
cannot
b
e c
h
ange
d
.
•
Th
e
DVD
d
oes not contain au
d
io source or su
b
tit
l
es in t
h
e se
l
ecte
d
L
anguage
.
-This is not a malfunction
.
“
”
appears on the TV screen,
pro
h
i
b
iting an operation.
•
Th
at operation is pro
h
i
b
ite
d
b
y t
h
is
U
nit or t
h
e
d
isc
.
-This is not a malfunction
.
• Some functions are not available in specific modes, but this is not a malfunction. Read the description in this manual for details on correct operations.
• Playback from a desired track and random playback are not available during programmed playback.
• Some functions are prohibited on some discs.
Loading ...
Loading ...
Loading ...