Loading ...
Loading ...
Loading ...
English-43
INSTALLATION07
• Searchforotherspotsiftherearelessthantwostuds,orthedistancebetweenthestudsaredierentfromthe
plate hanger.
• Fixtheinstallationplatewithoutincliningtooneside.
• Makesurethatawallcanwithstandtheweightoftheproduct.Ifyouinstalltheproductinaplacewhereitisnot
strong enough to withstand the product weight, the unit could fall and cause injury.
Disassembling/Assembling the Cover panel for indoor unit installation
In order to install the indoor unit, you must disassemble the cover panel rst. Please proceed following
instructions to disassemble and assemble the cover panel. Hooks (on the cover panel) may get damaged if you
apply excessive force as you disassemble and assemble the cover panel. Please follow the following instructions.
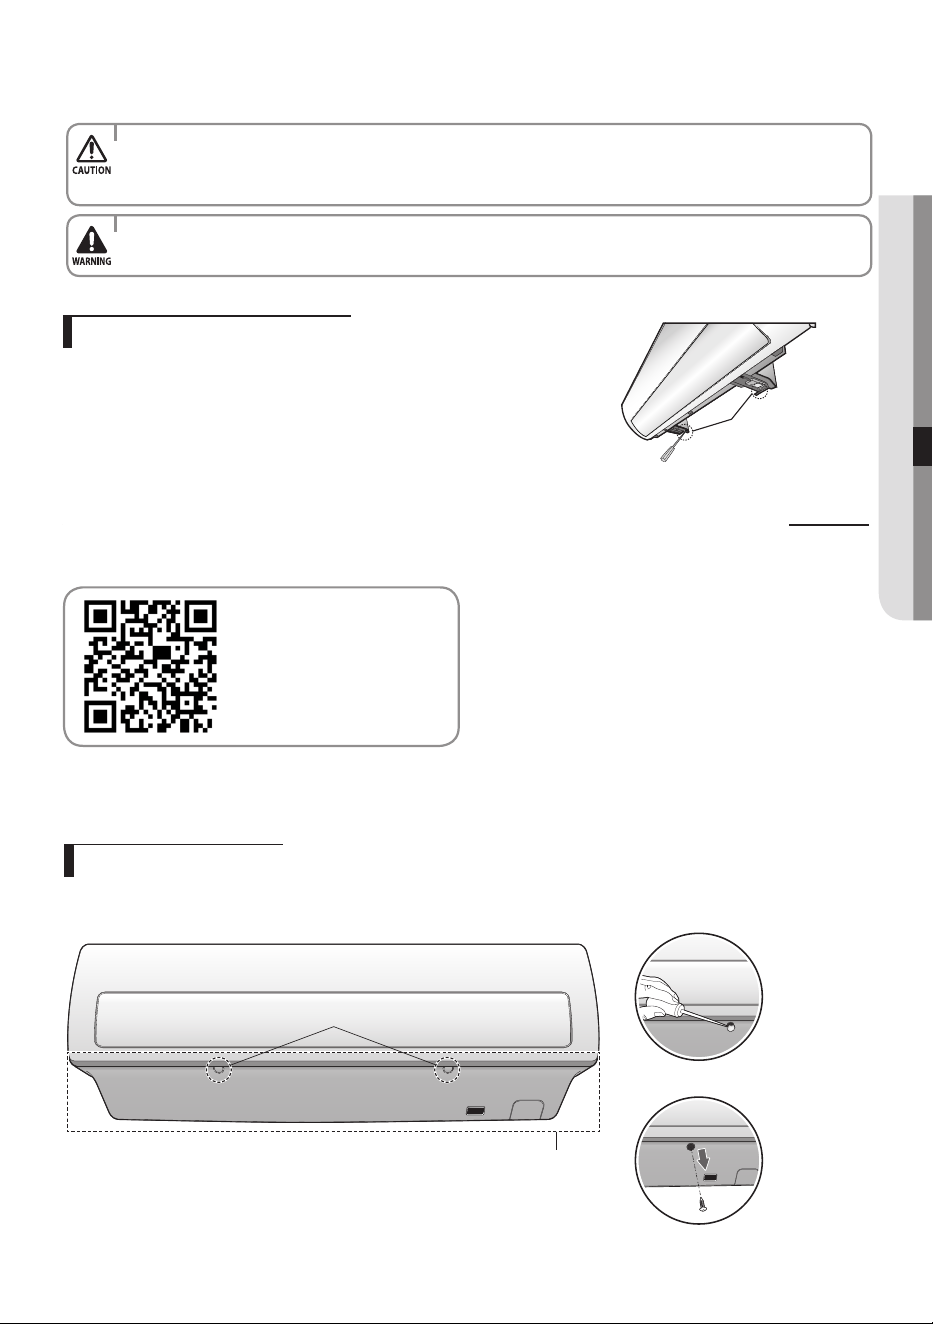
Removing the screws
Cover panel is assembled on the bottom part of the indoor unit (as shown in the illustration) and it is fastened
with screws. Remove the Cap screw rst and unfasten the screws so that you can disassemble the cover panel.
Cap Screw
<Remove the Cap screw>
<Unfasten the screw>
Cover Panel
Assembling the hanger screw
Use 2 screws to x the indoor unit with hanger plate as shown
in the picture.
Screw
Please scan
this QR code for detail
video of indoor unit
installation.
A3050 Australia_IB&IM_DB68-05206A_EN.indd 43 2014/12/29 19:07:36
Loading ...
Loading ...
Loading ...