Loading ...
Loading ...
Loading ...
A
B
C
E
D
17
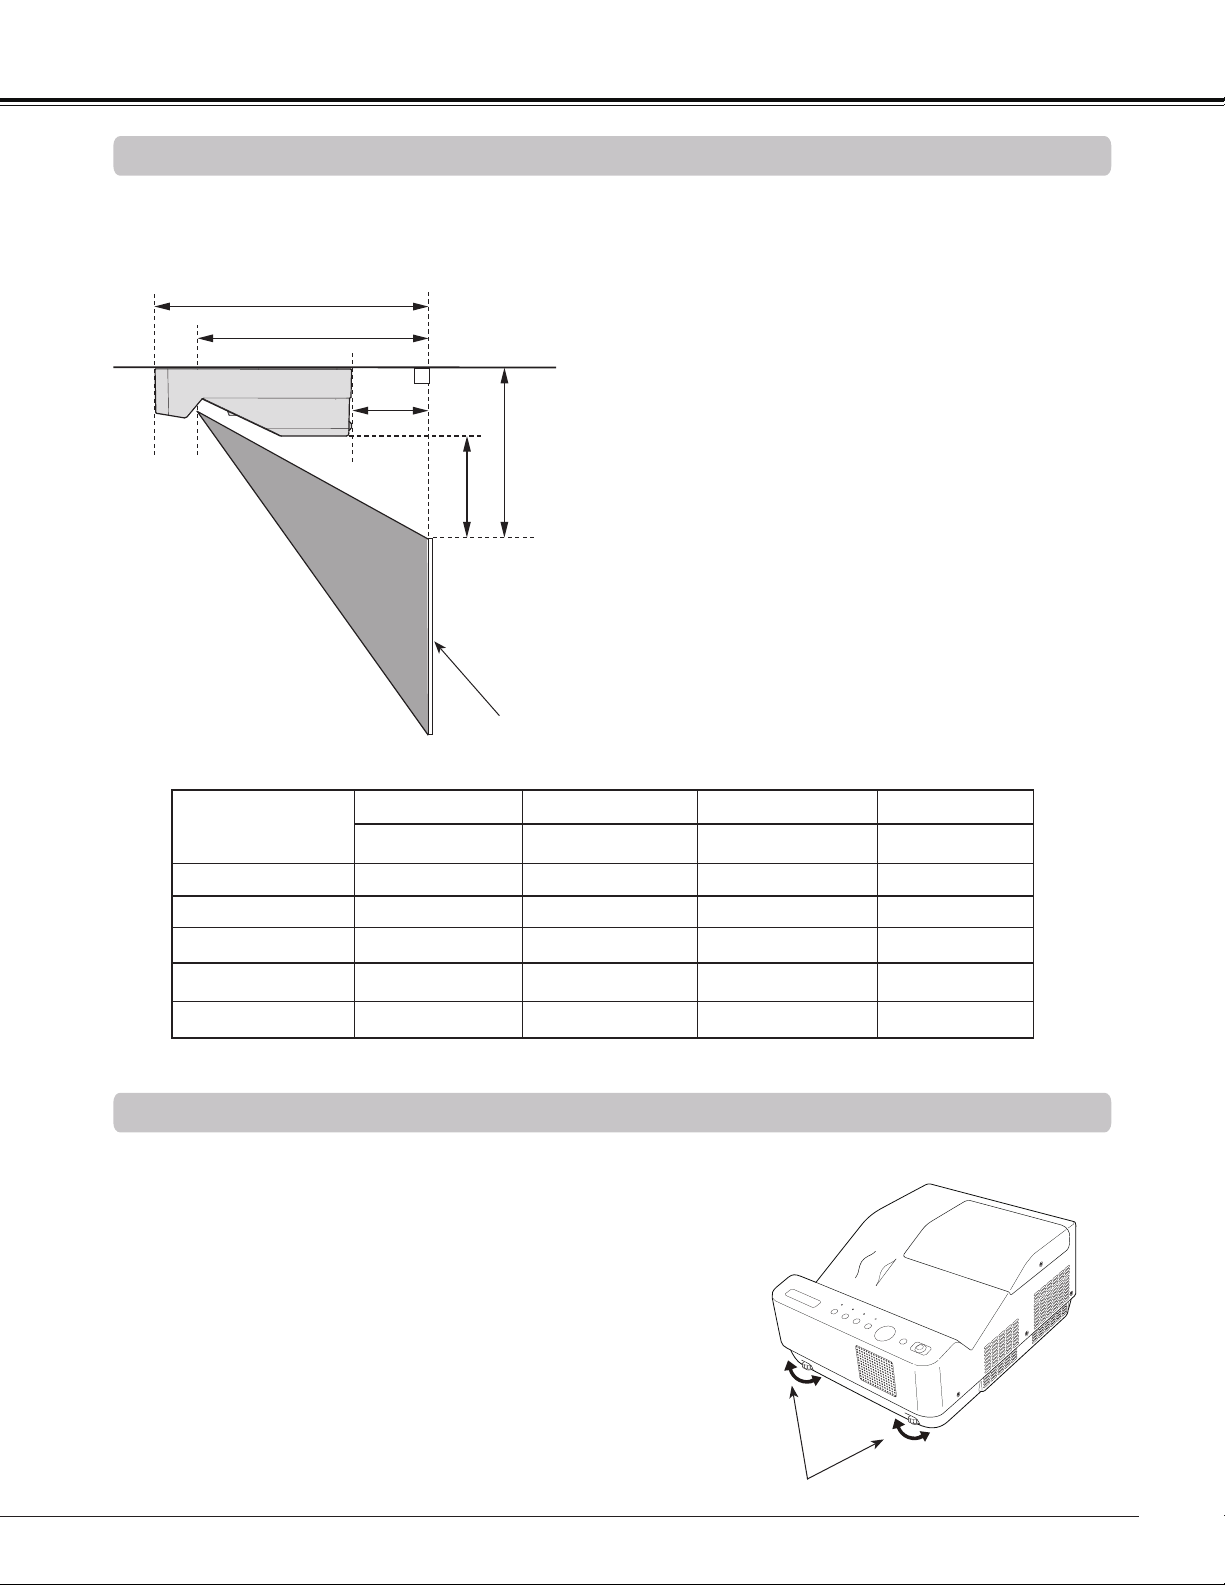
Positioning the Projector
For projector positioning, see the figures below. The projector should be set perpendicularly to the plane of the
screen.
Installation
Note:
• This projector is not equipped with an optical
zoom. To adjust the screen size, change the
throw distance.
• The brightness in the room has a great
influence on picture quality. It is recommended
to limit ambient lighting in order to obtain the
best image.
• All measurements are approximate and may
vary from the actual sizes. Make sure to check
the position of images by projecting images
on the screen before installing the projector
and screen, since each projector shows slight
variations.
• Make sure to project images on a fixed flat
screen.
• When projecting to wall or flat objects, even
slight warpage or irregularities of the screen
may have an effect on the quality of the
projected images.
Adjustable Feet
Projection angle can be adjusted within -1.0 to +1.0 degree
with the adjustable feet.
Rotate the adjustable feet and tilt the projector to the proper
height; to raise the projector, rotate the both feet clockwise.
To lower the projector or to retract the adjustable feet, rotate
the both feet counterclockwise.
To correct keystone distortion, press the KEYSTONE button
on the remote controller or on the top control or select
Keystone from the menu (See pages 28, 42, 49).
Adjustable Feet
Screen
Screen Size
(W x H) mm
16:10 aspect ratio
60"
74.6”
80" 110"
1292 x 808
1608 x 1005
1723 x 1077 2369 x 1481
A
12.60" (32.0 cm) 15.20" (38.6 cm)
16.14" (41.0 cm) 21.46" (54.5 cm)
B
9.06" (23.0 cm)
11.65" (29.6 cm)
12.60" (32.0 cm) 17.91" (45.5 cm)
C
-2.60" (-6.6 cm)
0.00" (0.0 cm)
0.95" (2.4 cm) 6.26" (15.9 cm)
D
8.86" (22.5 cm)
10.00" (25.4 cm)
10.43" (26.5 cm) 12.80" (32.5 cm)
E
1.85" (4.7 cm)
3.00" (7.6 cm)
3.43" (8.7 cm) 5.79" (14.7 cm)
Loading ...
Loading ...
Loading ...